7.1 INSTALLATION KITS
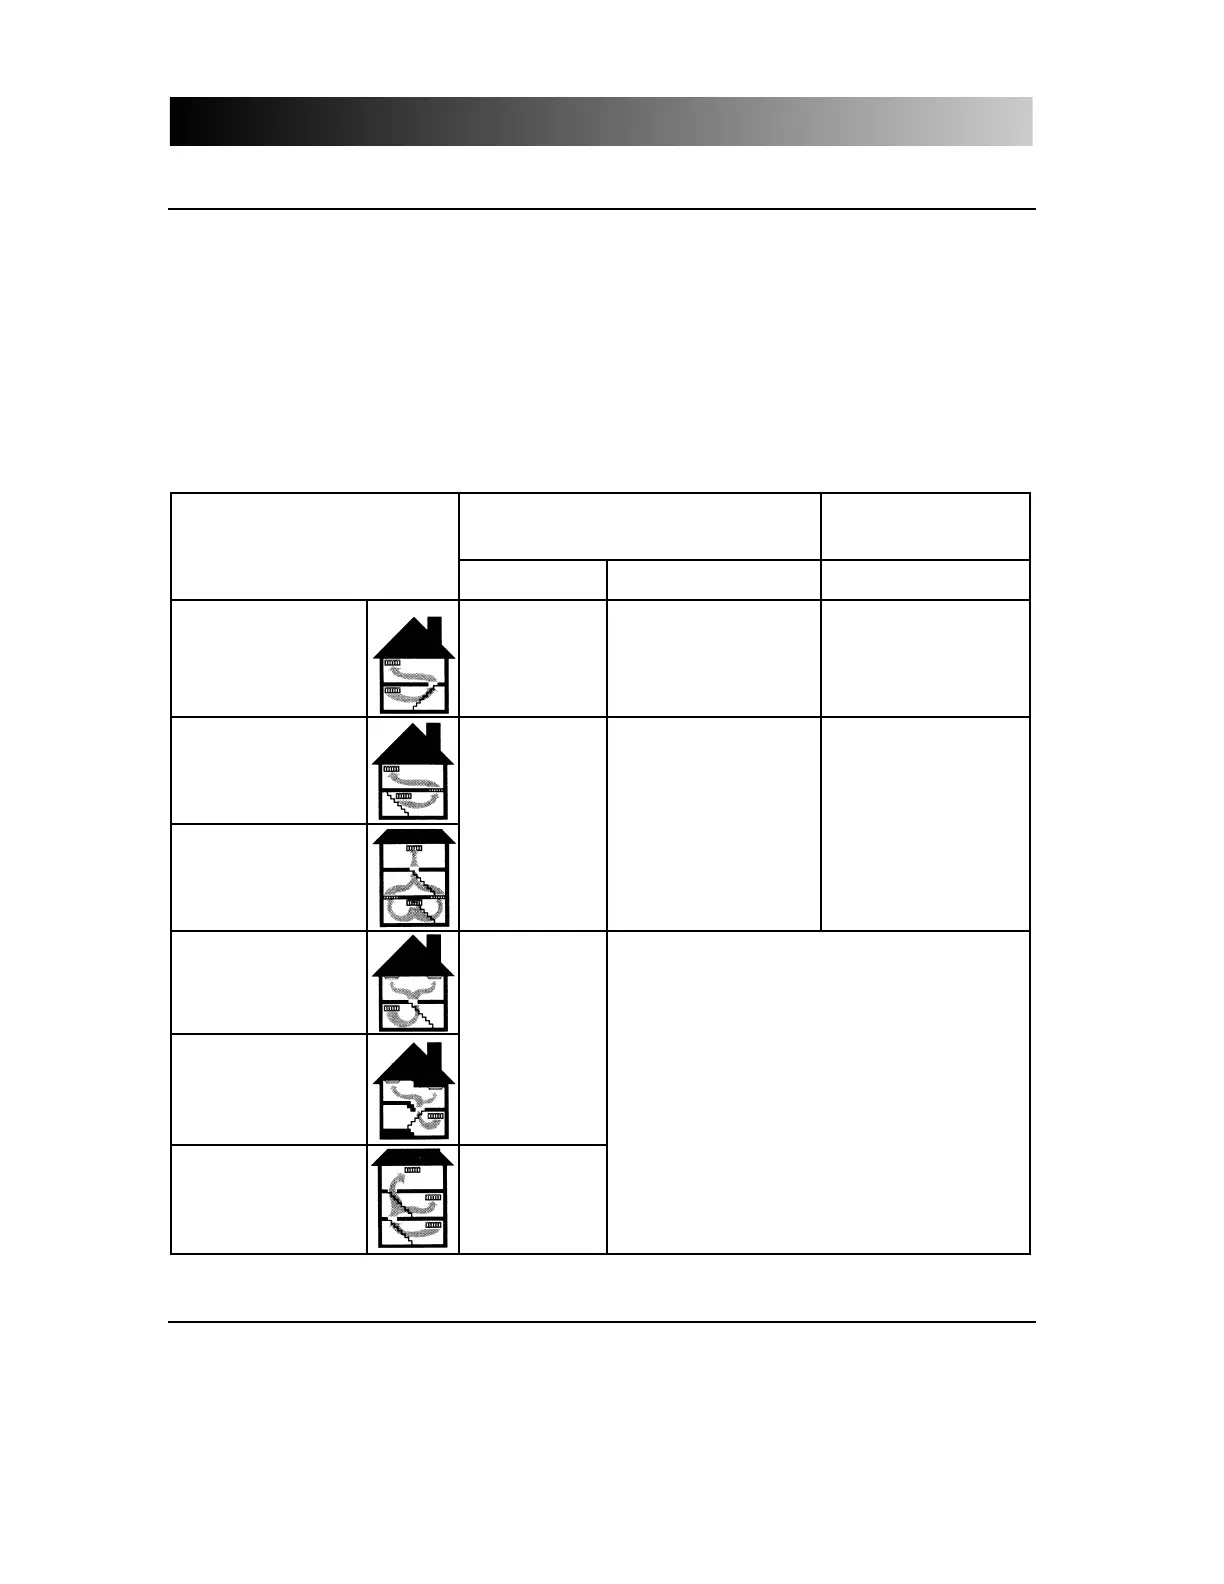
The table indicates the installation kits which are needed to correctly install your air exchanger.
Normally, the air exchanger is installed in the basement because it then becomes easier to clean.
The model PRO 200, however, can be installed in the attic if a basement installation is impracticle.
(Models EA 20200 and PRO 100 should not be installed in the attic.)
When you have to install extra registers in the ground floor, use either: two 6” x 10” registers or three
(4” x 10”) registers.
We strongly recommend that you purchase VENMAR kits and registers.
Note: the parts contained in kits UT20003 and UT20004 are not suitable for models PRO 100 and
PRO 200.
7.2 LOCATION OF COMPONENTS
It is necessary to carefully plan the location of all the components before proceeding with the actu-
al installation. The following suggestions will help your to decide on the best location for each of the
components.
YOUR HOUSE
BASEMENT ATTIC
EA 20200 PRO 100 / PRO 200 PRO 200
BUNGALOW
basement stairwell:
open, lateral
EA 20120 EA 20140 EA 20130
BUNGALOW
basement stairwell:
closed
EA 20120
+
2 or 3
registers
EA 20140
+
2 or 3
registers
EA 20130
+
2 or 3
registers
COTTAGE
basement stairwell:
closed
BUNGALOW
basement stairwell:
open, central
EA 20120
+
UT 20004
MULTI-LEVEL
COTTAGE
basement stairwell:
open
EA 20120
+
UT 20003
7. INSTALLATION OF THE SYSTEM
6
7.1 LES KITS D’INSTALLATION
Le tableau ci-dessous indique les kits d’installation nécessaires pour votre échangeur d’air.
Normalement, l’échangeur d’air est placé dans le sous-sol pour faciliter l’entretien. Le modèle PRO
200, cependant, peut être installé dans l’entretoit si une installation au sous-sol n’est pas pratique.
(Les modèles EA 20200 est PRO 100 ne devront pas être installés dans l’entretoit.)
Certaines types de maison requièrent l’installation de grilles supplémentaires dans le plancher du
rez-de-chaussée. Vous pouvez utiliser soit 2 grilles 6” x 10” ou 3 grilles 3” x 10”.
On recommande fortement l’achat de pièces VENMAR.
Note : les pièces contenues dans les kits complémentaires UT 20003 et UT 20004 ne conviennent
pas pour les modèles PRO 100 et PRO 200.
7.2 EMPLACEMENT DES COMPOSANTES
Il faut bien planifier l’emplacement des composantes avant de procéder à l’installation proprement
dite.Voici des suggestions qui vous permettront de déterminer l’emplacement idéal de chacune des
composantes.
VOTRE MAISON
SOUS-SOL ENTRETOIT
EA 20200 PRO 100 / PRO 200 PRO 200
BUNGALOW
escalier du sous-
sol : ouvert, latéral
EA 20120 EA 20140 EA 20130
BUNGALOW
escalier du sous-
sol : fermé
EA 20120
+
2 ou 3
grilles
EA 20140
+
2 ou 3
grilles
EA 20130
+
2 ou 3
grilles
COTTAGE escalier
du sous-sol : fermé
BUNGALOW
escalier du sous-
sol : ouvert, central
EA 20120
+
UT 20004
MAISON PALIERS
MULTIPLES
COTTAGE escalier
du sous-sol : ouvert
EA 20120
+
UT 20003
7. INSTALLATION DU SYSTÈME
6
 Loading...