15
667
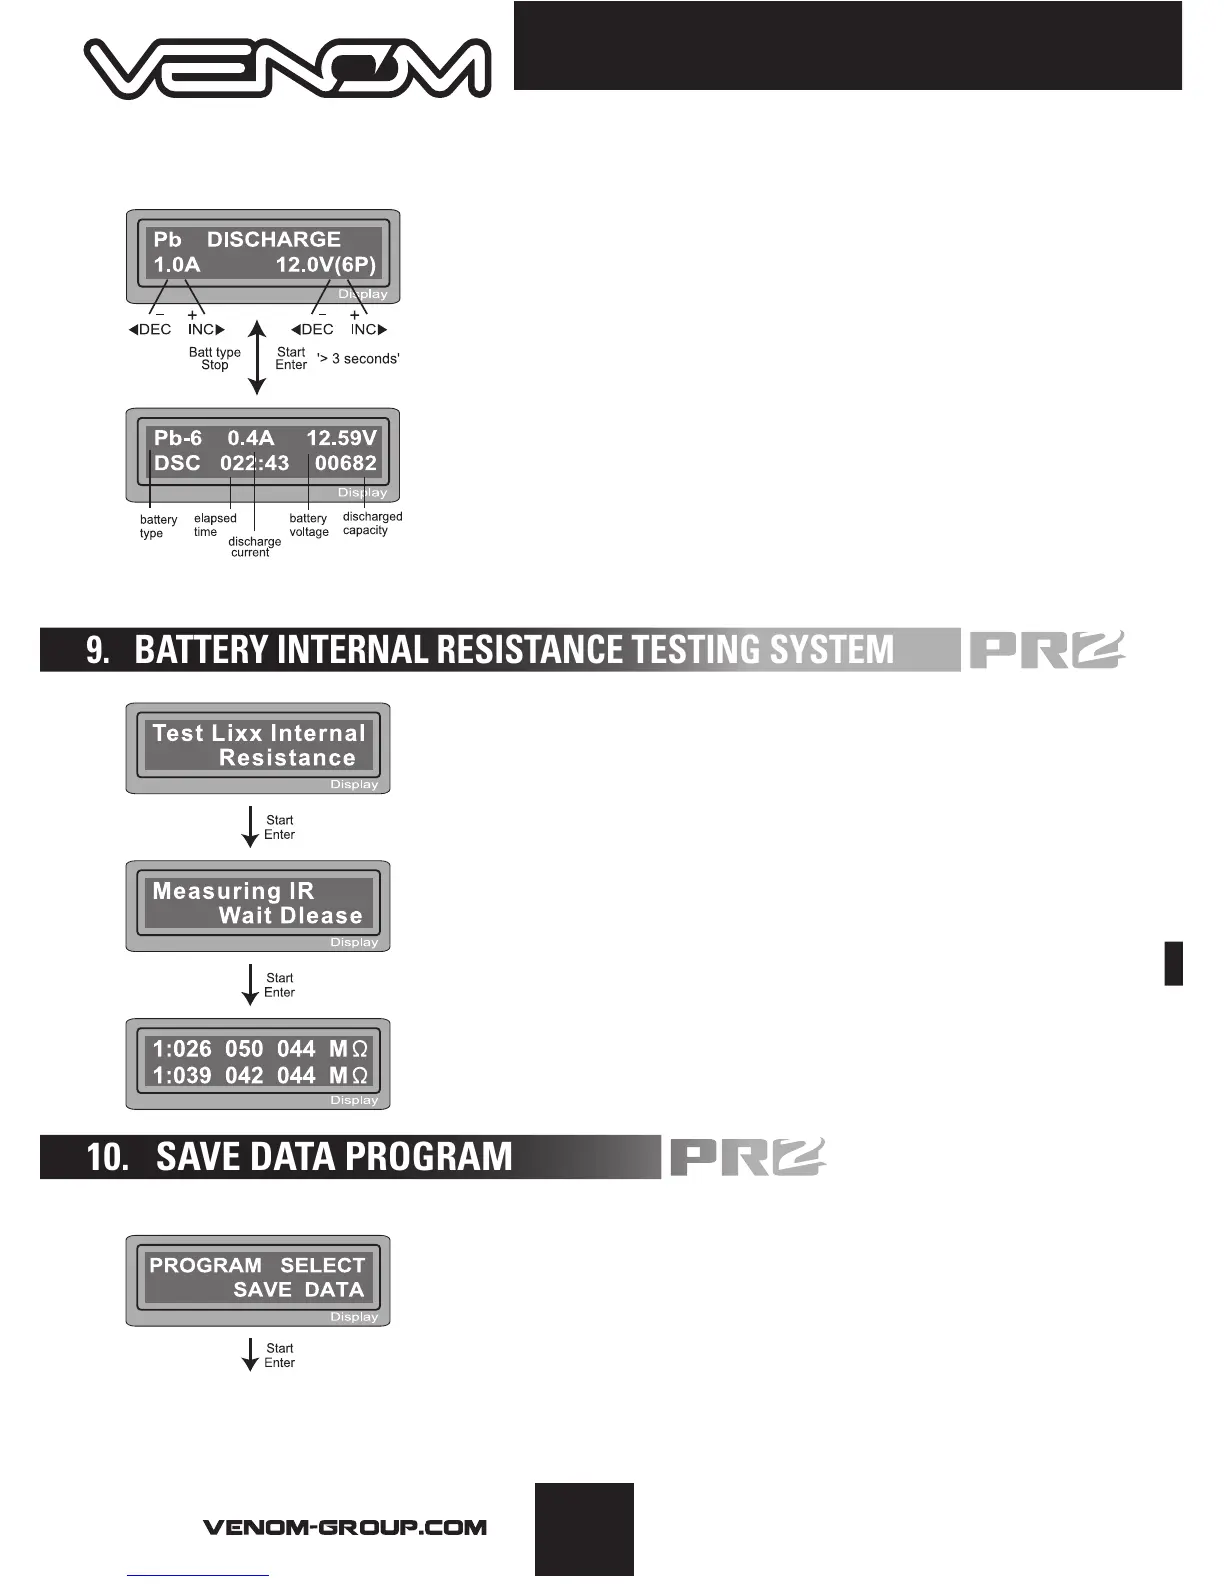
8.2 DISCHARGING A PB BATTERY
Set discharge current on the left and final voltage on the right.
The discharge current ranges from 0.1A to 1.0A.
Start the discharge process by pressing the START/ENTER
button for more than 3 seconds.
The screen will display the current state of discharge. Alter
the discharge current by pressing the START/ENTER button
during charging. Once you have changed the value, save it by
pressing START/ENTER again. To stop the process, press the
Batt type/Stop key once. An audible sound will indicate you
have ended of process.
Internal resistance testing can be a very valuable tool for
battery diagnostics. The data collected from this form of
testing is only truly valuable if the internal resistance is
monitored over the life of a pack. To properly test internal
resistance, you must connect
both the charge lead and the balance lead to the charger.
To begin, press START/ENTER. The charger will provide the
results in the form of a milli-ohm rating. Press increase to
check the total results of the pack. Press increase again to
view the single cell data.
The Venom Pro2 Charger provides a data storage and
load feature for your convenience. This feature can store
information for up to 5 batteries to be called back for the
process of charging or discharging without having to
reprogram the charger. To alter the values, press START/
ENTER, then change the blinking value using the increase/
decrease buttons.