Do you have a question about the Vent-Axia Advance S and is the answer not in the manual?
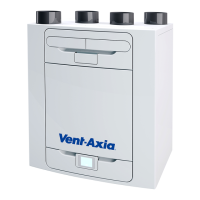
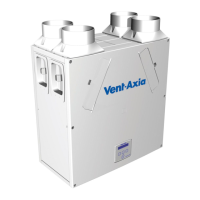
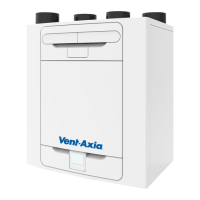
Overview of the MVHR unit, its function, and heat recovery capabilities.
Guidance on preparing for unit installation, inspecting the unit upon delivery, and general installation advice.
Details on wall mounting and floor mounting requirements and considerations.
Specifies the minimum clearance required around the unit for servicing and maintenance.
Explains how to configure the unit for Left or Right-Handed spigot setup.
Step-by-step instructions for mounting the unit to the wall using the provided bracket.
Step-by-step guide for mounting the unit to the floor, including board preparation and bracket use.
Instructions for alternative floor mounting using standard kitchen feet.
Details on installing the condensate drain for vertical discharge, including trap types and pipe sizes.
Guidance on connecting ductwork to the unit, including insulation and compliance requirements.
Safety warnings and steps for accessing the unit's internal electrical components.
Instructions on connecting external switches and sensors to control the unit's operation.
A table detailing the purpose and connection for each terminal on the unit.
Instructions on connecting the unit to the main power supply and optional light switches.
Steps for switching the unit on and off, and initialisation process.
General advice on commissioning the unit and an overview of the home screen display.
Detailed breakdown of the icons and information displayed on the unit's home screen.
Explanation of various mode indicator icons shown on the unit's display.
Explanation of the display related to indoor air quality monitoring.
Details on the heat recovery modes displayed on the unit.
Explanation of miscellaneous icons that may appear on the unit's display.
Instructions on how to pair a smartphone with the unit for control.
How to manually override the unit's speed settings for boost or purge functions.
Overview of the unit's menu hierarchy and navigation.
Instructions on how to set up timed operating schedules for the unit.
Steps to reset the filter timer after cleaning or replacement.
Introduction to the advanced user menu for detailed configuration options.
Visual guide to the structure and navigation within the advanced user menu.
How to configure the unit's handing (Left/Right) in the advanced menu.
Configuration options for airflow units (e.g., m³/h) in the advanced menu.
How to adjust the unit's airflow speed settings within the advanced menu.
Configuration of the LS (Switched Live) port allocation in the advanced menu.
Configuration of the SW (Switch) port allocation in the advanced menu.
Setting up proportional control parameters in the advanced user menu.
How to set or check service intervals within the advanced menu.
Configuration of the summer bypass function in the advanced menu.
Setting humidity thresholds and control modes in the advanced menu.
Adjusting CO2 sensor thresholds and related settings in the advanced menu.
Setting the unit's date and time parameters within the advanced menu.
Procedures for resetting the unit's PIN code.
Option to restore the unit to its factory default settings.
How to perform a hard reset on the Human-Machine Interface (HMI) of the unit.
Step-by-step guide for cleaning or replacing the unit's filters.
Instructions on how to reset the filter timer after maintenance.
General guidance on periodic maintenance tasks for the unit.
Instructions for cleaning the heat exchanger cell.
Guidance on inspecting and cleaning the unit's motors.
List of available spare parts that can be ordered from Vent-Axia, with part numbers.
How to troubleshoot issues by identifying notification, warning, or fault codes.
Information on contacting service and providing fault code numbers.
Lists and explains notification and warning codes displayed by the unit.
Details about the accessory for remotely mounting the controller.
Information on the accessory providing remote message indication.
Explanation of the unit's four user-defined speed settings.
How the unit prevents freezing in the heat exchanger at low temperatures.
Detailed explanation of the Summer Bypass feature and its modes of operation.
Diagrams showing the physical dimensions of the MVHR unit.
Table listing the unit's default parameters and their factory-set values.
Technical specifications and performance data of the MVHR unit.
Details of the product's warranty terms and conditions.
| Mounting | Wall or ceiling |
|---|---|
| Diameter | 100 mm |
| IP Rating | IPX4 |
| Application | Domestic |
| Control Options | Timer, humidity sensor |
| Voltage | 230 V |