EasyManua.ls Logo

Verbatim POWERBAY NAS Array - Sharing Fi Les Using Windows; Browse Network Neighborhood; Search Dialogue; Browse My Computer

Verbatim POWERBAY NAS Array
24 pages
Print Icon
To Next Page IconTo Next Page
To Previous Page IconTo Previous Page
Loading...
21
Browse Network Nei
g
hborhood
O
p
en t
h
e
File Browser
a
n
d
double
-
cl
i
ck
o
n
r
N
etwor
k
Nei
ghb
or
h
oo
d
o
r
M
y
Network Place
s
.
B
rowse to Work
g
rou
p
to fi nd the PowerBa
y
NAS array shared
f
olders
.
Search Dialogu
e
Select Star
t
in the system tray and select
S
earc
h
.
Use the
S
earch
dialogue to search for Computers
.
For the computer name to search
for enter “powerbay” and then press
Search Now
to fi nd the connected
w
the PowerBay NAS array. Double-click the PowerBay NAS array entry to
connect and view its shared folders.
Browse My Compute
r
Open
My Computer
and double-click on
r
M
y Networ
k
P
l
aces. Browse
t
o Wor
k
grou
p
to fi nd the PowerBay NAS array shared folders.
Once you have located the attached shared folders of the PowerBay
NAS arra
y
,
y
ou can ma
p
a drive letter to a folder. [You must assi
g
n a
drive letter in order to save fi les to the PowerBa
y
NAS arra
y
usin
g
the
bundled backu
p
so
f
tware.] To do this, ri
g
ht-click on the
f
older and
select “ma
p
network drive”. Fill out the dialo
g
ue box that Windows
p
resents (in
p
ut the lo
g
ical drive letter and enter the
p
ath o
f
a network
s
h
are
d
irector
y
) an
d
t
h
en se
l
ect Finis
h
. Now
y
ou can
l
o
g
in usin
g
the Samba User Account credentials that you created using web
con
g
uration tool o
f
the PowerBa
y
NAS arra
y
. The PowerBa
y
NAS arra
y
wi
ll
s
h
ow u
p
in
My Computer
under
r
N
etwor
k
Drive
s
.
Sharin
g
les usin
g
Mac OS
X
A Mac runnin
g
Mac OS X can access a connected PowerBa
y
NAS
arra
y
. Click on Go / Network to o
p
en the Network window. Existin
g
shares will show a
f
ter ex
p
andin
g
the “Shared” list, or b
y
clickin
g
on the
PowerBa
y
NAS arra
y
name in the list of attached devices.
To login to speci
c shares, you many need to double-click on
“PowerBay”
l
ocate
d
in “Wor
k
group” to open t
h
e connection
d
ia
l
ogue
box. I
f
prompted to “Select SMB/CIFS shared volume you want to
connect to” use the pull-down menu to select one o
f
the current shares.
You wi
ll
t
h
en
b
e prompte
d
to aut
h
enticate
b
y entering your user name
an
d
passwor
d
. For “user name” use t
h
e Mac OS “S
h
ort Name” t
h
at you
use
d
to create your account on t
h
e PowerBay NAS array.
A
f
ter com
p
letin
g
authentication
y
our shared
f
older will a
pp
ear on
y
our
deskto
p
. You can now dra
g
and dro
p
les to this
f
older as
y
ou can
f
or
an
y
f
older
.
Sharin
g
les usin
g
Linu
x
I
f
you are primarily sharing
les across Linux or UNIX computers, you
should confi
g
ure the PowerBa
y
NAS arra
y
to use NFS (Network File
System)
f
or
le sharing instead o
f
SMB. While your Operating System
documentation will explain the details o
f
NFS
le sharing, the brie
f
ste
p
s
b
e
l
ow wi
ll
g
et
y
ou starte
d
.
1. Use the PowerBay NAS array web-based con
guration tool to
ena
bl
e NFS
b
y c
h
ec
k
ing t
h
e Ena
bl
e
b
ox at: A
d
vance
d
Setup /
NF
S
S
erve
r
2. Use the web-based administration tool to create a new share
and defi ne the share’s NFS access
p
ro
p
erties usin
g
the settin
g
s
for Allowed Host, Folder, and Root Squash
.
3. Log into the Linux PC as root
.
4. Create a mount
p
oint, such as /mnt/nas b
y
enterin
g
the mount
command from your client computer. For example
,
mount –t nfs <IP address of the PowerBa
y
NAS arra
y
>:/shares
/
powerbay/powerbay/mnt/na
s
Now the folder powerbay will be mounted to the directory /mnt/
nas in t
h
e Linux s
y
stem. Linux users wit
h
access
p
rivi
l
e
g
es can
now access
les in this directory.
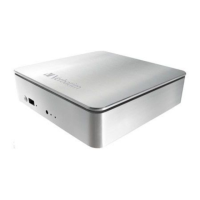
USB Print Server Installatio
n
T
he PowerBay NAS array features a built-in USB print server, giving
users the abilit
y
to share a
p
rinter on their local network. Connect a
USB printer to the USB port on the back of the PowerBay NAS array.
It is important to ensure that the printer manufacturer’s drivers have
been installed on any client computer you want to print
f
rom
.
1. Go to Start > Run and enter the following command to access
y
our PowerBa
y
NAS arra
y
: \\xxx.xxx.xxx.xxx (where xxx.xxx.xxx.
xxx is the IP address of
y
our PowerBa
y
NAS arra
y
). Click OK.
2. Next you’ll see a printer already listed named ‘lp’.
Rig
h
t c
l
ic
k
on t
h
e printer ca
ll
e
d
l
p’ an
d
c
h
oose t
h
e option
C
onnect’
.
3. T
h
e next message wi
ll
te
ll
you t
h
at t
h
e printer wi
ll
b
e insta
ll
e
d
on
your computer automatica
ll
y an
d
t
h
at you wi
ll
nee
d
to insta
ll
t
h
e
appropriate printer drivers
f
or it. Click OK.

Table of Contents

Related product manuals