English
Introduction
This guide is intended as a general outline of the key steps involved in installing a Solid
State Drive (SSD) into a laptop or desktop computer, and is not intended to provide
specic details pertaining to a particular PC hardware or Operating System (OS)
conguration. Check with your motherboard documentation to conrm that there is a
SATA III M.2 slot available and it can accept the M.2 2280 form factor. If, after reading this
outline, you do not feel condent you can carry out the necessary steps to perform the
installation, it is highly recommended that you contact a qualied service technician for the
installation of your SSD.
Note for those users replacing an existing Hard Disk Drive (HDD) or SSD: If you
intend to replace an existing drive on your computer with this SSD by way of cloning or
data migration, you will need to procure data cloning/migration software and complete
this process before installing the Vi560 SSD. There are many types of data
cloning/migration software available online at little or no cost to you. If you plan on cloning
your current drive onto your new SSD, a USB-to-SATA cable or adapter is also needed.
Both the software and the USB-to-SATA cable are not included with this product.
Verbatim suggests fully backing up your system before performing any hardware
or software modications. Verbatim is not liable for any damage caused by you
in the installation of your SSD or any 3rd party warranty voided during
installation.
For Your Safety and that of the SSD
• To reduce the risk of damage to sensitive electronics by electrostatic discharge, touch
an unpainted metal surface (such as your computer case) with your ngers before
touching the SSD to your computer.
• Ensure your working environment is clean, dry, and static-safe.
• Handle your SSD with care and do not touch the gold connectors on the end of
the SSD.
• Do not alter, modify, or disassemble the device.
You Will Need the Following
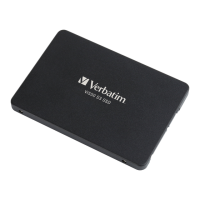
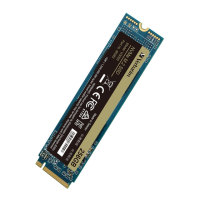
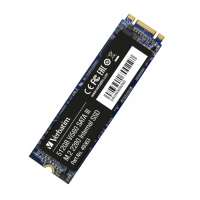
1. Verbatim Vi560 SATA III M.2 2280 SSD
2. Host laptop or desktop computer*
3. SATA III Cable (only needed if cloning existing SATA Hard Disk Drive (HDD) or SSD
device)*
4. A non-magnetic tip screwdriver suitable for opening the case, cover, and/or access
panel(s) of your desktop computer or laptop*
5. A non-magnetic tip screwdriver suitable for fastening the M.2 SSD device to the
motherboard*
6. A suitable screw to fasten the Vi560 SSD to your motherboard (typically included with
your motherboard)*
*Not included
Connecting the SSD to a Desktop Computer
1. Power off your desktop computer.
2. Unplug the power cable from the desktop computer.
3. Press the power button and hold it for a few seconds to discharge any remaining
electricity.
4. Locate the cover and/or access panel(s) for installing a SATA III M.2 SSD using your
computer’s user manual.
5. Open the computer’s cover or case and any associated access panel(s) to gain
access to the motherboard.
6. Decide whether you are replacing your existing SATA HDD or SSD OR if you are
installing your new SSD alongside an existing SATA HDD or SSD. Note: many
motherboards have at least (1) SATA III 2.5” ports and at least (1) SATA III M.2
available. Consult your motherboard documentation to conrm your options.
a. If you are replacing your existing HDD or SSD with a cloned drive or as a clean
installation:
i. Consult your motherboard documentation to locate the existing SATA III 2.5”
or M.2 port.
ii. Remove your HDD or SSD by unplugging it from your SATA interface
connector.
iii. Insert the Vi560 SATA III M.2 2280 SSD into the SATA III M.2 interface
connector. Make sure to line up the SSD eyelet with the motherboard
screw (exhibit A).
iv. Fasten the Vi560 SSD to your motherboard using a screw (exhibit B).
b. If you are installing the SSD alongside your existing HDD or SSD:
i. Consult your motherboard documentation to locate an available M.2 port.
ii. Insert the Vi560 SATA III M.2 2280 SSD into the SATA III M.2 interface
connector. Make sure to line up the SSD eyelet with the motherboard
screw (exhibit A).
iii. Fasten the Vi560 SSD to your motherboard using a screw (exhibit B).
7. Replace any covers or access panel(s) you opened or removed.
8. Power on your desktop computer.
9. Using your new SSD:
a. If you cloned your previous drive to the new SSD, it should be ready for you to
use.
b. If you installed your SSD alongside your existing drive setup, you will need to
navigate to your operating system’s disk management tool. Here, you will need
to format the drive, assign partition(s), and assign a drive letter.
c. If you did not clone your previous drive and do not wish to install the SSD
alongside your existing drive setup, proceed to install operating system,
drivers, rmware, applications, and user data to your SSD as desired.
Connecting the SSD to a Laptop Computer
1. Power off your laptop computer.
2. Unplug the power cable and remove the laptop battery.
3. Press the power button and hold it for a few seconds to discharge any remaining
electricity.
4. Locate the cover and/or access panel(s) for installing a SATA III M.2 SSD using your
computer’s user manual.
5. Open the cover and/or access panel(s) to gain access to the motherboard.
a. Remove your internal HDD or SSD by unplugging it from your SATA III 2.5” or
M.2 interface connector.
b. Insert the Vi560 SATA III M.2 2280 SSD into the SATA III M.2 interface
connector. Make sure to line up the SSD screw eyelet with the motherboard
screw (exhibit A).
c. Fasten the Vi560 SSD to your motherboard using a screw (exhibit B).
6. Replace any covers or access panel(s) you opened or removed.
7. Replace the battery back into the laptop computer and power on the laptop.
8. Using your new SSD:
a. If you cloned your previous drive to the new SSD, it should be ready for you to
utilize now.
b. If you did not clone your previous drive, proceed to install operating system,
drivers, rmware, applications, and user data to your SSD as desired.
1
 Loading...