EasyManua.ls Logo

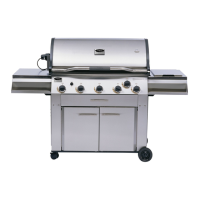
Vermont Castings VCT323SSN/P User Manual

Vermont Castings VCT323SSN/P
18 pages
To Next Page IconTo Next Page
Page #1 background imageLoading...
Page #1 background image
30006291 3/13 Rev. 2 En
VCT323SSN/P Assembly Procedures
Tools Required: Knife or scissors, #2 & #3 Phillips screwdriver, 7/16” & 11/32” wrench or ratchet. Refer to
the parts list for hardware details. The use of a manual screwdriver is strongly recommended. A power drill
may cause damage to the unit or stripping of the protective coating.
CAUTION: This grill is intended ONLY to be used as a cart model, this grill cannot be built into an
enclosure.
CAUTION: The assembly of this grill requires two (2) people.
CAUTION: Some parts may have sharp edges; to avoid injury, wearing gloves during assembly, lifting
or moving the grill is recommended. Protective eyewear and long sleeves are also strongly recom-
mended.
NOTE: Remove the protective plastic coating from the stainless steel, failure to do so will void the warranty.
6235
VC323SSP cover
Question and Answer IconNeed help?

Do you have a question about the Vermont Castings VCT323SSN/P and is the answer not in the manual?

Vermont Castings VCT323SSN/P Specifications

General IconGeneral
BrandVermont Castings
ModelVCT323SSN/P
CategoryGrill
LanguageEnglish

Summary

Assembly Preparation and Safety

Tools Required for Assembly

Lists the necessary tools for assembling the grill, recommending manual screwdrivers.

General Assembly Precautions

Highlights safety warnings for assembly, including two-person requirement and sharp edges.

Protective Coating Removal Note

Instructs to remove protective plastic coating from stainless steel to avoid voiding the warranty.

Unpacking and Component Verification

Carton Contents

Lists all components expected to be found within the grill's shipping carton.

Internal Grill Components

Lists all components that are part of the grill assembly itself.

Cart Assembly Steps

Attach Cart Sides, Bottom and Base

Instructions for assembling the cart's base, sides, and bottom panel.

Attach Back Panel

Details on how to attach the back panel to the cart assembly.

Upper Cart and Tank Installation

Attach Upper Cart Brace and Tank Retainer

Guides the attachment of the upper cart brace and the LP tank retainer.

Door and Caster Installation

Attach Door and Complete Cart

Instructions for attaching the cart door and its handle.

Attach Casters to Cart Base

Details on how to attach the swivel and stationary casters to the cart base.

Brackets and Grease System

Attach Cart Mounting Brackets

Instructions for attaching the mounting brackets to the cart.

Attach Grease Cup Holder, Cup and Shield

Guides the installation of the grease cup holder, grease cup, and grease shield.

Grill and Shelf Installation

Attach Grill to Cart Assembly

Steps for mounting the main grill unit onto the assembled cart.

Attach Left & Right Side Shelves

Instructions for attaching the side shelves using spacers and brackets.

Internal Component Installation

Attach Paper Match Holder

Guides the attachment of the paper match holder to the inside of the cart door.

Install Grease Tray

Instructions for correctly positioning the grease tray over the grease cup.

Install Ignitor Battery

Details on installing the 'AAA' battery for the ignitor system.

Install Battery Holder and Backlighting Battery

Guides the installation of the battery holder and backlighting battery.

Install Internal Components (Grates, Heat Plates, Warming Rack)

Instructions for placing sear heat plates, cooking grates, and warming rack inside the grill.

Fuel Source Installation

Install the LP Cylinder (LP Models ONLY)

Steps for properly installing and securing the LP gas cylinder.

Install Natural Gas Supply Line

Instructions for connecting the natural gas supply line to the grill.

Related product manuals