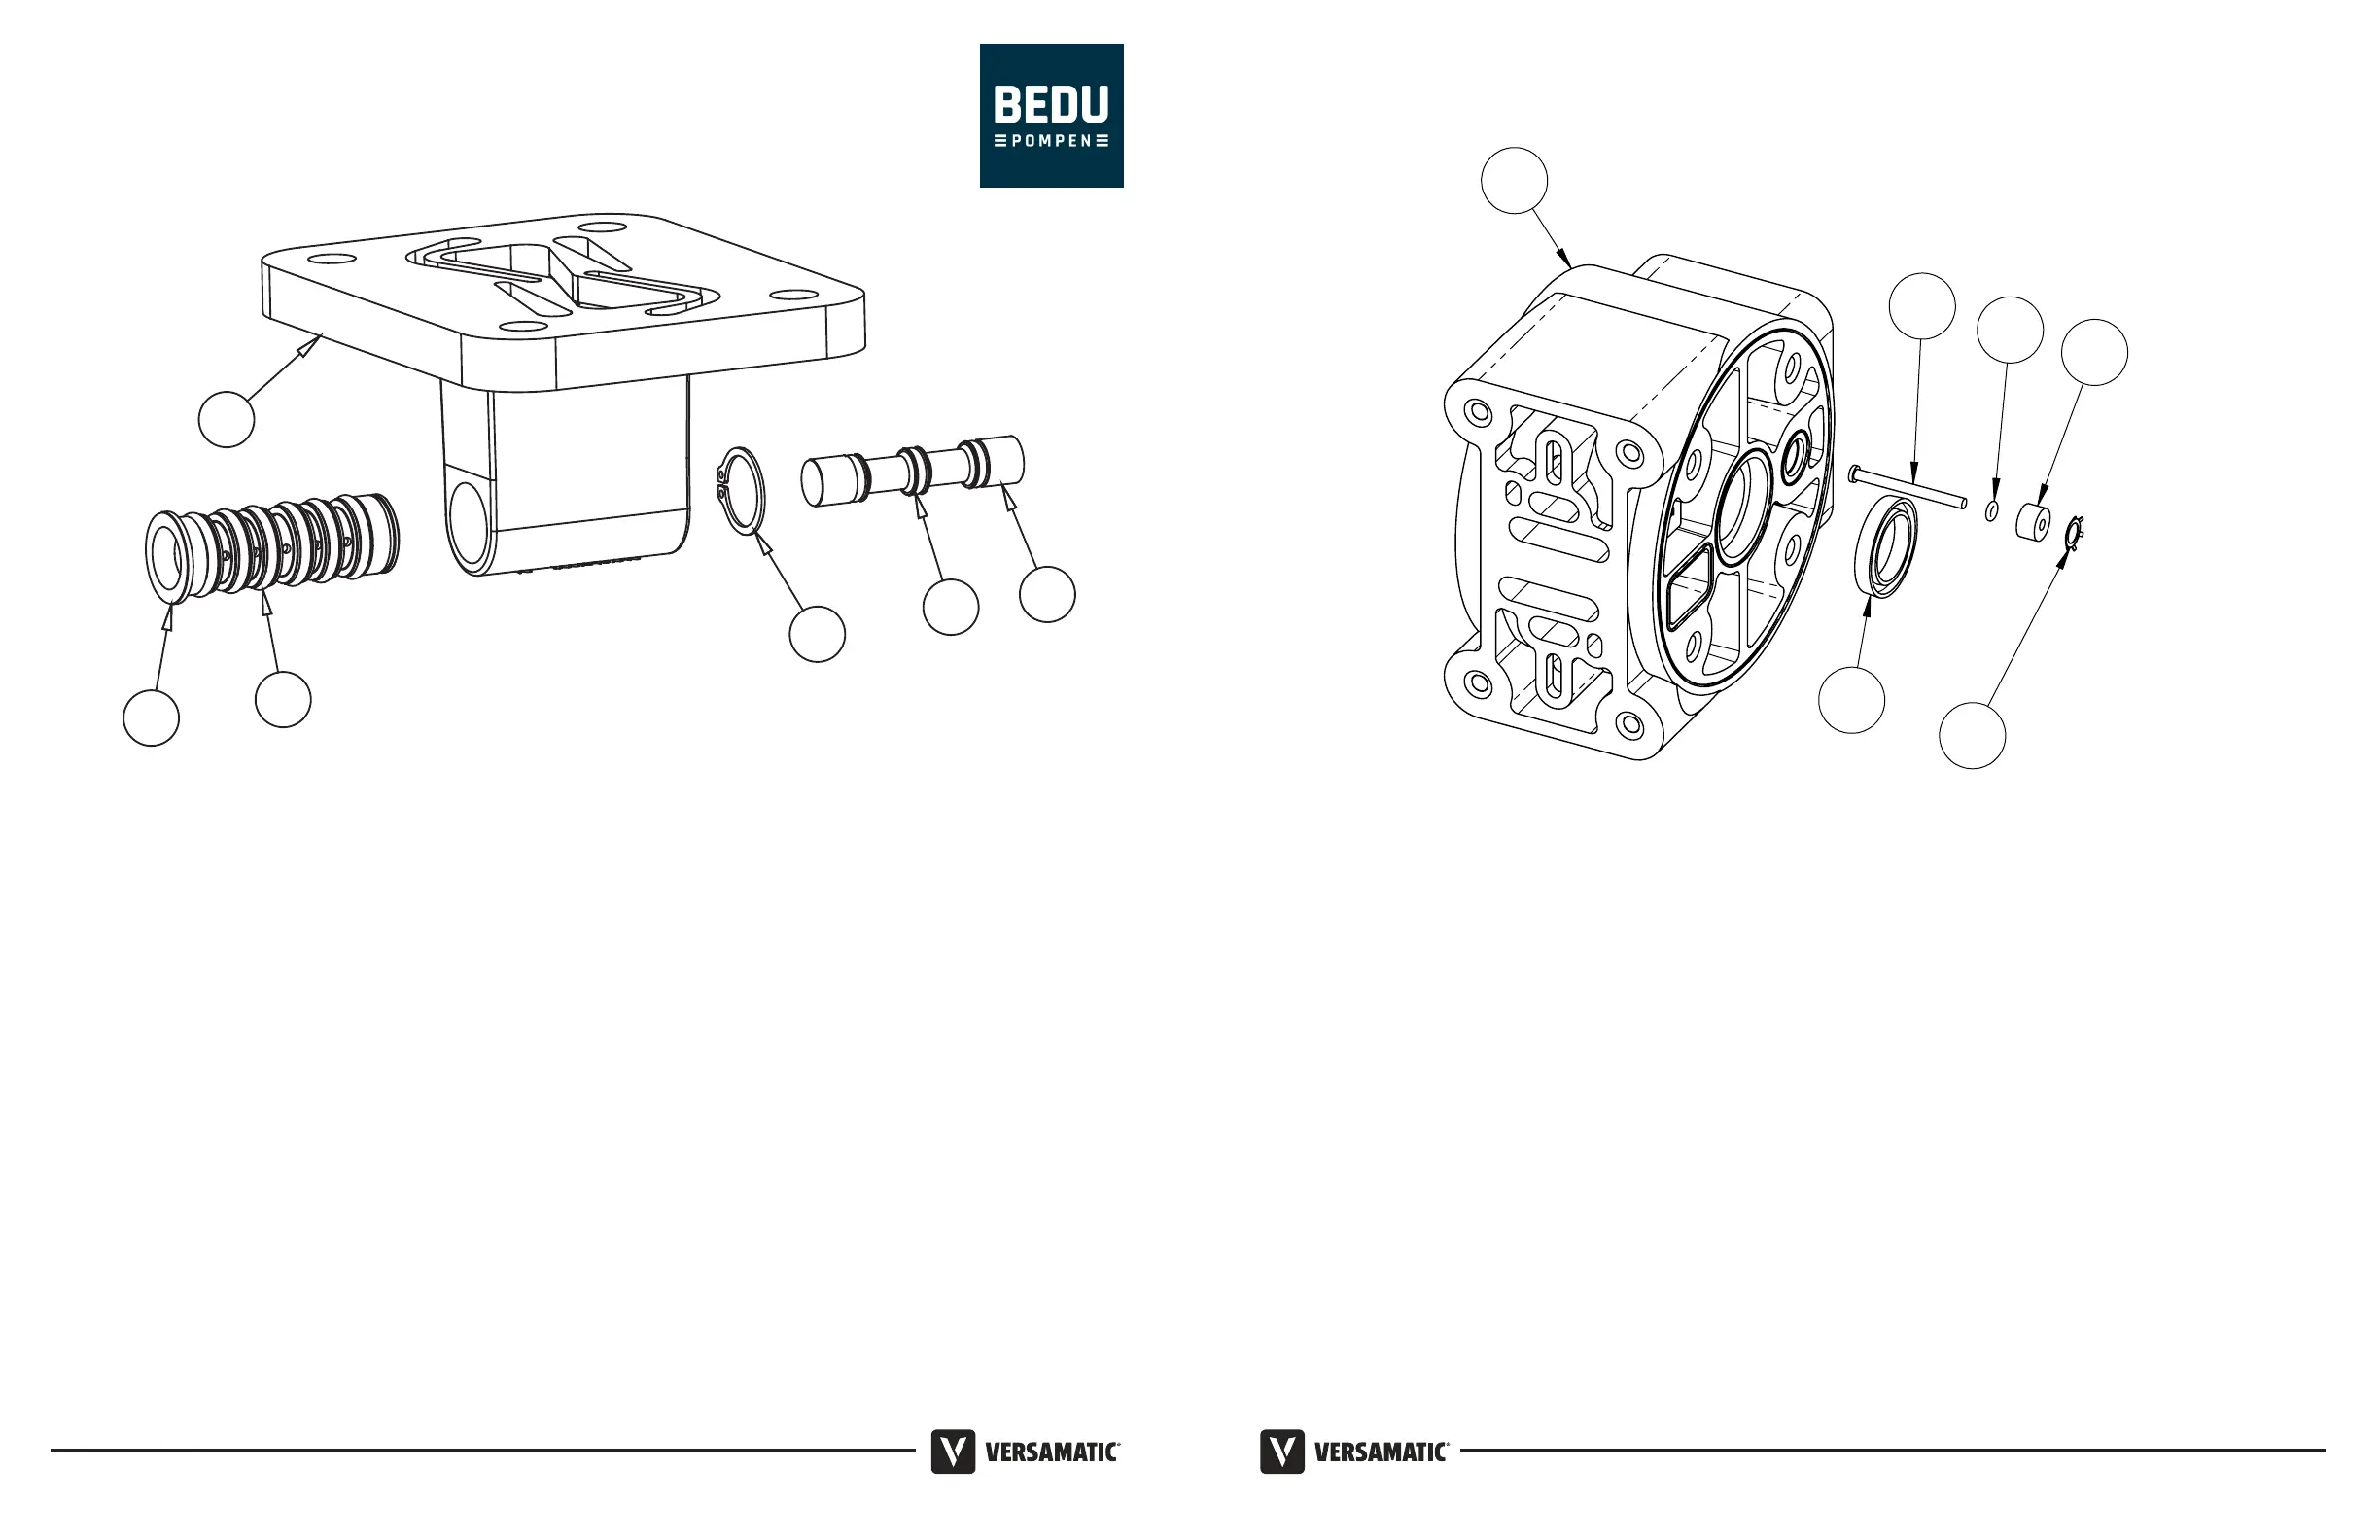
Pilot Valve Assembly
Pilot Valve Servicing
With Pilot Valve removed from pump.
Step 1: Remove snap ring (2-F).
Step 2: Remove sleeve (2-B), inspect O-Rings (2-C),
replace if required.
Step 3: Remove spool (2-D) from sleeve (2-B),
inspect O-Rings (2E), replace if required.
Step 4: Lightly lubricate O-Rings (2-C) and (2-E).
Reassemble in reverse order.
2-A
2-B
2-C
2-F
2-E
2-D
Pilot Valve Assembly Parts List
Item Part Number Description Qty
2 095-110-558 Pilot Valve Assembly 1
2-A 095-095-558 Valve Body 1
2-B 755-052-000 Sleeve (With O-Rings) 1
2-C 560-033-360 O-Ring (Sleeve) 6
2-D 775-055-000 Spool (With O-Rings) 1
2-E 560-023-360 O-Ring (Spool) 3
2-F 675-037-080 Retaining Ring 1
Intermediate Assembly
Intermediate Assembly Drawing
Step 1: Remove plunger, actuator (36) from center of
intermediate pilot valve cavity.
Step 2: Remove ring, retaining (38), discard.
Step 3:
Remove bushing, plunger (7), inspect for wear
and replace if necessary with genuine parts.
Step 4: Remove O-ring (30), inspect for wear and
replace if necessary with genuine parts.
Step 5: Lightly lubricate O-ring (30) and insert into
intermediate.
Step 6: Reassemble in reverse order.
Step 7: Remove seal, diaphragm rod (42).
Step 8:
Clean seal area, lightly lubricate and install new seal,
diaphragm rod (40, not shown).
36
30
7
42
38
3
Model E2 Bolted Plastic Flap • 1817
• Model E2 Bolted Plastic Flap