Diaphragm Servicing
Torque:
480 in-lbs.
13
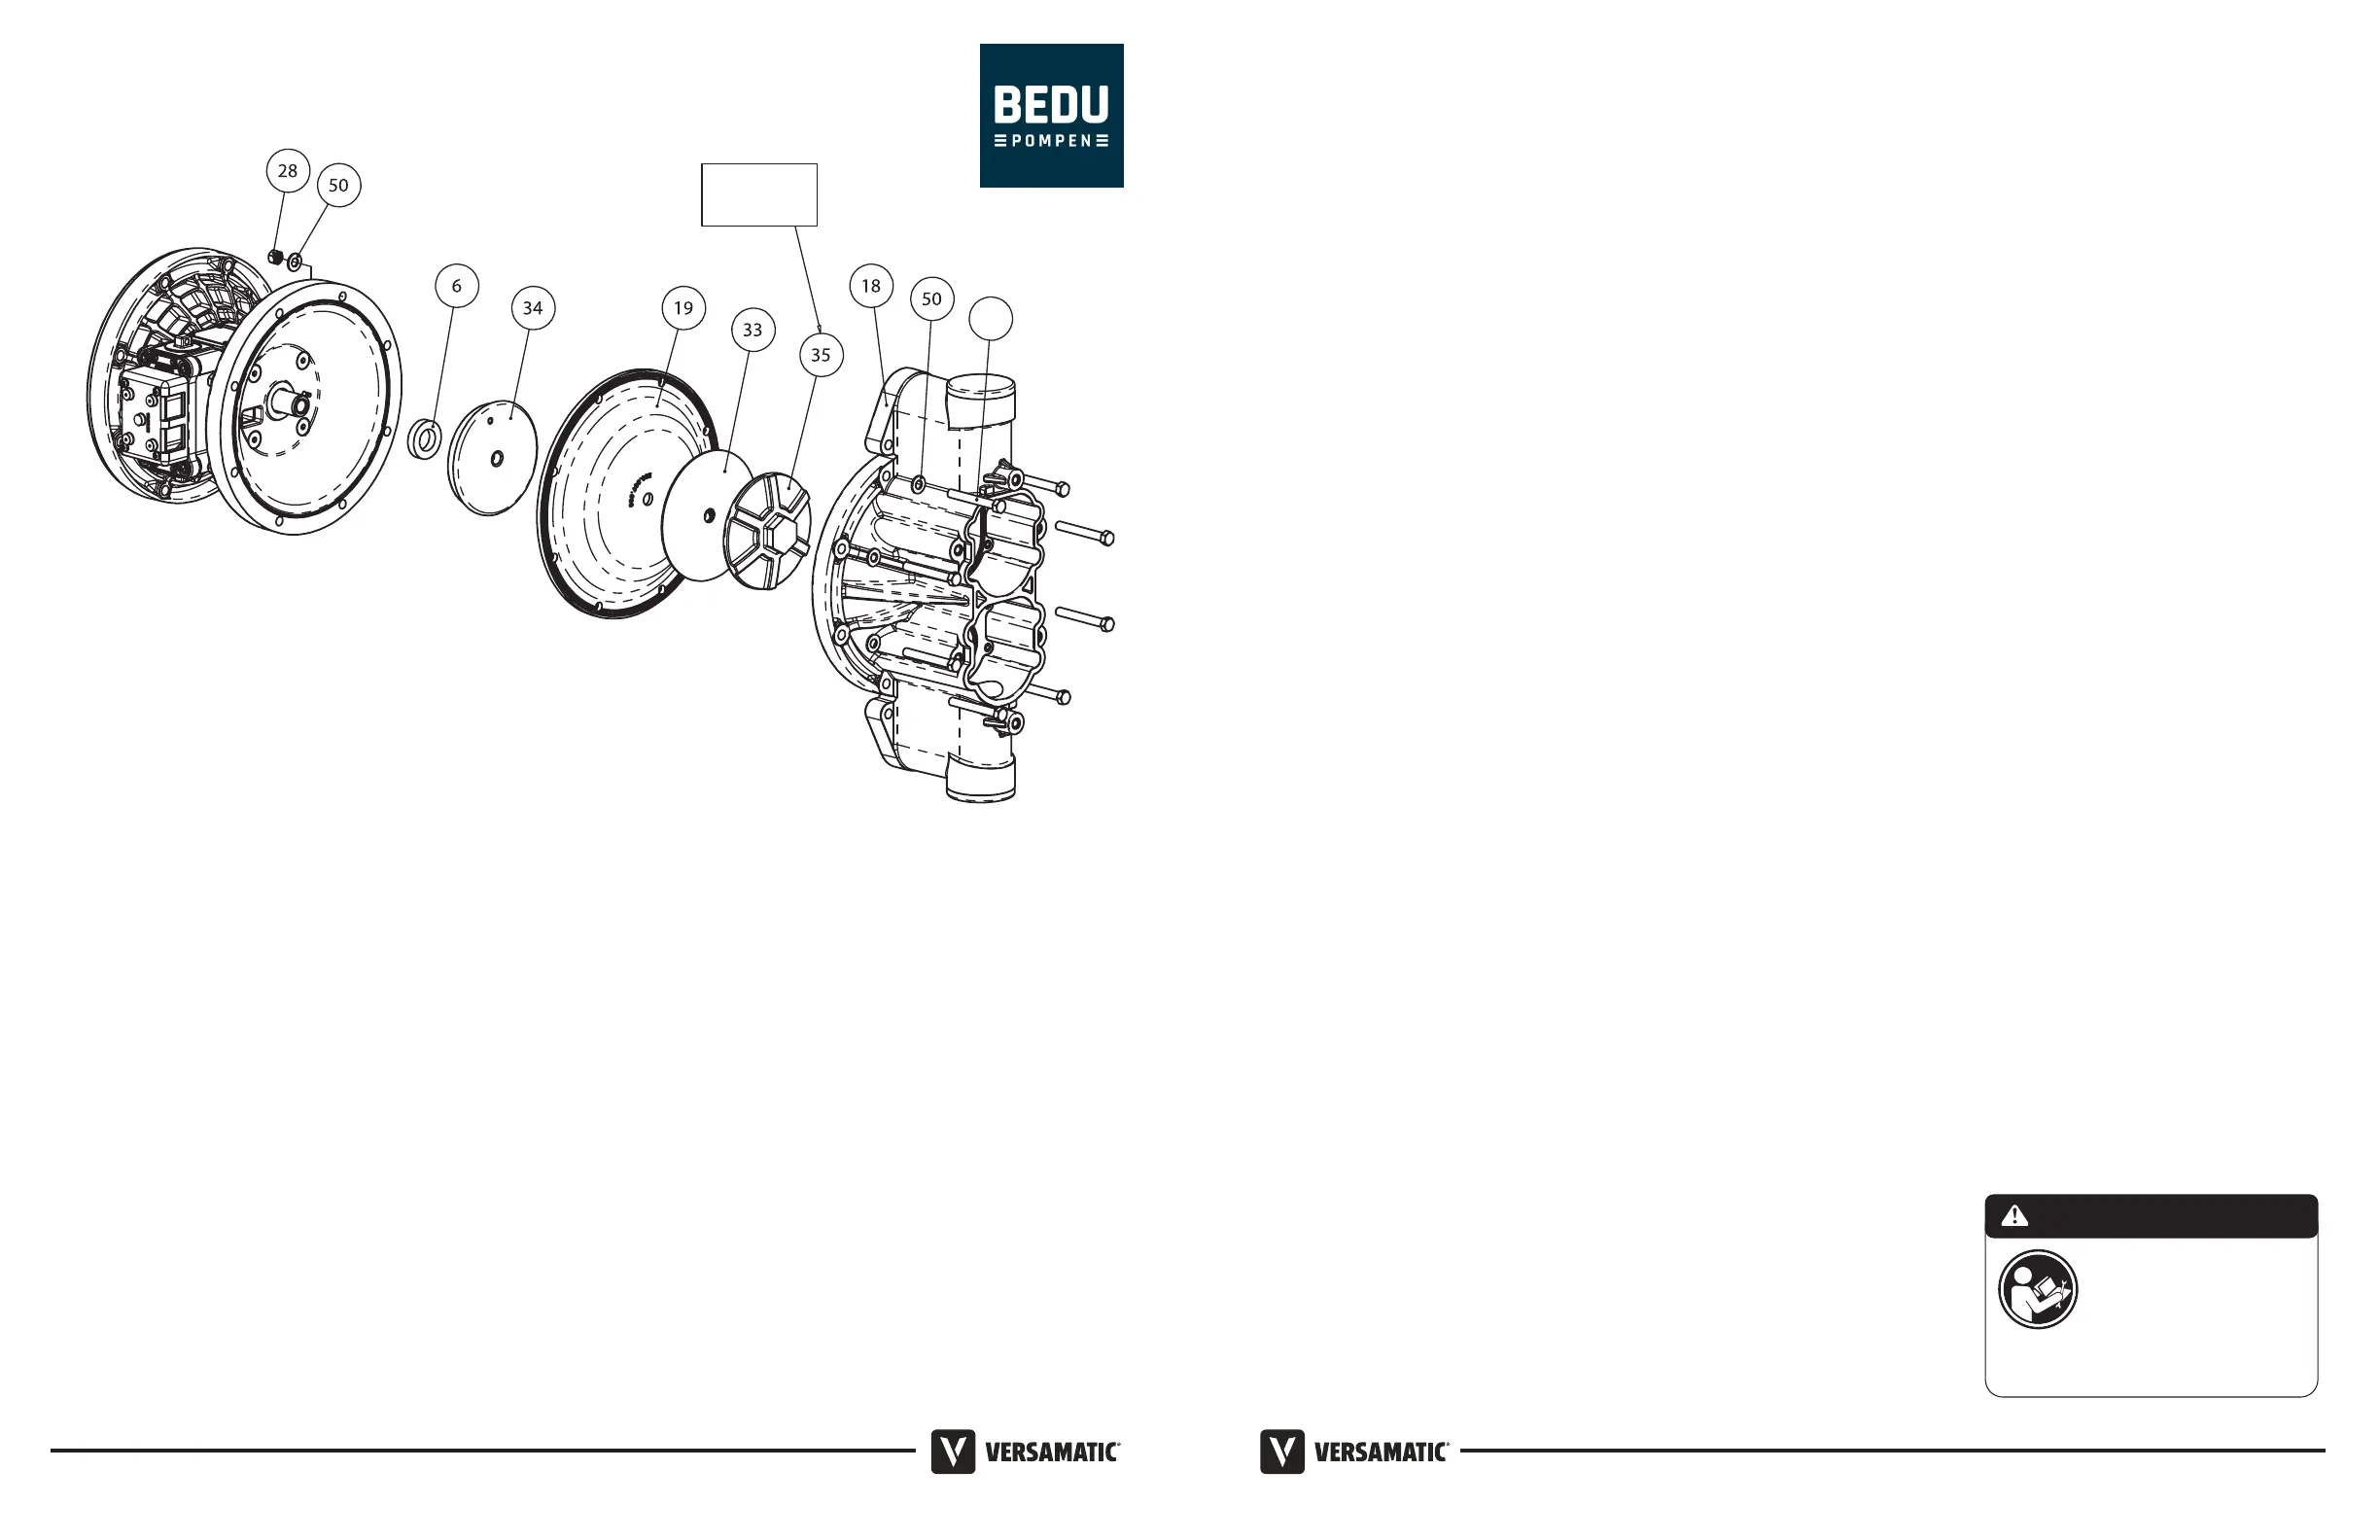
Diaphragm Service Drawing, Non-Overlay
Step 1: With manifolds and outer chambers
removed, remove diaphragm assemblies from
diaphragm rod. DO NOT use a pipe wrench or similar
tool to remove assembly from rod. Flaws in the rod
surface may damage seals. Soft jaws in a vise are
recommended to prevent diaphragm rod damage.
Step 1.A: NOTE: Not all inner diaphragm plates
are threaded. Some models utilize a through hole
in the inner diaphragm plate. If required to separate
diaphragm assembly, place assembly in a vise,
gripping on the exterior cast diameter of the inner
plate. Turn the outer plate clockwise to separate the
assembly.
Always inspect diaphragms for wear cracks or
chemical attack. Inspect inner and outer plates for
deformities, rust scale and wear. Inspect intermediate
bearings for elongation and wear. Inspect diaphragm
rod for wear or marks.
Clean or repair if appropriate. Replace as required.
Step 2: Reassemble
Outer plate with a threaded stud, diaphragm, and
an inner plate with through hole. Secure threaded
inner plate in a vise. Ensure that the plates are being
installed with the outer radius against the diaphragm.
Step 3: Lightly lubricate, with a compatible material,
the inner faces of both outer and inner diaphragm plates
when using on non Overlay diaphragms (For EPDM
water is recommended). No lubrication is required.
Step 4: Push the threaded outer diaphragm plate
through the center hole of the diaphragm. Note: Most
diaphragms are installed with the natural bulge out
towards the uid side.
Step 5: Thread or place, outer plate stud into
the inner plate. For threaded inner plates, use a
torque wrench to tighten the assembly together.
Torque values are called out on the exploded view.
Repeat procedure for second side assembly.
Allow a minimum of 15 minutes to elapse after
torquing, then re-torque the assembly to compensate
for stress relaxation in the clamped assembly.
Step 6: Thread one assembly onto the diaphragm
rod with sealing washer (when used) and bumper.
Step 7: Install diaphragm rod assembly
into pump and secure by installing the outer
chamber in place and tightening the capscrews.
Step 8: On opposite side of pump, thread the
remaining assembly onto the diaphragm rod. Using a
torque wrench, tighten the assembly to the diaphragm
rod. Align diaphragm through bolt holes, always going
forward past the recommended torque. Torque values
are called out on the exploded view. NEVER reverse
to align holes, if alignment cannot be achieved
without damage to diaphragm, loosen complete
assemblies, rotate diaphragm and reassemble as
described above.
Step 9: Complete assembly of entire unit.
IMPORTANT
Read these instructions completely,
before installation and start-up.
It is the responsibility of the
purchaser to retain this manual for
reference. Failure to comply with
the recommendations stated in this
manual will damage the pump, and
void factory warranty.
Model E2 Bolted Plastic Flap • 2019
• Model E2 Bolted Plastic Flap