2
PLL & Transmitter
PLL & TransmitterPLL & Transmitter
PLL & Transmitter
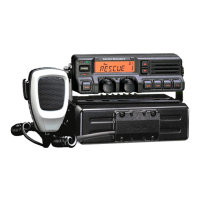
Set up the test equipment as shown for transmitter alignment. Adjust the supply
voltage to 7.5V for all steps where not specified otherwise.
PLL VCV (Varactor Control Voltage)
Connect the DC voltmeter between TP03 on the chip side of the Main Unit and
ground.
Set the transceiver to CH 3 (high band edge), and adjust L1004 on the chip side of
the Main Unit for 3.6 V ± 0.1 V on the voltmeter.
Set the transceiver to CH 1 (low band edge), and confirm the low-end VCV is more
than 0.8 V while transmitting, and also while receiving.
PLL Reference Frequency
Set the transceiver to CH 2 (band center), key the transmitter and adjust TC1001
on the component side of the Main Unit, if necessary, so the frequency counter
displays the band center frequency ±100 Hz (for the version being aligned) when
transmitting.
Transmitter Output Power
Set the transceiver to CH 2 (band center), and select high power output.
Ensure that the supply voltage is precisely 7.5 V, then adjust VR1004 on the
component side of the Main Unit (while the PTT switch is pressed) for 5.0 W on the
wattmeter, and confirm that supply current remains below 2.0 A.
Modulation Level
Set the transceiver to CH 2 (band center), adjust the AF generator for 77 mV rms
output at 1 kHz to the MIC jack.
Press the PTT switch and adjust VR1002 on the component side of the Main Unit
for a deviation of ±4.2 kHz (for 25 kHz steps), or ±2.1 kHz (for 12.5 kHz steps).
Receiver
ReceiverReceiver
Receiver
Set up the test equipment as shown for receiver alignment.
Sensitivity
Set the transceiver to CH 3 (high band edge), and the RF signal generator tuned to
the same frequency, set the generator for ±3.0 kHz deviation with 1 kHz tone
modulation, and set the output level for 40 µV at the antenna jack.
 Loading...