6 INSTALLATION
Refer to the appropriate installation procedures depending on the size and type of your Mini-Mate
System
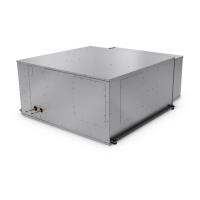
6.1 Installing Ceiling-mounted Evaporators
WARNING! Risk of ceiling collapse and heavy unit falling. Can cause building and equipment
damage, serious injury or death. Verify that the supporting roof structure is capable of
supporting the weight of the unit(s) and the accessories, see Table 3.2 on page13. Be sure to
securely anchor the top ends of the suspension rods. Make sure all nuts are tight.
NOTICE
Risk of leaking water. Can cause equipment and building damage.
Improper installation, application, and service practices can result in water leakage from the
unit. Do not mount this unit over equipment and furniture that can be damaged by leaking
water. Install a water-tight drain pan with a drain connection under the cooling unit. We
recommend installing monitored leak detection equipment for the unit and supply lines. Check
drain lines periodically for leaks, sediment buildup, obstructions, kinks and/or damage and
verify that they are free running.
6.1.1 Installing Suspension Rods andMounting Ceiling Units
Refer to the Location Considerations on page11 before beginning installation.
NOTE: Follow all national and local building, electrical and plumbing codes.
• The ceiling and ceiling supports of existing buildings may require reinforcements.
• Recommended clearance between ceiling grids and building structural members is the unit’s
height plus 3in. (76mm).
• Four 3/8-in.-16 TPI threaded suspension rods are required and field supplied. The factory-
supplied 3/8-in.-16 TPI hardware kit includes the remaining installation hardware for rod to
unit.
To install the suspension rods:
1. Install the 4 field-supplied rods by suspending them from suitable building structural members
so that they will align with the 4 mounting locations on the unit base.
2. Securely anchor the top ends of the suspension rods.
3. Make sure all nuts are tight.
To lift and install the unit on the rods:
1. Referring to Figure 6.1 on the next page, place the hex nuts (Item 2) on the threaded rods,
and add the washer, sleeve, and isolator (Items 3, 4, and 6) to the bracket holes on the unit.
2. Using a suitable lifting device that is rated for the weight of the unit (see Mini-Mate Unit
Weights on page13), raise the unit and pass the threaded rods through the 4 mounting
locations in the unit base.
3. Attach the threaded rods to the flanges using the washer and plain nut (Items 7 and 8) from
the hardware kit to hold the unit in place as shown in Figure 6.1 on the next page.
4. Adjust the plain nuts to distribute the weight of the unit evenly by the rods, making sure that
the unit does not rest on the ceiling grid and that the unit is level.
NOTE: The unit must be level to properly drain condensate.
5. Use the Nylock nuts to "jam" the plain nuts in place as shown in Figure 6.1 on the next page.
6 Installation 27