Do you have a question about the VEVOR LT2V-39 and is the answer not in the manual?
Ensure proper installation and grounding by a qualified technician for safe operation.
Damaged supply cords must be replaced by qualified personnel to prevent hazards.
Only authorized service centers should perform repairs or replacements on the cooktop.
Children require supervision when using the appliance; they should not play with it.
Avoid storing flammable materials near the cooktop to prevent fire hazards.
The cooktop is not designed for heating or warming rooms.
Wear appropriate clothing for personal safety while operating the cooktop.
Use pans with flat bottoms matching the heating element size for efficiency and safety.
Use only suitable glazed cookware that can withstand temperature changes to prevent breakage.
Never soak or immerse removable heating elements in water.
Do not use a damaged cooktop; contact a qualified technician immediately.
Clean the cooktop carefully, being mindful of steam burns and potential fumes from cleaners.
Cut the worktop to specified dimensions, ensuring adequate space and heat-resistant material.
Ensure the cooktop has proper ventilation with unobstructed air intake and exit.
Maintain a minimum gap of 760mm between the hob and any overhead cupboards for safety.
Installation must be performed by a qualified person; do not attempt DIY installation.
Do not install the cooktop above appliances like refrigerators or dishwashers.
Ensure surrounding walls and areas can withstand heat generated by the cooktop.
Ensure connection is done by an after-sales technician using proper tools and safety regulations.
The installer must verify correct electrical connection and compliance with safety regulations.
Ensure the power cable is not bent or compressed during installation.
The power cable should be regularly checked and replaced only by qualified personnel.
An "E4" fault indicates no heating for 2 minutes after gear selection.
Contact customer service via email with details and order number for troubleshooting assistance.
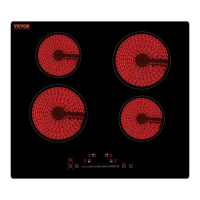
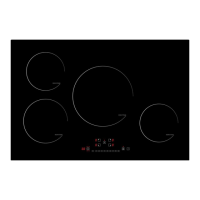
Provides a schematic illustration of the cooktop's control panel and its components.
Place suitable cookware; operation of both zones is identical.
Avoid placing hot pots or pans directly on the control panel keypad.
Press On/Off to enter standby; unit returns to standby if no program is selected within 2 minutes.
Select the desired cooking zone by pressing the corresponding button.
Adjust cooking power levels by sliding the control.
The cooking zone can operate at a maximum power of 1000W.
The cooking zone can operate at a maximum power of 800W.
Press the timer button after selecting a cooking zone to set a cooking duration.
Confirm timer settings by sliding controls for minutes and tens of minutes.
Cancel the timer by setting the time to "00" for the selected zone.
The hob has a child lock feature to prevent accidental operation by children.
Activate child lock by holding the "Inter lock" key for 3 seconds; timer shows "LO".
Deactivate child lock by holding the lock key for 3 seconds; hob returns to normal.
Press the pause button to temporarily stop and resume the hob's operation.
The "H" symbol indicates residual heat in a cooking zone after use.
The unit has safety systems to prevent overheating, switching off hotplates when necessary.
Each hotplate has a limiter to prevent excessive surface heating.
Immediately disconnect power if the radiant surface cracks and contact a technician.
Stainless steel, enamel, iron, ceramic, and copper pans are suitable for radiant cooktops.
Avoid aluminum pans unless they have stainless steel encapsulated bottoms to prevent staining.
Do not switch on hotplates without a pan; ensure pans have flat, dry bases.
Ensure the pan's diameter is at least as large as the hotplate for efficient heating.
Lift pans instead of dragging them to prevent scratching the radiant glass surface.
Do not use tin foil or plastic containers as they can melt and fuse to the surface.
If the glass surface cracks, disconnect power and contact a technician; do not clean.
Clean the glass surface when cool using a damp cloth and soapy water; avoid abrasive products.
Perform thorough weekly cleaning with specialized products to protect the hob.
Use a scraper to remove stubborn dirt or burnt-on material from the surface.
Remove burnt sugar or plastic quickly with a scraper while hot to prevent permanent marks.
Do not use the cooktop surface as a general work area to prevent scratches.
| Model | LT2V-39 |
|---|---|
| Number of Burners | 2 |
| Power | 3500W |
| Voltage | 220-240V |
| Frequency | 50/60Hz |
| Material | Stainless Steel |
| Type | Induction Hob |