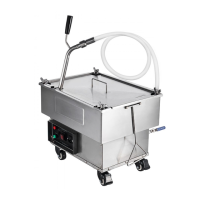
This document describes the VEVOR Oil Fryer Filter, a device designed to filter oil from deep fryers, ensuring cleaner oil and potentially extending its lifespan.
Function Description
The VEVOR Oil Fryer Filter is designed to filter used cooking oil from deep fryers. This process helps remove food particles and sediment, leading to cleaner oil and potentially reducing the frequency of oil changes. The device is intended for commercial use in various settings such as restaurants, canteens, hospitals, and other commercial enterprises that produce continuous mass production of food. It is not intended for use by persons with reduced physical, sensory, or mental capabilities, or lack of experience and knowledge, unless they have been given supervision or instruction concerning use of the equipment by a person responsible for their safety. Children should be supervised to avoid playing with the equipment.
Important Technical Specifications
The VEVOR Oil Fryer Filter is available in several models, each with specific voltage requirements, plug types, and tank filling capacities.
| MODEL |
Voltage |
PLUG |
Tank filling capacity (MAX.) |
| LYC-18L |
AC120V 60Hz |
US |
16L |
| LYC-18L-EU |
AC220-240V 50Hz |
EU |
16L |
| LYC-38L |
AC120V 60Hz |
US |
38L |
| LYC-38L-EU |
AC220-240V 50Hz |
EU |
38L |
| LYC-55L |
AC120V 60Hz |
US |
52L |
| LYC-55L-EU |
AC220-240V 50Hz |
EU |
52L |
The device is a CE security certification compliant, indicating it meets European Union safety, health, and environmental protection requirements. It is also marked with a symbol indicating separate refuse collection in the European Union, meaning products marked with this symbol must not be discarded with normal domestic waste but must be taken to a collection point for recycling electrical and electronic devices.
Usage Features
The operation of the VEVOR Oil Fryer Filter involves several steps to ensure proper and safe use:
Setup:
- Remove the Oil Filter from its packaging, ensuring all protective packaging, plastic, and residues are cleaned from its surfaces.
- Lay out all components of the Oil Filter on the floor, ready for assembly.
- An Allen key is required to assist in the assembly process.
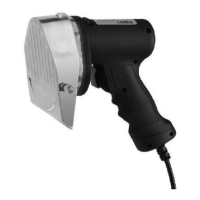
- Assemble the oil gun to the main housing correctly.
- Put the filter paper and silicon seal ring into the pan.
- Place the rectangular stainless steel frame to cover the silicone seal ring, then filter net, and tighten the screws.
- It is crucial that the filter paper is installed in the order shown in the figure, and the filter paper (A-2) must be installed on top of the filter (A-1); otherwise, the machine may not work and be empty.
Operation:
- Ensure that the filter paper is fresh and in place properly. Refer to instructions if you need to replace or install the filter paper.
- Ensure that you have the filter machine plugged in and turned OFF, and the oil draining valve on the oil gun and main housing (Model LYC-38L, LYC-38L-EU, LYC-55L, LYC-55L-EU) is in the "OFF" position.
- Open your fryer and attach the drain valve extension.
- Position the front of the filter machine under the fryer drain valve extension.
- Turn the fryer power switch OFF.
- Open the drain valve on the fryer and allow the frypot oil to drain into the filter machine.
- With the filter machine hose positioned in its holster on the machine, turn the filter machine ON as the oil drains into the machine.
- Allow the machine to pump the oil through the paper and cycle it back into the machine until the oil has been filtered.
- Once all of the oil has drained from the fryer and has been filtered through the machine, turn the machine OFF and close the drain valve on the fryer.
- Move the filter machine hose from the machine and into the frypot and turn the machine back on.
- Return the oil to the fryer and allow the filter machine to run for 10-15 seconds after no more oil comes through the hose.
- For added safety of the filter pipe, please lift the pipe to vertical position and open the draining valve on the bottom of the pipe to filter thoroughly the residue oil, or it'll become solid and blocked the pipe.
- WARNING: DO NOT OVERFILL THE OIL FRYER FILTER.
Safety Precautions:
- Serious Injury or Property Damage Can Occur if Proper Precautions Are Not Followed.
- Because this equipment utilizes high voltage, it should only be installed and serviced by a licensed electrician or trained servicer. Attempting to install or service the equipment yourself could result in serious, potentially fatal injuries.
- If an electrical shock is felt when touching equipment, shut off power immediately (pull cord or turn off circuit breaker) and call a trained servicer for repair. Failure to do so could result in serious, potentially fatal injuries.
- Always turn the power switch off whenever the equipment is not used.
- If the supply cord is damaged, it must be replaced by a special cord or assembly available from the manufacturer or its service agent.
- Improper installation, adjustment, alteration, service, or maintenance can cause property damage, injury, or death. Read the installation, operating, and maintenance instructions thoroughly before installing or servicing this equipment.
- DO NOT USE if the filter pan is not completely dry and free of water droplets.
- DO NOT overfill the filter pan.
- DO NOT use water jets to clean this equipment. Doing so will damage the unit and void the warranty.
- DO NOT use the electrical cord as a leash to move the appliance.
- DO NOT attempt to move this appliance or transfer hot liquids from one container to another when the unit is at operating temperature or filled with hot liquids.
- DO NOT leave appliance unattended while draining or refilling with oil/shortening.
Maintenance Features
Cleaning & Maintenance:
- WARNING: SERIOUS INJURY OR PROPERTY DAMAGE CAN OCCUR IF PROPER PRECAUTIONS ARE NOT FOLLOWED.
- The power supply must be disconnected before servicing, maintaining, or cleaning this machine.
- The power supply must be disconnected before servicing, maintaining, or cleaning this machine.
- DO NOT pump water through the filter pump system. The pump functions using oil lubrication, and water will damage the pump.
- DO NOT attempt to lift filter machine off floor for cleaning. Bodily injury may occur.
- DO NOT attempt to circulate water through pump. Internal rusting in pump will occur.
- DO NOT use the appliance as a step for cleaning or accessing the ventilation hood. Serious injury could result from slips, trips, or contact of hot liquids.
- If the supplied power cord or receptacle is damaged, it MUST be replaced by an authorized service and parts company technician in order to avoid a hazard.
- NOTE: Follow these cleaning instructions before using machine for the first time.
- NOTE: Shortening Filter must be cleaned DAILY. Failure to do so will void warranty.
- NOTE: The contents of crumb catch and filter pan of any filter system must be emptied into a fireproof container at the end of each day. Some food particles can spontaneously combust if left soaking in certain types of oil or shortening.
- NOTE: It is recommended that this appliance be inspected by a qualified service technician for proper performance and operation on a yearly basis.
Daily Cleaning:
- Disconnect filter hose wand and drain.
- Disconnect filter tube and turn pump on for 3-5 seconds to force shortening from pump. Failure to do this will cause pump or hose to clog with shortening.
- Unplug shortening filter.
- Remove filter tube and clamp assembly.
- Unscrew wing nuts on filter clamp assembly to remove filter paper from filter plate.
- Discard used paper; wash filter plate and thoroughly rinse with hot water; dry well.
- Remove and wash tank. Rinse and dry thoroughly.
- Replace tank onto filter.
- Wash clamp assembly, rinse with hot water, and dry well. For Model LYC-38L, LYC-38L-EU, LYC-55L, LYC-55L-EU, there's a draining valve on the bottom of the main housing to release the residue. Close the drain valve while filtering and open it after rinsing hot water.
- Replace filter paper on tube and clamp assembly and install in tank.
Replacing Filter Paper:
- Ensure that the machine is OFF and oil has been returned to the Fryer.
- Unscrew the 4 clamps pressing the filter paper frame down.
- Remove the metal frame and, if necessary, the used filter paper.
- Place a new sheet of filter paper into the filter pan.
- Measure 8 ounces of filter powder and distribute evenly over the paper surface.
- Place the metal frame over the gasket and filter paper.
- Reinstall the 4 clamps and ensure the filter paper is securely in place.
Troubleshooting:
The manual provides a troubleshooting guide for common issues like the pump not starting or stopping during operation, pumping erratically, or oil not returning to the fry pot. It outlines potential causes and remedies, such as checking power supply, resetting thermal overload switches, replacing damaged components, or clearing clogs. For complex issues, it advises calling a service agent or qualified technician.