4-2. DCV MEASUREMENT
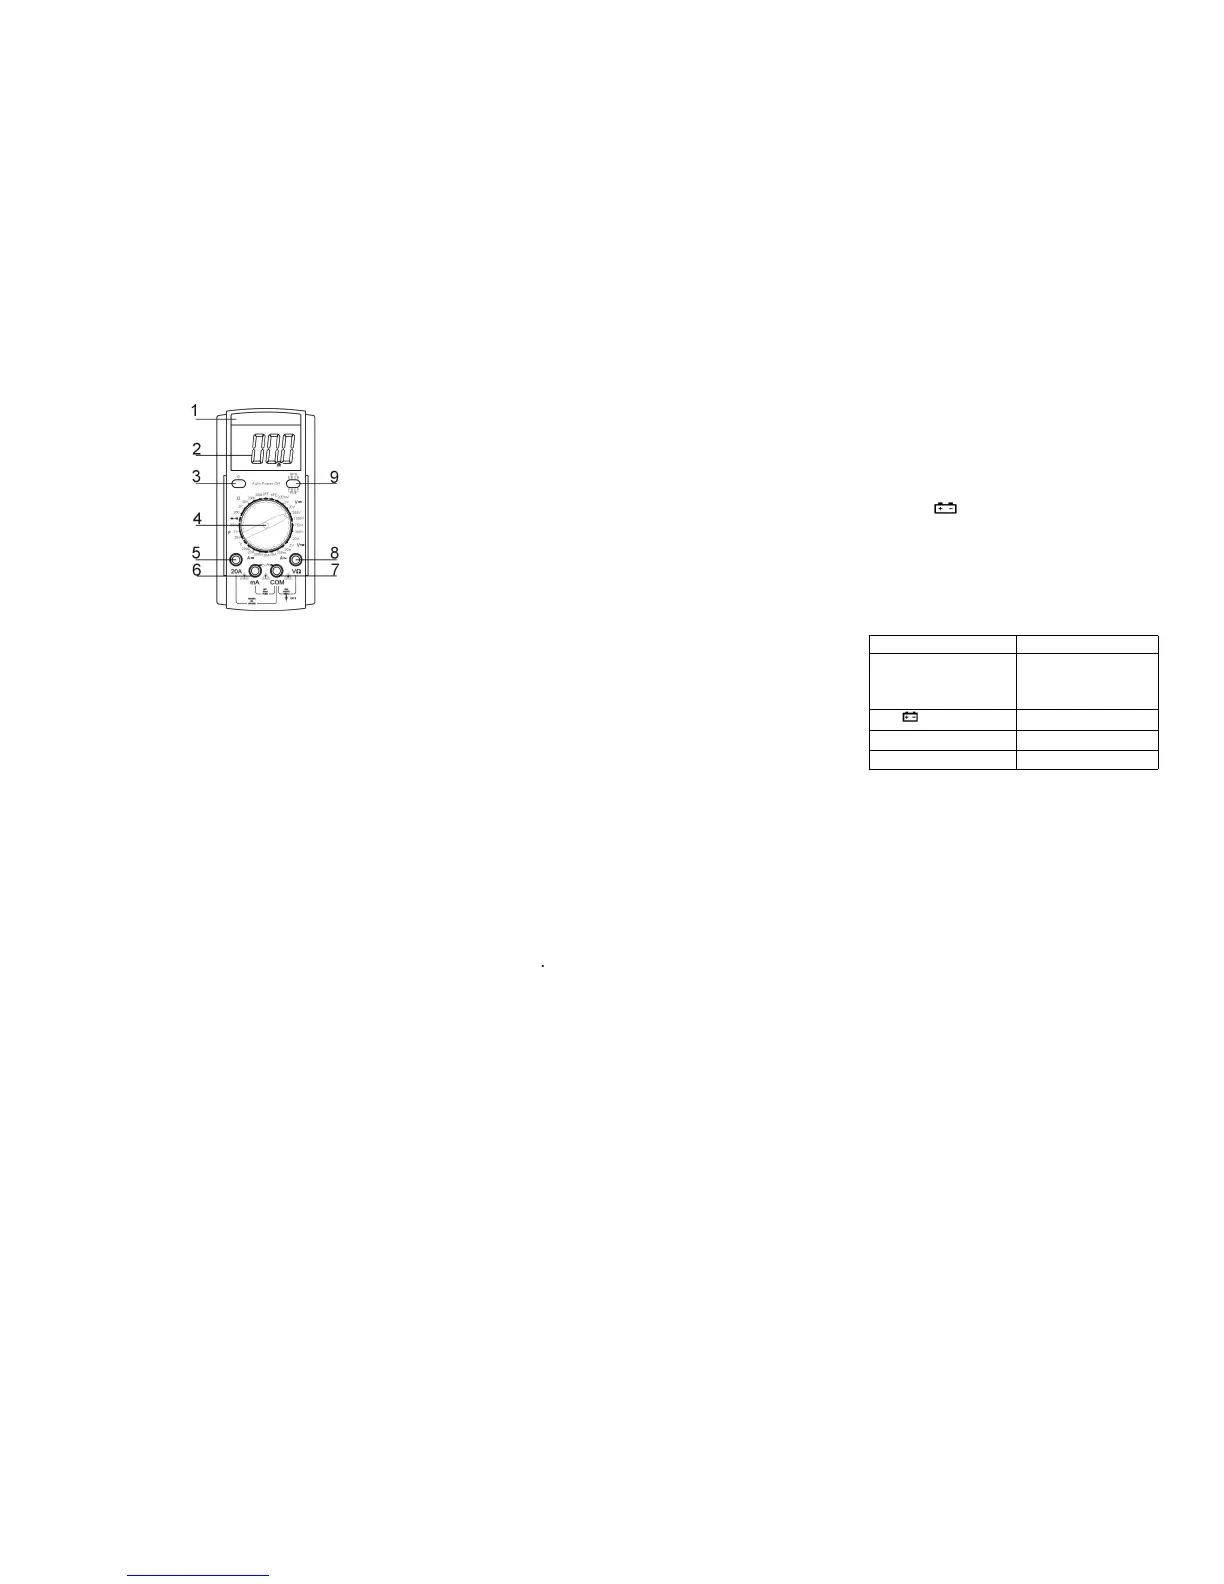
4-2-1. Insert the black test lead to “COM” jack, the red one to V/Ω jack.
4-2-2. Set the range knob to a proper DCV range, connect the test leads across to the circuit under
tested, the polarity and voltage of the point which red lead connect will display on LCD.
NOTE:
1.If the measured voltage is unsure beforehand, should set the range knob to the highest range,
then, switch to a proper range according to the displayed value.
2.If LCD displays “1”, it means overrange, should set the range knob to a higher range.
4-3.ACV MEASUREMENT
4-3-1.Insert the black test lead to “COM” jack, the red one to V/Ωjack.
4-3-2. Set the range knob to a proper ACV range, connect the test leads across to the circuit under
tested.
NOTE:
1. If the measured voltage is unsure beforehand, should set the range knob to the highest range,
then, switch to a proper range according to the displayed value.
2.If LCD displays “1”, it means overrange, should set the range knob to a higher range.
4-4.DCA MEASUREMENT
4-4-1.Insert the black test lead to “COM” jack and the red one to“mA” jack(max. 200mA),or
insert the red one to “20A” jack(max. 20A).
4-4-2.Set the range knob to a proper DCA range, connect the test leads across to the circuit under
tested, the current value and polarity of the point which red lead connect will display on LCD.
NOTE:
1.If the measured current is unsure beforehand, should set the range knob to a higher range, then,
switch to a proper range according to the displayed value.
2.If LCD displays “1” , it means overrange, should set the range knob to a higher range.
3.Max. input current is 200mA or 20A(subject to where red lead insert),excessive current will
blow the fuse. Be careful when measuring 20A due to un-fused. Continuously measuring large
current may heat the circuit, affect the accuracy, even damage the meter.
4-5. ACV MEASUREMENT
4-5-1. Insert the black test lead to “COM” jack and the red one to“mA” jack(max. 200mA),or
insert the red one to “20A” jack(max. 20A).
4-5-2.Set the range knob to a proper ACA range; connect the test leads across to the circuit under
tested.
NOTE:
1.If the measured current range is unsure beforehand, should set the range knob to the highest
range, then set to a proper range according to the displayed value.
2.If LCD displays “1” , it means overrange, should set the range knob to a higher range.
3.Max. input current is 200mA or 20A(subject to where the red lead insert to),excessive current
will blow the fuse. Be careful when measuring 20A due to un-fused. Continuously measuring
large current may heat the circuit, affect the accuracy, even damage the meter.
4-6. RESISTANCE MEASUREMENT
4-6-1. Insert the black test lead to “COM” jack and the red one to“V/Ω” jack.
4-6-2.Set the range knob to a proper resistance range, connect the test leads across to the
resistance under measured.
NOTE:
1. If the resistance value being measured exceeds the max value of the range selected, LCD
displays "1", thus, should set the range knob to a higher range. When the resistance is over 1MΩ,
the meter may take a few seconds to stabilize. This is normal for high resistance readings.
2.When input terminal is in open circuit, overload displays.
3.When measuring in-line resistance, be sure that power is off and all capacitors are released
completely.。
4-7. CAPACITANCE MEASUREMENT
4-7-1.Insert the red test lead to “COM” terminal and the black one to “mACx” jack.
4-7-2.Set the range knob to a proper capacitance range, connect the test leads to the capacitor
under measured(note: the polarity of red test lead is “+”).
NOTE:
1.If the capacitance range under measured is unsure beforehand, should set the range knob to the
highest range, then, set to a proper range according to the displayed value.
2.If LCD displays“1” , it means overrange, should set the range knob to a higher range.
3.Before measuring, LCD display might not be zero, the residual reading will be decreased
gradually and could be disregarded.
4.When measuring large capacitance, if creeps seriously or break capacitance, LCD will display
some instability value.
5.Discharge all capacitors completely before capacitance measurement to avoid damage.
6.UNIT: 1uF =1000nF 1nF=1000pF
4-8.DIODE AND CONTINUITY TEST
4-8-1.Insert the black test lead to “COM” terminal and the red one to V/Ω jack( Note: the polarity
of red test lead is “+”).
4-8-2.Set the range knob to “ ” range, connect the test leads to the diode under measured,
reading is the approximation of the diode positive volt drop.
4-8-3.Connect the test leads to two points of the measured circuit, if buzzer sounds, the resistance
is lower than approx.(70±20)Ω.
4-9.TRIODE hFE
4-9-1.Set the range knob to hFE.
4-9-2.Insert the positive pole to “COM” terminal and the negative pole to“mA” jack.
4-9-3.Verify the type of the transistor is NPN or PNP, insert the emitter, basic and collector to the
proper jack on test accessory.
4-10. AUTO POWER-OFF
After stop operating for about(20±10) minutes, the meter is auto power-off to be in sleepy mode.
Press POWER key twice to restart the power.
5.MAINTENANCE
DO NOT try to verify the circuit for it’s a precision meter.
5-1.Beware of waterproof, dustproof and shockproof.
5-2.Do not operate and store the meter in the circumstance of high temperature, high humidity,
and flammability, explosive and strong magnetic field.
5-3.Use the damp cloth and soft solvent to clean the meter, do not use abrasive and alcohol.
5-4.If do not operate it for a long time, should take out the battery.
5-4-1.When LCD displays “ ” symbol, should replace the battery as below:
5-4-1-1.Take out the holster and drop out the battery case.
5-4-1-2.ake out the battery and replace a new one. It’s better to use alkalescency battery for long
time use.
5-4-1-3.Fix the battery case and take on the holster.
5-4-2.Fuse replacement
To use the specified type when replacement.
6. If the meter does not work properly, check the meter as following:
CONDITIONS WAY TO SOLVE
NO DISPLAYING
●Power is off
●HOLD key
●Replace battery
symbol displays
●Replace battery
NO CURRENT INPUT
●Replace fuse
BIG ERROR
●Replace battery
 Loading...