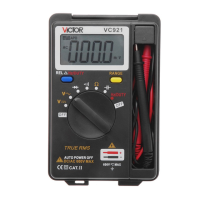
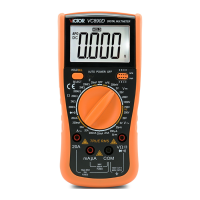
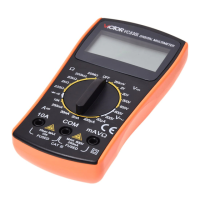
6. Common ground
7. Terminal for
V oltage
,
resistance, and frequency testing
4-2
4-2
4-2
4-2
. DCV
DCV
DCV
DCV
measurement
measurement
measurement
measurement
4-2-1 . Apply the black test leads to “ COM ” terminal and the red one to “ V/ Ω /Hz ”
terminal.
4-2-2 . Switch the knob to a proper DCV range, then, connect the test leads
cross the measured circuit, the voltage and polarity of the point which connected
with the red test lead will be displayed.
NOTE
NOTE
NOTE
NOTE
:
:
:
:
1 . If the voltage under measured is unclear beforehand, should set the range knob to the
highest range, then, switch to a proper range according to the displaying value.
.
If LC D
displays
“ 1
”
,
it means overrange, the range knob must be switched to a higher rang e.
2 . D o not input a voltage over 1000V
,
or the meter might be damaged.
3 . Be careful when measuring high voltage circuit.
4-3
4-3
4-3
4-3
. ACV
ACV
ACV
ACV
measurement
measurement
measurement
measurement
4-3-1 . Apply the black test leads to “ COM ” terminal and the red one to “ V/ Ω /Hz ”
terminal.
4-3-2
.
Set the range knob to a prop er ACV range, then, connect the test leads
cross to the measured circuit.
NOTE:
NOTE:
NOTE:
NOTE:
1 . If the range under measured is unclear beforehand, should set the range knob to the
highest range, then, switch to a proper range according to displaying value. . If LCD
displays “ 1 ”
,
it means overrange, should set the range knob to a higher range.
2. The remained digits do not affect on measuring accuracy.
3. D o not input a voltage over 1000V rms
,
or,
the meter might be damaged.
4 . Be careful when measuring high voltage circuit.
4-4
4-4
4-4
4-4
. DC
DC
DC
DC
current
current
current
current
measurement
measurement
measurement
measurement
4-4-1
.
Apply the black test leads to “ COM
”
terminal and the red one to “ m A
”
ter minal
( Max.200 mA
) ,
or the red test lead to “ 20A ” terminal ( max. 20A ) .
4-4-2 . Set the range knob to a proper DCA current range, then, connect the meter to the
measured circuit, the measured current value and the current polarity which the
red test lead connect will be displayed on LCD.
NOTE:
NOTE:
NOTE:
NOTE:
1 . If the range under measured is unknown beforehand, should set the range knob to the
highest range, then, switch to a proper range according to the displaying value ; If LCD
displays “ 1
”
, it means overrange, the range knob must be set to a higher range.
2 . T he max. input current is 200 mA or 20A ( subject to the position where the red test
lead insert
) ,
large current may blow the fuse. Be careful especially at 20A range,
because there is no fuse protection at this range, large current may heat the circuit,
even damage the meter.
4-5
4-5
4-5
4-5
. AC
AC
AC
AC
current
current
current
current
measurement
measurement
measurement
measurement
4-5-1 . Apply the black test lead to “ COM ” terminal , and the red one to “ m A ” ter m
( max. 200 mA
) ,
or the red teat lead to “ 20A ” terminal ( max. 20A
) ;
4-5-2 . Set the range knob to a proper AC
A
current range, then, connect the meter to the
circuit under measured.
NOTE:
NOTE:
NOTE:
NOTE:
1
.
If the current range under measure is unknown beforehand, should set the range knob
t
o
the highest range, then, switch to the proper range according to the displaying value. If
LCD displays “ 1
”
, it means overrange, must set the range knob to a higher range.
2
.
T he max. input current is 200 mA or
20A
( subject to the position where the red test lea d
insert
) ,
large current might blow the fuse
,
be careful especially at 20A range, becaus e
there is no fuse protection at this range, large current may heat the circuit, even damage
the meter.
3. The remained digits do not affect on measuring accuracy.
4-6
4-6
4-6
4-6
. Resistance
Resistance
Resistance
Resistance
measurement
measurement
measurement
measurement
4-6-1 . Apply the black test lead to “ COM ” terminal , and the red one to “ V/ Ω /Hz ”
terminal.
4-6-2 . Set the range knob to a proper resistance range, connect the test leads across the
resistance under measured.
NOTE:
NOTE:
NOTE:
NOTE:
1
.
If the resistance value is over the selected range value, “ 1
”
displays, thus, should se t to
a higher range. When measuring value is over 1M Ω , the reading needs a few seconds
to be stable. It's normal for high resistance measuring.
2 . When input terminal is open-circuit, overload displays.
3 . Before measuring in-line resistance, be sure that power is off and all capacitance are
released.
4 . D o not input voltage at this range.
4-7
4-7
4-7
4-7
. Capacitance
Capacitance
Capacitance
Capacitance
measurement
measurement
measurement
measurement
Set the knob to proper capacitance range, and insert the capacitor under tested.
NOTE:
1 . If the capacitance is unknown beforehand, should set the range knob to the highest
range
,
then, switch to a proper range according to the displaying value.
If
“ 1
”
displa ys,
it means overrange, should set to a higher range.
2 . Before taking measurement, LCD displaying might not be zero, the remaining will
become smaller and smaller, it can be ignored. .
3. If creeps seriously or the capacitor is breakdown when measuring large capacitance,
some digits are displayed and unstable.
4. Before measuring, should release the capacitor completely to avoid damage.
5. unit: 1 uF =10 00 nF 1nF=10 00 pF
4-8.
4-8.
4-8.
4-8.
Transistor
Transistor
Transistor
Transistor
hFE
hFE
hFE
hFE
4-8-1. Set the range to “ hFE ” range.
4-8-2. Select NPN or PNP
,
insert separately emitter
,
base and collector to proper
terminal.
4-9
4-9
4-9
4-9
. Diode
Diode
Diode
Diode
and
and
and
and
continuity
continuity
continuity
continuity
test
test
test
test
4-9-1 . Apply the black test lead to “ COM ” terminal , and the red one to “ V/ Ω /Hz ”
terminal ( the polarity of the red test lead is “ +
”
) .
4-9-2 . Set the range knob to “
”
, connect the test leads to the diode under measured ,
and the reading is close to the value of diode forward voltage drop.
4-9-3 . Connect the test leads to two points of circuit under measured, if the built-in buzze r
sounds, the resistance between two points is less than approx. (70 ± 20) Ω .
NOTE:
NOTE:
NOTE:
NOTE:
Do not input voltage at “ ” range to avoid damage the meter.
4-10
4-10
4-10
4-10
. Frequency
Frequency
Frequency
Frequency
measurement
measurement
measurement
measurement
4-10-1 . Apply the test leads or shield cable to “ COM ” and “ V/ Ω /Hz ” terminal.
4-10-2 . Switch the range knob to frequency range, connect the test leads across to the
signal source or the measured load.
NOTE:
NOTE:
NOTE:
NOTE:
1 . When input is over 1 0V rms , reading is possible but maybe overrange.
2 . It's better to use shielding cable on noisy condition when measuring small signal.
3 . Be careful when measuring high volt circuit.
4 . Do not input a voltage over 250V DC or AC peak factor to avoid to damage the meter.
4-11
4-11
4-11
4-11
. Conductance
Conductance
Conductance
Conductance
measurement
measurement
measurement
measurement
4-11-1 . Apply the black test leads to “ COM ” terminal, and the red one to “ mA ”
terminal.
4-11-2
.
Set the range knob
to
“ nS
”
range, connect the test leads to the insulating resistan ce
under measured.
4-12
4-12
4-12
4-12
. DATA
DATA
DATA
DATA
HOLD
HOLD
HOLD
HOLD
PRESS “ HOLD ” key, the current data will be hold on LCD.
4-13.
4-13.
4-13.
4-13.
Auto
Auto
Auto
Auto
Power
Power
Power
Power
Off
Off
Off
Off
After working (20 ± 10) minutes, the meter will be auto power off and to be sleeping
mode. Press POWER key twice to restart the power.
4-14.
4-14.
4-14.
4-14.
BACKLIGHT
BACKLIGHT
BACKLIGHT
BACKLIGHT
Press B/L key to turn on the backlight, and press it again to turn off.
NOTE: When turning on backlight, the working current will be enlarged, it leads to
shorten battery usage and enlarge accuracy of some functions.
5
5
5
5
. Maintenance
Maintenance
Maintenance
Maintenance
Do not try to modify the electric circuit.
5-1 . Keep the meter away from water, dust and shock.
5-2 . Do not store and operate the meter under the condition of high temperature, high
humidity, combustible, explosive and strong magnetic place.
5-3 . W ipe the case with a damp cloth and detergent, do not use abrasives and alcohol.
5-4 . I f do not operate for a long time, should take out the battery to avoid leakage
5-5 . Change fuse
When replacing fuse, to use the same type and specification
6.
6.
6.
6.
If
If
If
If
the
the
the
the
meter
meter
meter
meter
does
does
does
does
not
not
not
not
work
work
work
work
properly,
properly,
properly,
properly,
check
check
check
check
the
the
the
the
meter
meter
meter
meter
as
as
as
as
following:
following:
following:
following:
MB-9807-62

 Loading...