3. Place a vinyl record on the turntable. When playing
a 45 RPM record, please use the included adaptor.
4. Select the appropriate speed.
5. Gently push tone arm clip to the right to release the tone arm.
6. Raise the cue lever to lift the tone arm off the tone arm support.
7. Move the tone arm gently to the edge of the record (or the starting point of a track).
The turntable will begin to turn.
8. Gently lower the tone arm by slowly releasing the cue lever.
9. When the record reaches to its end, tone arm and rotation stop. Lift the tone arm and
place it to tone arm rest manually.
IMPORTANT:
- Closing the PHONO door will help prevent dust from settling on the turntable.
- Always relock the tone arm clip before transporting the unit.
- Do not place anything on top of the PHONO door, especially while playing a record.
- Remove the needle cover before you balance the tone arm
- Hold tone arm whenever you make any adjustment or action so as to protect the tonearm.
- Do not try to adjust the balance weight while playing a record as this could break the
needle and scratch the record.
- Remove the balance weight before transportation to prevent damage or breakage to the unit.
HOW TO REPLACE THE TURNTABLE STYLUS (#ATN3600L)
Please note: The stylus should last about 300 hours under
normal use. It is recommended that the stylus be replaced
as soon as you notice a change in sound quality. 78 RPM
records may accelerate stylus wear and may have to be
changed sooner.
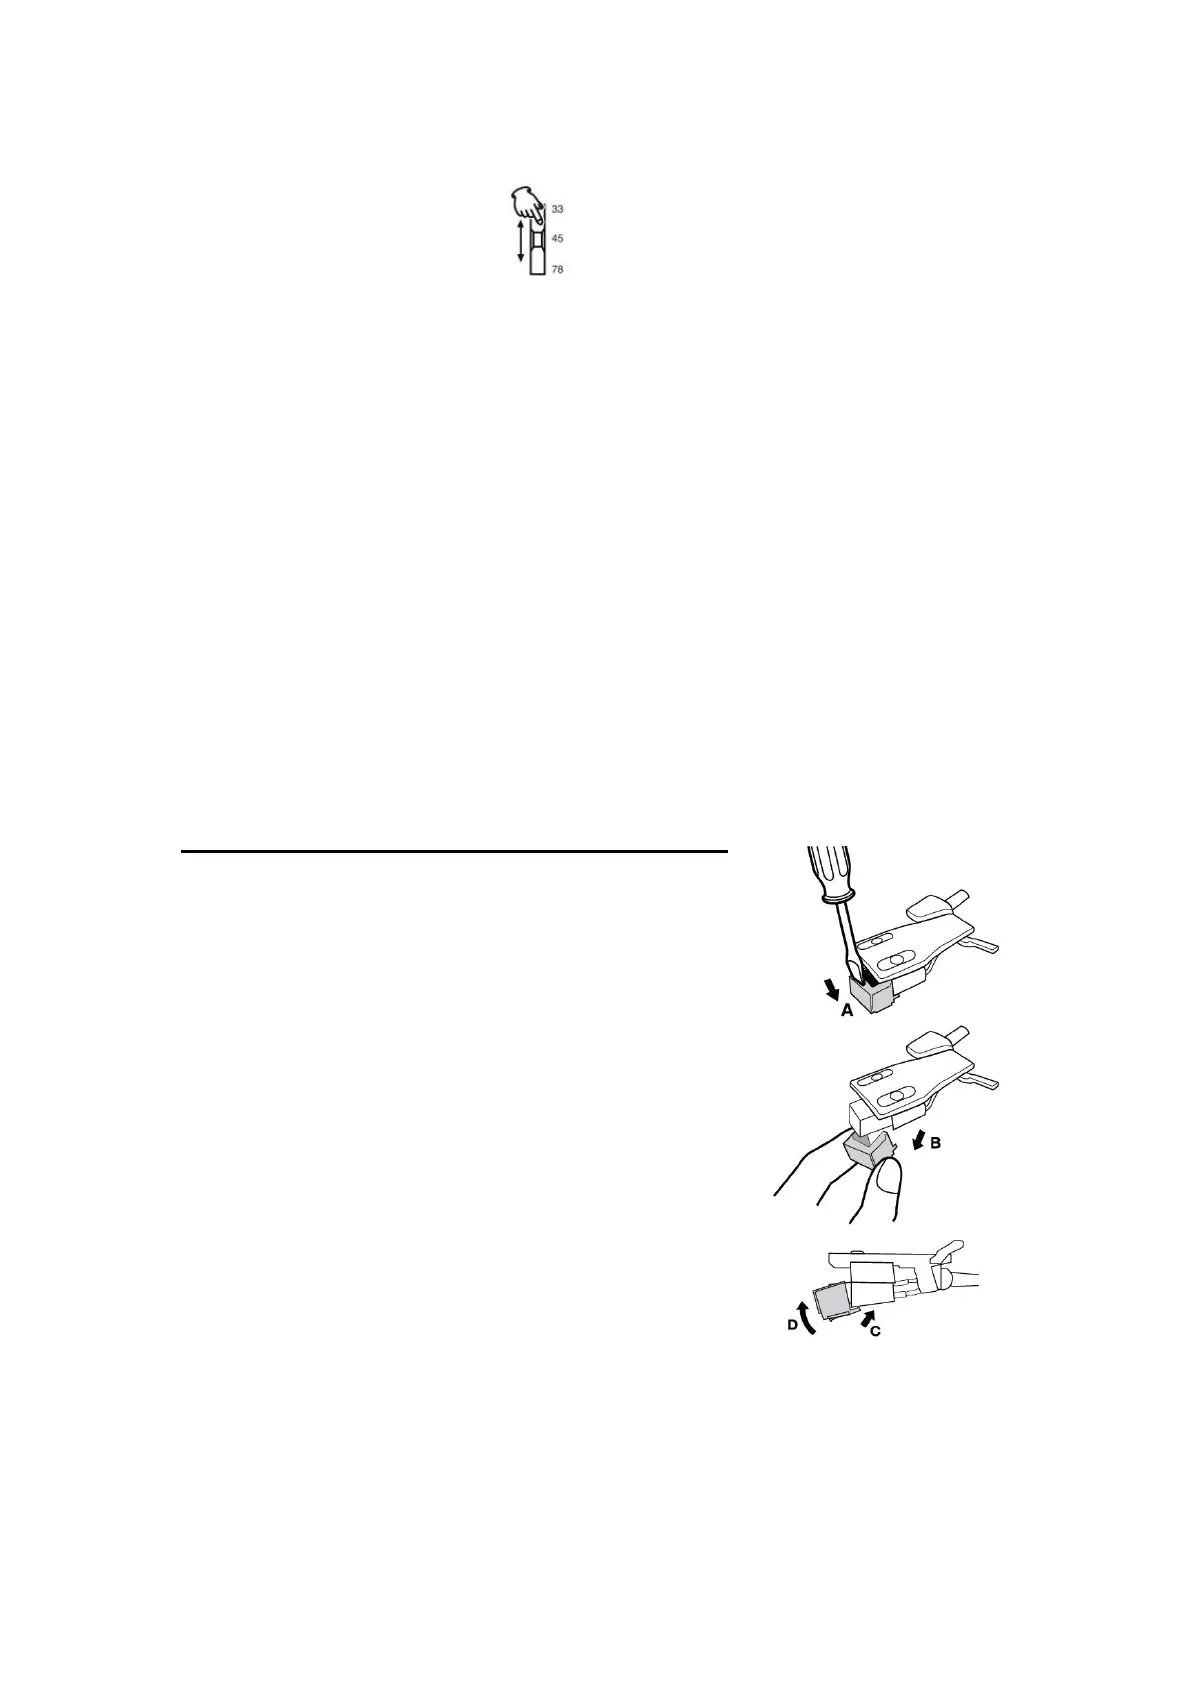
Removing the Stylus from the Cartridge
1. Set a small screwdriver (or use your finger) at the tip of
the stylus and carefully push down to the direction “A”.
WARNING: When applying force to stylus, too much may
damage or break the stylus.
2. Pull the stylus out toward the direction “B”.
Installing the Stylus
1. Hold the tip of the stylus and insert the other edge by
pressing toward direction “C”.
2. Push the stylus up toward direction “D” until it locks at
the tip.
Caution:
- Do not remove/bend the stylus needle and do not touch the needle to avoid injury.
- Turn off the unit’s power before you replace the stylus and keep out of reach of children
 Loading...