3
First, a few essentials...
•
The primary operating mode of a ViewClix frame is to display its Slideshow,
sequencing through pictures that have been shared by family or friends.
•
When a Video Call is received, the Slideshow is hidden during the call. After the
call is ended, the Slideshow automatically starts displaying again.
•
Starting a ViewClix frame is accomplished by plugging it in — no need to worry
about a power switch. Likewise, if you need to move the ViewClix frame, just
unplug it.
•
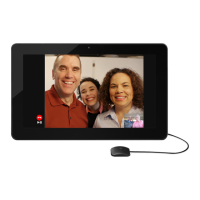
When a ViewClix Smart Frame is powered on, it displays a few “splash screens”
and the Internet connection is setup/established. After that, the frame will show
a camera preview so that you can make sure the position and lighting is good for
Video Calls.
Install the ViewClix Smart Frame
We recommend that the Frame Organizer initially set up the frame in
their own home, prior to installing at the senior’s residence.
This “staging” will help the process of getting started go smoothly.
Step 1
Open the box and
take out the View-
Clix frame.
Remove the fame
from packing ma-
terials and place
it face-down on a
cloth-covered flat
surface, to avoid
scratches.