59
Controlling the Projector through a Network
The projector provides diverse networking and remote management features. The
NOTE: Please ensure Network > Control > HTTP is enabled.
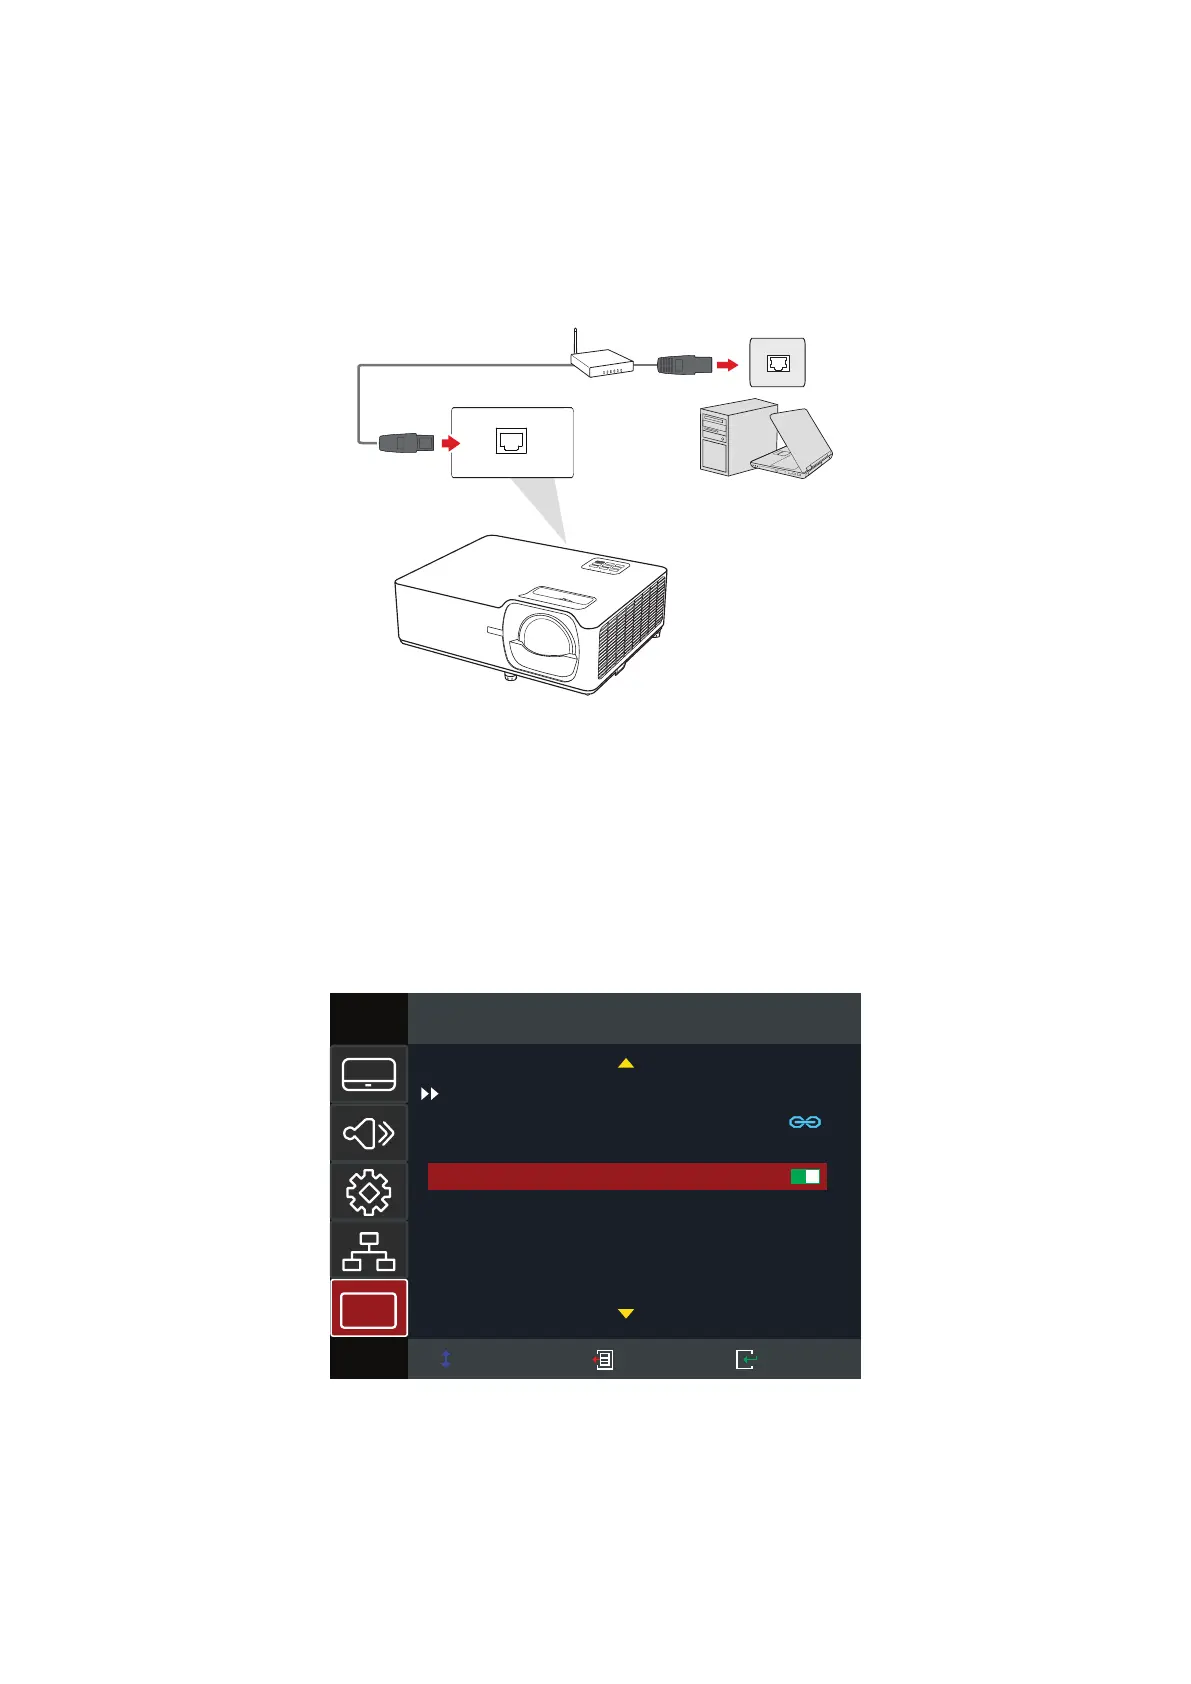
1. Connect the projector to a network via the LAN/RJ45 port.
CONTROL
2. Open the On-Screen Display Menu and go to: Network > LAN.
3. Select DHCP and turn it OnO to
NOTE: Please wait for around 15~20 seconds, then re-enter the LAN
page. The Projector IP Address, Subnet Mask, Default Gateway, DNS
in the Projector IP Address row.
Select Exit Enter
Network
LAN
Network Status
MAC Address
DHCP
IP Address
Subnet Mask
Gateway
DNS
i
C0:0A:A0:00:FB:00
190.000.0.100
250.000.000.0
190.000.0.200
190.000.0.20
4. Using a web browser, and under the same network, type in the projector’s IP
address.
5. Enter the user name and password, then click Log in.
NOTE: The default user name and password is admin.