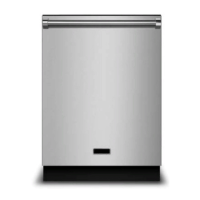
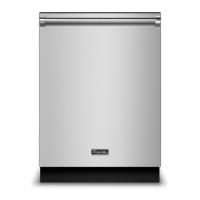
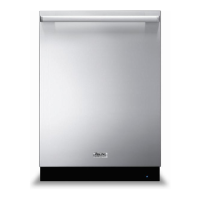
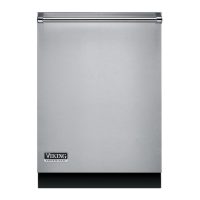
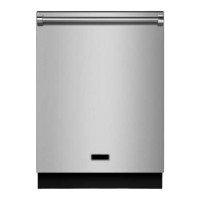
This document is a Use & Care Manual for Viking 1 & 3 Series Built-In Dishwashers, covering models VDW302, VDW302WS, RVDW103, RVDW103WS, FDW103, FDW302, FDW103WS, FDW302WS, CFDW103, and CFDW302. It provides comprehensive instructions for the safe and efficient operation, loading, and maintenance of these appliances.
The dishwasher is designed to offer years of reliable service, with a focus on user satisfaction. Users are encouraged to contact the Consumer Support Center for any questions or comments. The manual emphasizes safety, urging users to read all warnings and instructions carefully to prevent injury, electric shock, or damage to the appliance. It highlights the importance of proper installation and grounding by a qualified technician and advises against unauthorized adjustments or repairs.
Function Description:
The Viking Built-In Dishwashers are designed for normal household use, providing efficient cleaning of dishes, cutlery, and cookware. They feature multiple wash programs tailored to different levels of dirtiness and types of items. The dishwashers incorporate a detergent dispenser, a rinse agent dispenser, and a salt container (on select models) to optimize washing and drying results.
Key operational features include:
- Program Selection: Users can choose from various wash programs such as Tub Clean, Pots & Pans+, Pots & Pans, Auto, CombiClean, Regular Wash, China/Crystal, Quick Wash, and Rinse & Hold. The 3 Series models also offer an "Intense Wash" function for heavily soiled dishes.
- Function Buttons: The control panel includes an On/Off button, Program Selection/Cancel button, and function buttons (F1, F2, F3, F4) for Half Load, Sanitize, HighGloss (3 Series only), and Intense Wash (3 Series only).
- Half Load Function (F1): This feature allows users to run the dishwasher without a full load, saving water and energy while utilizing both upper and lower baskets.
- Sanitize Function (F2): Available with Regular Wash, Pots & Pans, and Pots & Pans Plus programs, this function raises the water temperature in the final rinse to meet NSF/ANSI STANDARD 184 requirements for residential dishwashers, ensuring effective sanitization. A successful sanitization is indicated by an "S" on the display.
- HighGloss Function (F3) (3 Series only): This function is designed to provide superior drying performance.
- Intense Wash Function (F4) (3 Series only): This feature utilizes an impeller under the lower spray arm to enhance washing of heavily soiled dishes, particularly those placed on the right side of the lower basket.
- Delay Start Button (8): Users can set a delay for the program start, ranging from 1 to 24 hours.
- Floor Lighting Indicator: During wash operation, the dishwasher illuminates the floor, turning off automatically at the end of the cycle. This feature is automatic and cannot be turned off by the consumer.
- Water Softener (select models): For areas with hard water, the dishwasher includes a water softening system. Users can adjust the water hardness level based on a test strip to optimize performance and prevent mineral buildup.
Usage Features:
The dishwashers are designed for user convenience with flexible loading options and clear indicators.
- Loading the Dishwasher: Instructions are provided for optimal loading of upper and lower racks to accommodate various items, including cups, glasses, pots, dishes, and cutlery. Items should be placed with openings facing downwards to prevent water collection. Small and light items go in the upper rack, while large and very dirty items go in the lower rack. Overloading is discouraged, and items should not hinder the movement of spray arms.
- Rack Adjustments:
- Variable Height Setting (Upper Rack): The upper rack features a lifting mechanism, allowing users to adjust its height even when fully loaded, without removal.
- Folding Tines (Upper Rack): These tines can be pulled and moved to create more space for glasses or cups, and can also lay flat.
- Adjustable Shelves: Shelf height can be adjusted to accommodate different sizes of glasses and cups.
- Removable Third Rack (3 Series only): This rack is designed for small or long dishes and can be easily removed for unloading or if not needed.
- Adjustable Lower Rack Tines: Six foldable tines in the lower rack allow for easier placement of large items like pans and bowls, creating larger spaces by folding individual or all tines.
- Sliding Cutlery Basket: The cutlery basket can slide over the tines to the left or right, allowing flexible placement of dishes. It includes an inset for cutlery to ensure sufficient water flow, which can be removed for larger items. The entire basket can be removed for easier loading.
- Detergent and Rinse Agent Dispenser: Clear instructions are given for filling the detergent dispenser with the correct amount based on dirtiness and water hardness. The rinse agent dispenser ensures streak-free drying, with an adjustable dosage regulator (levels 1-6) to prevent watermarks or streaks.
- Salt Dispenser (select models): For models with a water softener, the manual details how to fill the salt container with special dishwasher salt to soften water and prevent damage to the softening device.
Maintenance Features:
Regular cleaning and maintenance are crucial for prolonging the dishwasher's life and ensuring optimal performance.
- Cleaning the Filters: The filters (coarse filter, metal/plastic filter, and microfilter) should be cleaned regularly to remove food residues. Detailed steps are provided for removing, cleaning under running water (with a brush if necessary), and correctly replacing the filters. Operating the dishwasher without properly installed filters can cause damage.
- Cleaning the Spray Arms: The lower and upper spray arms should be checked regularly for dirt and calcium residue that may block the nozzles. Instructions are given for removing, cleaning under running water, and replacing the spray arms. For 3 Series models, the third spray arm's holes should also be checked and cleaned if clogged.
- Caring for Your Dishwasher Exterior: The control panel and colored doors should be cleaned with a soft cloth lightly dampened with mild detergent and clear water. Stainless steel doors require a soft cloth and a cleaner specifically made for stainless steel, applied in the direction of the grain. Abrasive cleaners or those containing bleach should be avoided.
- Cleaning the Door Gasket: The door gasket should be regularly cleaned with a damp cloth to remove food particles and debris, using a gentle household cleaner and rinsing thoroughly.
- Caring for Your Dishwasher Interior: The manual advises caution when cleaning the underside of the main filter due to sharp edges. For models with interior lighting, replacement should only be done by an authorized service agent.
- Troubleshooting: A comprehensive troubleshooting chart helps users identify and remedy common issues such as the dishwasher not starting, dishes not drying, stains, breakage, milky appearance, rust stains, and foam. This section aims to help users resolve problems without needing to call a service provider.
The manual also includes important safety warnings, such as avoiding contact with dishwasher detergents and rinse agents, not drinking water from the dishwasher, and exercising caution with sharp items during loading and unloading. It emphasizes the importance of using only dishwasher-safe items and proper detergents to prevent damage to dishes and the appliance.


 To Next Page

 General