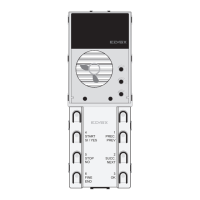
5
Posizionamento ponticelli
TP
inserito condizioneMaster,ID=1
non inserito condizioneSlave(IDdaconfigurare)
M
inserito funzionamentocomeart.89F3-89F5(3/6tasti)
non inserito
funzionamento come art. 13F3 - 12F3 - 13F5 -
12F5(4/8tasti)
SA
inserito
configurazione come unità elettronica audio
(13F3 - 12F3 - 89F3)
non inserito
configurazione come unità elettronica video
13F5 -12F5 - 89F5. All’unità elettronica audio
con questa configurazione, può essere colle-
gataunaTLCesternatipoTVCC
Attribuzione codice identificativo ID Unità Elettronica
Ilcodicediidentificazionedellatargaèrichiestoperlesoleunitàelettroni-
cheprecedentementedistintecomeSLAVE.Laprogrammazionepuòes-
sere effettuata attraverso i tasti presenti sulla targa, con il programmatore
art. 950C o conl’interfacciaart.692I/UcollegataadunPCconinstallato
ilSoftwareSaveProg/EVCom. Se l’attribuzione dell’identificativo avviene
utilizzandoitastidelleunitàelettroniche,ènecessariodisporrenelleunità
elettroniche,diunnumeroditastiparialnumeroditargheSLAVE.
Procedura manuale di programmazione ID delle unità elettroniche
Eseguire la seguente procedura per ogni targa di tipo SLAVE
- Alimentare l’impianto.
- Premere e mantenere premuto il tasto RESET.
- Premere e mantenere premuto anche il primo tasto in alto a destra.
- RilasciareiltastoRESETmantenendopremutoiltastoinaltoadestra
per 2 s, finché dall’unità elettronica viene emesso un tono acuto.
- InserirelaPasswordimpostatadidefault,premendoinsequenzaitasti
6 - 5 - 4 - 3 - 2 - 1 (fare riferimento alla serigrafia sulla mascherina).
- Adognipressionediuntastovieneemessoun“Bip”.
- Alla fineselapasswordècorretta,latargaemetteuntonoacutodi
conferma, altrimenti emette un tono basso ed esce dalla fase di program-
mazione.
- Entro25s,premereunodeitastiperassociareallatargaSLAVEilcodice
identificativo.
Nell’unita elettronica configurata come 13F3 / 13F5 e 12F3 / 12F5, al tasto
inaltoadestracorrispondelatarga(SLAVEID=2),altastoindicatocon“1
PREC. / PREV.”corrispondelatarga(SLAVEID=3)ecosìvia.
Nell’unita elettronica configurata come 89F3 / 89F5,altasto“1 / PREC.
/ PREV.”corrispondeallatarga(SLAVEID=2),altastoindicatocon“2 /
SUCC. / NEXT”corrispondeallatarga(SLAVEID=3)ecosìvia.
Seilcodiceèdisponibile,latargaemetteuntonoedescedallafasedi
programmazione.
Nota: superando il tempo di timeout, l’unità elettronica esce dalla fase di
programmazione, quindi sarà necessario ripetere le operazioni.
Iltempoditimeoutvieneprolungatodi30sadognipressionediuntasto.
Electronic Unit ID code assignment
Theentrancepanelidentificationcodeisonlyrequiredfortheelectronic
unitspreviouslyestablishedasSLAVE.Programmingcanbecarriedout
using the buttons on the entrance panel, using programmer art. 950C or
interfaceart.692I/UconnectedtoaPConwhichtheSaveProg/EVCom
softwarehasbeeninstalled.IfIDassignmenttakesplaceusingthebuttons
ontheelectronicunit,anumberofbuttonsequaltothenumberofSLAVE
entrance panels must be made available on the electronic units.
Manual ID programming procedure for the electronic units
- Power up the system.
- Press and hold the RESET button.
- Press and hold the top right-hand button at the same time.
- ReleasetheRESETbuttonwhilecontinuingtoholdthetopright-hand
button for 2 s, until the electronic unit emits a sharp tone.
- Enter the Password, set by default, by pressing buttons 6 - 5 - 4 - 3 - 2 - 1
in sequence (refer to the printing on the faceplate).
- Every time a button is pressed, a beep is emitted.
- At the end if the password is correct, the entrance panel emits a sharp
tone of confirmation, otherwise it emits a low tone and exits the program-
ming phase.
- Within 25 s, press one of the buttons to assign the identification code to
theSLAVEpanel.
On the electronic unit configured as 13F3 / 13F5 and 12F3 / 12F5, the
buttonattoprightcorrespondstotheentrancepanel(SLAVEID=2),the
buttonindicatedwith“1 PREC. / PREV.”correspondstotheentrancepanel
(SLAVEID=3)andsoon.Ontheelectronicunitconfiguredas89F3 / 89F5,
the“1 / PREC. / PREV.”buttoncorrespondstotheentrancepanel(SLAVE
ID=2)andthebuttonmarkedas“2 / SUCC. / NEXT”correspondstothe
entrancepanel(SLAVEID=3)andsoon.
Ifthecodeisavailable,thepanelemitsatoneandexitstheprogramming
phase.
Note: if the timeout period is exceeded, the electronic unit exits the pro-
gramming phase, and the steps must be repeated.
Thetimeoutperiodisextendedby30severytimeabuttonispressed.
Jumper positions
TP
activated Mastercondition,ID=1
not activated Slavecondition(IDtobeconfigured)
M
activated operationasart.89F3-89F5(3/6buttons)
not activated
operation as art. 13F3 - 12F3 - 13F5 - 12F5
(4/8buttons)
SA
activated
configuration as electronic audio unit (13F3 -
12F3 - 89F3)
not activated
configuration as electronic video unit 13F5
-12F5-89F5.AnexternalCCTVtypecamera
can be connected to the electronic audio unit
with this configuration.
Tabella 1 Table 1
Oltre alla procedura standard di attribuzione dell’identicativo ID dei
posti interni contenuta nella documentazione del posto interno, è
possibile utilizzare la procedura di assegnazione automatica identi-
cativo ID principale e secondario descritta in questo paragrafo
1) Premere il pulsante PRG ed il tasto 1/PREC/PREV
2) Digitare la password (654321 di default), premere il tasto riferito al nu-
merodi identicativoIDdacuideve iniziarelaproceduradiattribuzione
(digitandoadesempioiltasto1,l’attribuzionedell’identicativoinizieràda
ID=1).
3) Entro 5 minuti circa deve essere iniziata la procedura di programmazio-
ne del posto internoacuideveessereattribuitol’ID=1checorrisponde
all’esempiodiprimoIDdigitatosull’unità elettronica (per la procedura di
programmazione del posto interno, fare riferimento alle istruzioni di prodot-
to dello stesso).
4) L’unità elettronica comunica con il posto interno in programmazione, ed
invia una chiamata.
5)Alla chiamata è possibile rispondere o lasciare che termini il ciclo di
chiamata.Aquestopuntol’identicativoèattribuito.
6)Procederedalpunto3inpoi,perl’assegnazionedell’identicativoauto-
matico degli altri dispositivi (posti interni).
In addition to the standard procedure for assigning the ID of indoor
stations described in the documentation for indoor stations, you can
use the automatic main and secondary ID assignment procedure de-
scribed in this paragraph
1) Press the PRG button, and key 1/PREC/PREV
2)Typethepassword(654321bydefault),thenpressthekeycorrespond-
ingtotheIDnumberfromwhichtheallocationprocedureistostart(typing
number1,forexample,theallocationsequencewillbeginwithID=1).
3) Within about 5 minutes, the system should begin the procedure for pro-
gramming the indoorunit to be allocated ID= 1, which corresponds for
exampletotherstIDtypedontheelectronicunit(theprocedureforpro-
gramming the indoor unit is explained in the instructions supplied with the
product).
4)Theelectronicunitcommunicateswiththeindoorunitbeingprogram-
med, and sends a call.
5)Thecallcaneitherbeanswered,orleftunanswereduntilthecallcycle
terminates.AtthispointtheIDnumberhasbeenallocated.
6)Repeattheprocedurefromstep3onwards,tocompletetheautomaticID
number allocation for other devices (indoor units).