13
14
8
BREWING PROCESS
9
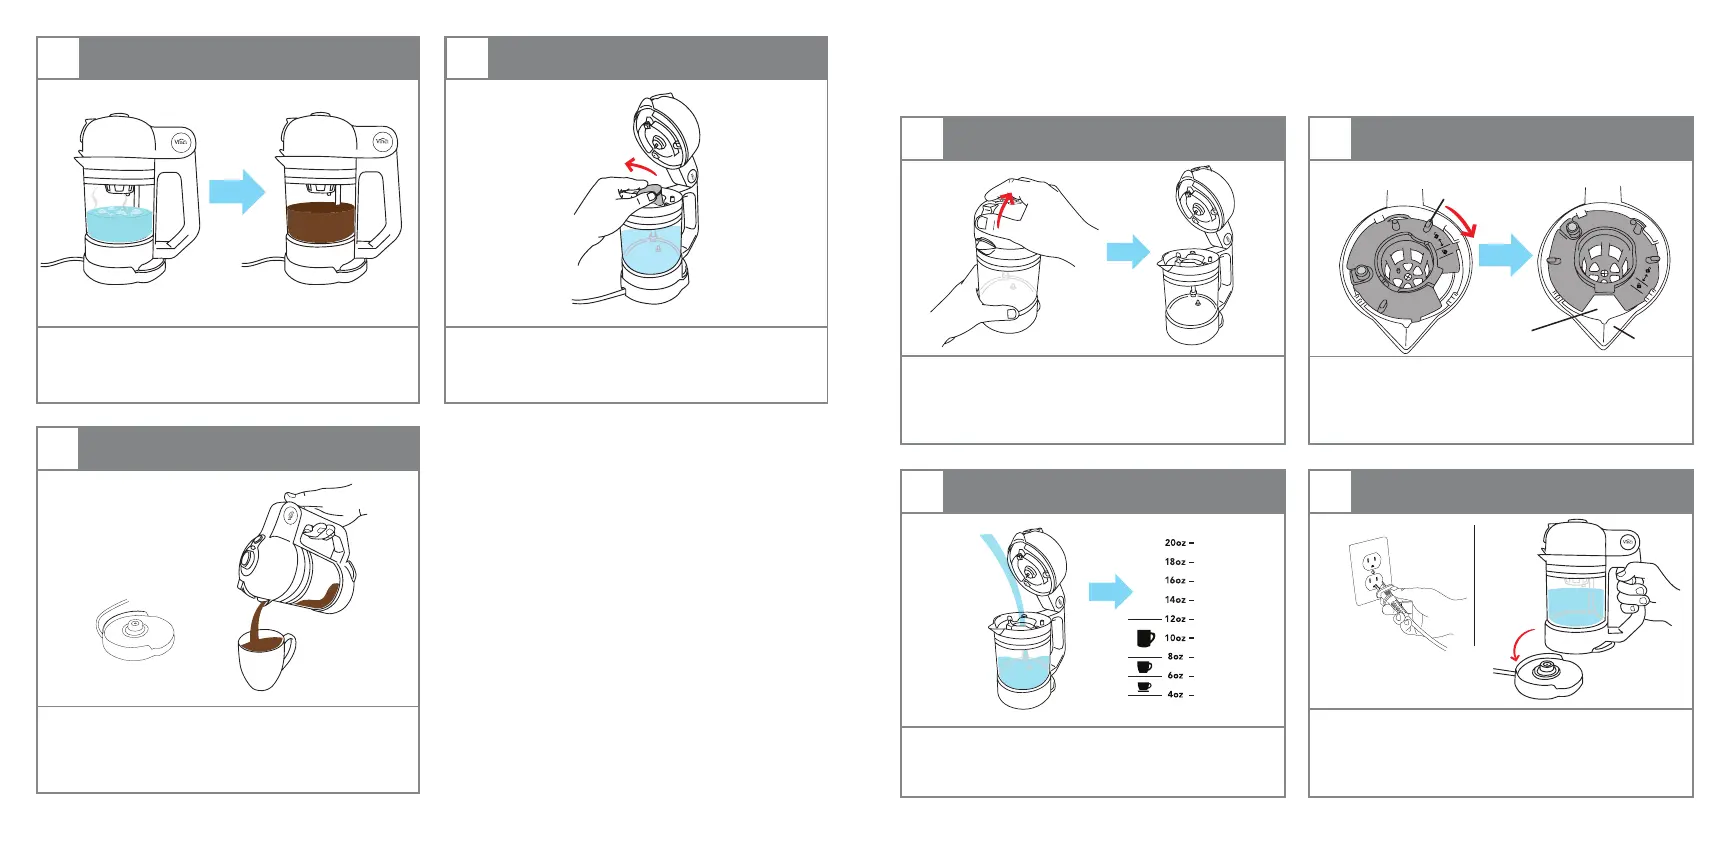
REMOVE CAPSULE
10
ENJOY!
(Fig. V.1)
Soon after pressing the BREW button, the
water will begin to heat and will begin to
brew.
After the brewing process is complete,
remove Carafe(E) from Power Base(I) to pour
your freshly brewed hot coffee.
CAUTION:
• Do NOT open Control Lid(B) or remove the
Carafe(E) from the Base during the brewing
process.
• Do NOT touch the glass portion of the
Carafe(E) after the brewing process has begun
or for several minutes after, as the glass WILL
be very HOT. Only use Handle to move.
Remove your spent K-Cup® or Reusable
Filter Cup(J) before or after you pour your
coffee.
HOW TO BOIL WATER
IMPORTANT: Make sure that all surfaces are all clean of any unwanted minerals or coffee grounds
before using. This will ensure that the brewer will provide the best cup of cold brewed coffee.
Securely hold the base of the Carafe(E) and
slide your finger in an upward motion on
the Lid Release(C) to unlock and open the
Control Lid(B) .
1
3
2
4
Make sure that the K-Cup® Holder(G) is
secured and “Locked” in the correct position.
Illustrations to the left shows the Unlocked
(Fig. A) and Locked (Fig. B) position.
OPEN LID
ADD WATER
LOCK K-CUP HOLDER
POWER
Fill the Carafe(E) with fresh, room temperature
filtered water to your desired level: The
minimum level is 4 oz.
NUB
OPENING
UNLOCKED
(Fig. A) (Fig. B)
LOCKED
SPOUT
Plug into an electrical outlet and make sure
the Power Base(I) is on a dry, flat surface.
Place the Nano Brewer onto the Power
Base(I).
“BEEP”


 To Next Page