4 – 10
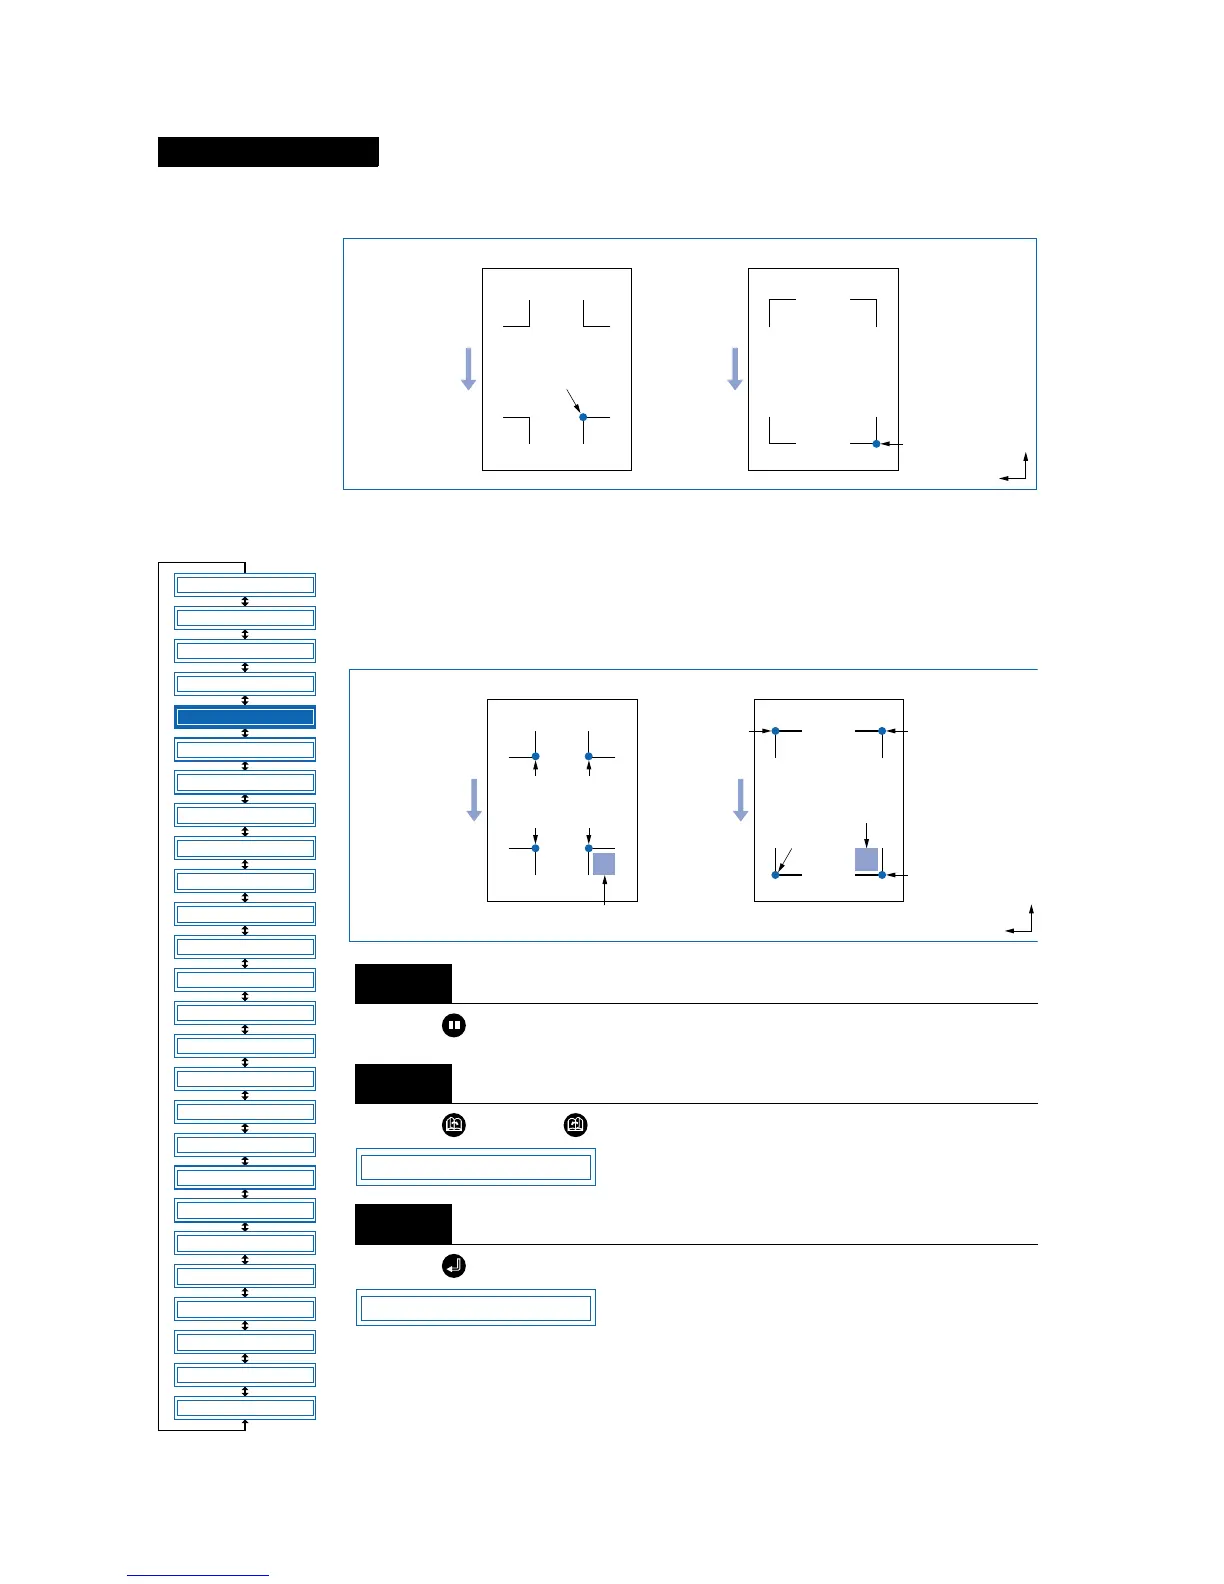
The drawing origin point following reading of the registration marks will be at the bottom-right registration
mark, as shown below.
■ Setting the Registration-Mark Mode
For 2-point alignment, the origin and X-axis registration marks are read; for 3-point
alignment, the origin, X-axis, and Y-axis registration marks are read; and for 4-point
alignment, all four registration marks are read. Axis alignment (correction of any
tilt) and distance adjustment are then performed.
Press the (PAUSE) key to switch to PAUSE mode.
Press the (NEXT) or (PREV.) key until the following menu is displayed.
Press the (ENTER) key to display the Auto Reg. Mark submenu.
Drawing origin point
Step
1
Step
2
Step
3
Registration-mark pattern 1
Medium feed direction
Registration-mark pattern 2
Origin point
Origin point
X
Y
FEED
MOVE TO R. MARK
AUTO PRE FEED
TANGENTIAL
AUTO REG. MARK
CLEAR BUFFER
AXIS ALIGNMENT
DISTANCE ADJUST
PAGE LENGTH
PLOT AREA
EXPAND
ROTATE
MIRROR
COPY
SORT
RS-232C
COMMAND
BLADE WEAR SETUP
PEN UP/DOWN
TEST MODE
PEN UP SPEED
OFFSET FORCE
OFFSET ANGLE
STEP PASS
INIT. DOWN FORCE
LENGTH UNIT
*
*
*: Option
Registration-mark pattern 1
Medium feed direction
Registration-mark pattern 2
Move the cutter
blade within
this area.
Point 1
(Drawing
origin point)
Point 2
Point 4
Point 3
Point 4
Point 1
(Drawing
origin point)
Point 3
Point 2
Move the cutter blade
within this area.
X
Y
AUTO REG. MARK
MARK MODE
 Loading...