1. Download the latest drivers for Windows, macOS and Android OS from the following
link: http://www.displaylink.com/downloads/
2. Download the latest KVM docking software from http://www.visiontek.com
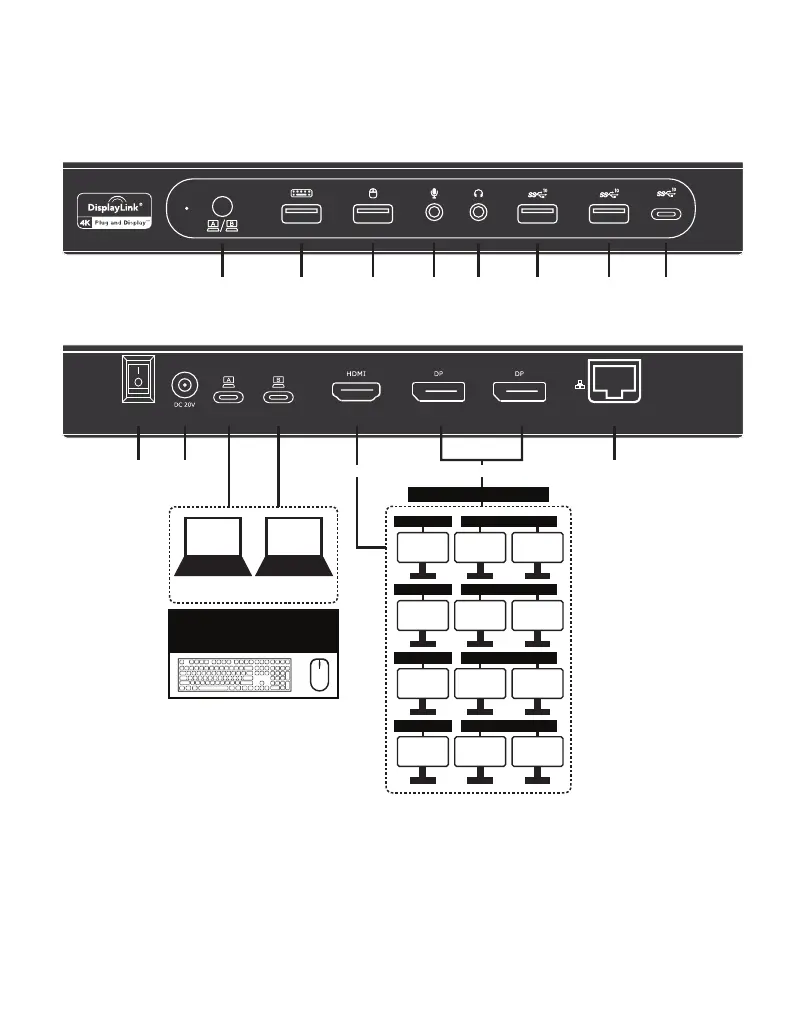
3. Connect the Power adapter (PSU) to the DC power jack on the VT4900 Docking
Station.
4. Connect the included 2 x USB-C to C cables to USB-C (Upstream) Ports (Host A / B) on
the Docking Station and then to an available USB-C Port on each Host computer.
5. Connect your DisplayPort / HDMI displays to the corresponding ports on the VT4900
Docking Station.
6. Connect any other devices to the Docking Station, including an RJ-45 (Gigabit) for
network connection, USB peripherals, speakers and microphones.
7. Power On the Docking Station.
Display Mode
Switch Button
Keyboard
USB 2.0
Mouse
USB 2.0
Mic
In
USB-A
3.2 Gen 2
USB-C
3.2 Gen 2
USB-A
3.2 Gen 2
Audio
Out
Power
Switch
Power In
(230W)
Gigabit
Ethernet
1 2
USB-C
System 1
USB-C
System 2
100W PD 100W PD
Switchable Display Modes
1
1 1
HDMI (DP ALT)
DisplayPort (DisplayLink)
2
1 1
HDMI (DP ALT)
DisplayPort (DisplayLink)
2
2 2
HDMI (DP ALT)
DisplayPort (DisplayLink)
1
2 2
HDMI (DP ALT)
DisplayPort (DisplayLink)
DisplayPort (DisplayLink)HDMI Out (DP ALT)
Share between system 1 & 2
Note: DP Alt Mode Supported
Ethernet, Mic In and Audio Out are supported on the main Host System Only
Switch Between Display Modes:
Press the display mode switch button on the front of the VT4900 Docking Station
 Loading...