STEP T HREE
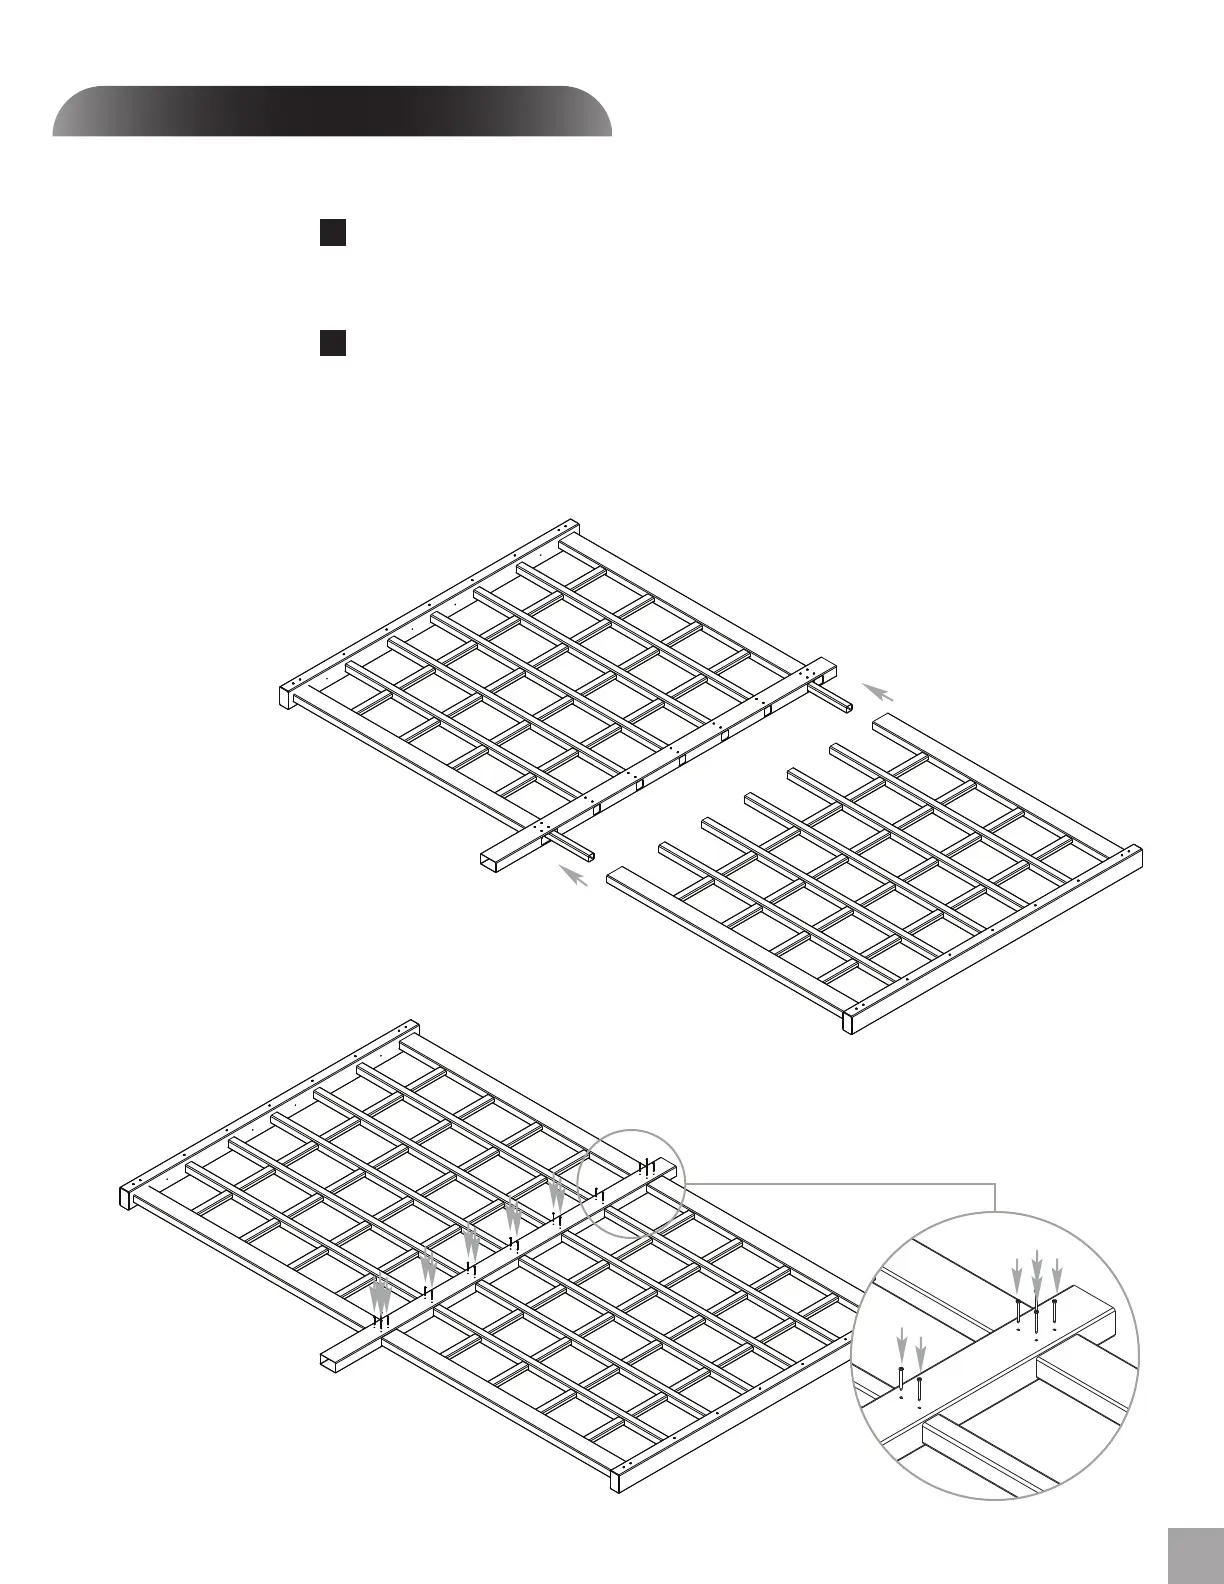
Attach the second wall half to the wall assembly through the
centre post and rail insert as shown. Make sure all the horizontal
rails butt up against each other.
Fasten the assembly together using 18, 1 1/2 in. screws
through the pre-drilled holes on the center post as shown.
Again, make sure all the screws are on the same side of the
wall.
5
6
Pergola Trellis Assembly
5
6
5
10’ Pergola Trellis Instructions


 To Next Page