4
II your camera
does
not have a
hoi
shoe. plug the pointed end
of
lhe
Detachable
Shuner
Cord
®
into
the Shutter Cord Socket
CD
on
the
flash. Plug the other end
01
the
cord
inlo the camera Hash terminal
marked
" X "
(Reier
to
your
camera
instructions
lor
specific
information
o
~
•
regarding
your
camera's
electronic
!lash
synchroni
zation.)
Shooting
Automatically
On-Camera
Dir
ec
t Flash
T
his
method
01
operation with
your
283 flash allows you to
photograph
subjects al
ma~lmum
distances
from the flash
while
still maintaining
automatic flash
e~posure
contro
l
1
Mounllhe
Sensor ®
onlo
the front
of
the flash. (See
page
5)
2
Set
your
camera
10
the
correct
shutter speed
for
electronic
flash.
(Refer
10
your camera
instructions)
3
Sct the ASA or DIN
number
of tho him you are
using
on
Ihe
Calculalor
Dial (see page
7)
, The l
our
colored Iriangles
on
Ihe d ial now line
up
below the four
aulomalic
I-slOps
for the
Iilm
you are using.
4
Select
anyone
01
the
lour
automatlc -
I-stops
on
lhe
Calculator
Diallhat
provides Ihe automatic operaling
range
or
deplh
01 held you desire
'"
1
Mount
the Sensor ®
onto
Ihe
Ironl
01
lhe
flash (See
pageS)
2
Set
your
camera 10 Ihe correcl
shulter speed
lor
eleclronic
flash
(Refer
10
your
came,a
mSlruclions )
3
Sellhe
ASA
or
DIN
film
speed
on
Ihe
Calculator
Dial (See page 7)
4
Aller
positioning
your subject, aim
the flash head
for
the
des
ir
ed
bounce
angle. The adjuslable head
01
the 283 tills
upward
90
I,om
the
1
II-~
\
.1 I
.
"
51
,. -
" .
o
(waight
ahead) pOSition, w
llh
click
stops
at
0 . 45 , 60 ,
75
,and
90 (See 'Helplul H,n
ts
',
page20)
5
Select
anyone
01
the four automatic
I-steps
on
the
Calculalor
Dial that
provides the
automaltc operating
range
or
depth
of
field you desire.
Remember that/he automatic operatrng range
must
be
sufficient
to
mclude the
en/lTe
lIash-lo-/ellec/or-lo-sub;ecl
distance.
6
TUIn the knurled dial on the
Mode
Selector ®
unilithe
color
that
correspOnds
10
the
f-stop
you
selecled in step
::
5 above appears
in Ihe w
indo
w
on
the
side
of the Selector
"
5
Turn the knurled dial
on
II'Ie Mode
Seleclor
®
untilihe
color
thai
corresponds
10
Ihe
I-st
op
you
seleclod in
step::
4 above appears
in the window
on
the
side
01 Ihe Selector.
6
Set
your
camera lens
10
the auto
I-stop
you selected in
slep::
4
?e
tlhe
(
uaSh
head
lilt
10
the 0
(Slralgh\
ahead) posit
ion.
EXAMPLE OF ON-CAMERA DIRECT
FLASH' You
wish
10
pho
tograph a
subject 15
foet away
Ir
om
the flash
and
desire
moderately
great
depth
of
lield
. Using ASA
2S
lilm, set
,
."
...
0'
..
;
lhe
Mode
Seleclor
10
Ihe
Blue position, and sel
your
camera
lens
10
f4
Your
automatic
operaltng range is from 210
15
leet
8
Sli
de
Iho
On-all
Switch to the RED
"
ON
"
posilion
. Focus the camera
II
desired.
les
t the
e~posure
using
the
Sufficient
Ughl
Indicator
(see page 6). Take Ihe
piclure
alter
the Ready
Ughl
glows
Your flash unil
will
automalicatty determine correct
e~posures
withoul
further
adjustments as long
as
you remain
within
the
automalic range
you have select
ed
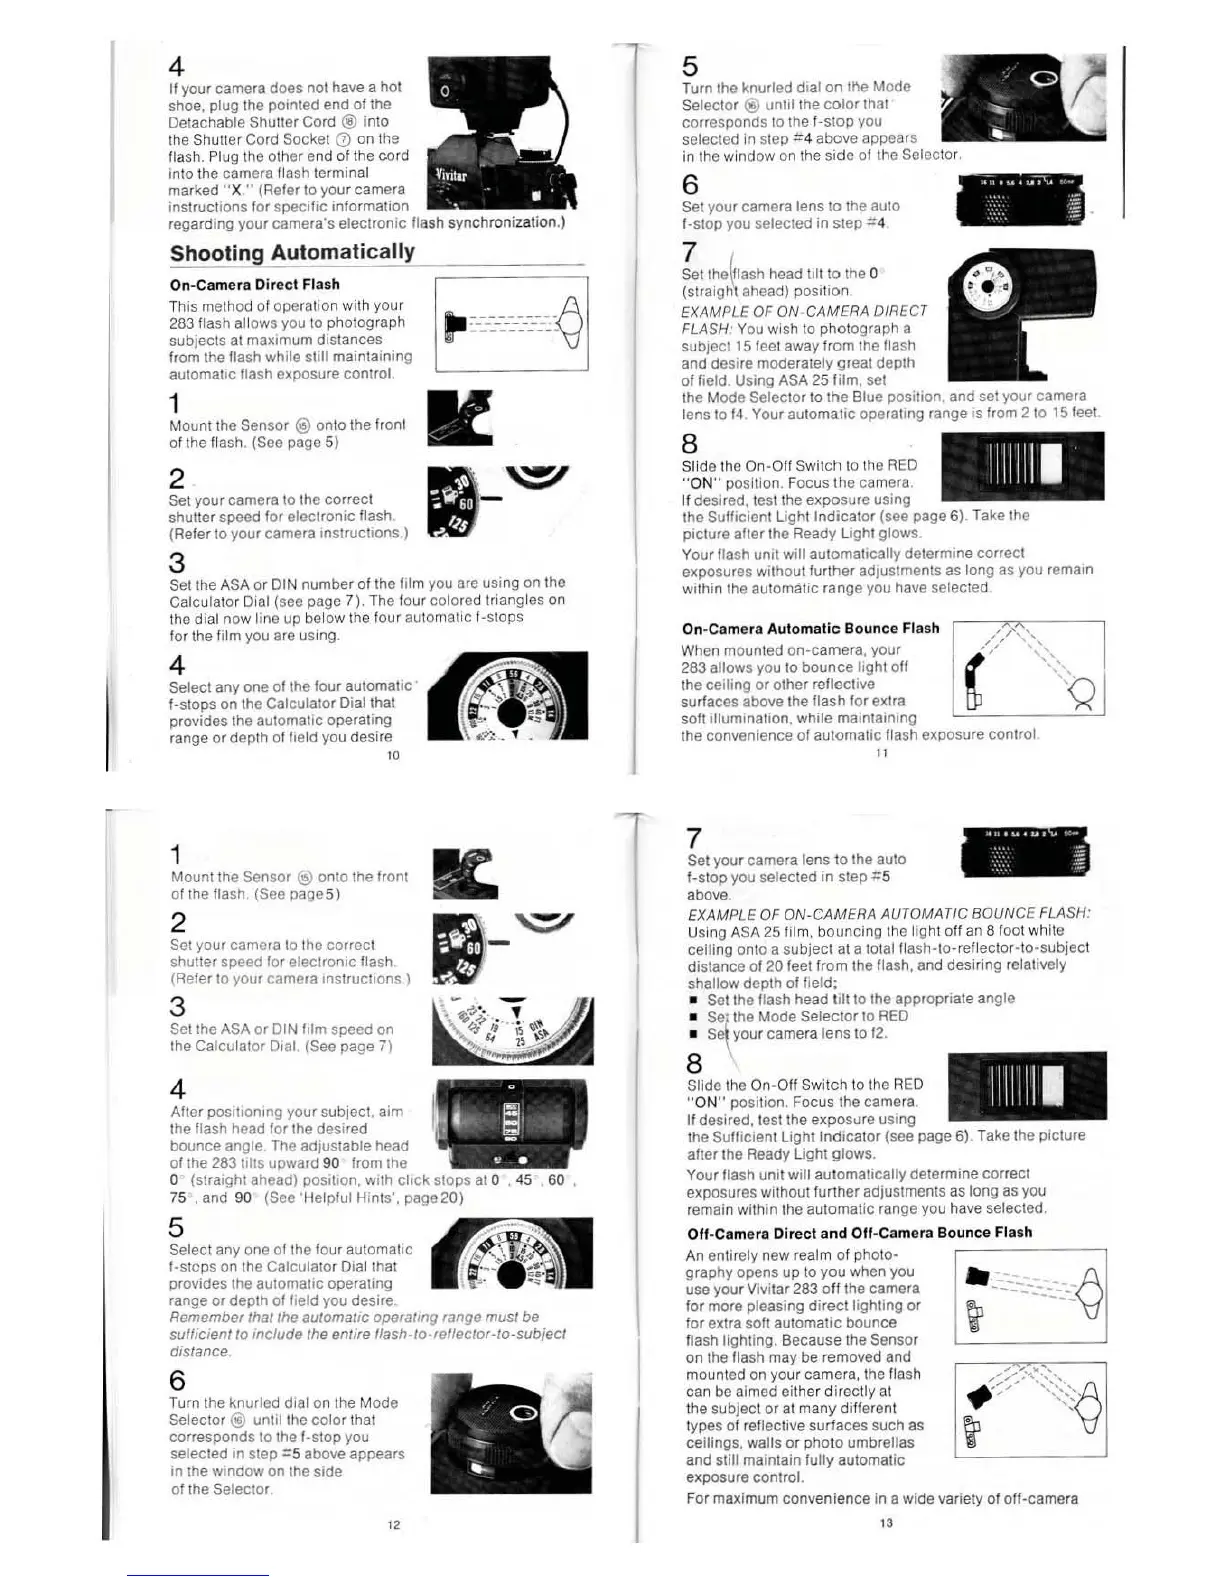
On-Camera
Automatic
Bounce
Flash
When mounted
on-camera,
your
283 allows you
10
bounce
light
off
Ihe
ceiling
or
other
reflect
ive
sur/aces above
Ihe flash l
or
e~Cra
soft iltumrnalion. while
ma
intaining
lhe
convenience of
automalic
ftash exposure
control
"
7
Set
your
camera lens
to
the auto
I-stop you selected in
slep::5
above,
.. ,. ,
..
, -
;
EXAMPLE OF ON-CAMERA AUTOMATIC BOUNCE FLASH:
Using
ASA25
film,
bouncing
Iho light off an 8
loot
white
ceiling
onto a
subjecl
al
a tot
al
fla
sh-to-
reflector-t
o-subject
distanco
of
20
feet from the flash, and
desiring
relalively
shallow
dopth
of
fi
eld;
• Set Ihe flash head 1
111
to
Ihe
appropriale
angle
•
S;t
the
Mode
Selector
10
RED
•
s_
\
your
camera lens to
12
.
8
Slido Ihe
On-Off
Switch to the
RED
"O
N" position. Focus the camera,
I!
desired,tost
the exposlJre using
the
Sufficient
Ught
Indicalor
(see
page
6)
. Take the piClure
aller
Ihe Ready
Ught
glows
.
Your flash
unit
wilt
aulomatically
detormine correct
exposures without
further
adjustmenls
as
long as you
remain wit
hin
the
automalic
rango you have selected.
Oil-Cam
e
ra
Direct
and
OIl·Camera
Boun
ce Flash
An
ontirely new realm of
pho
to-
graphy
opens
up
to
you
when you
use
your
Vlvitar 283 011 the camera
for
more pleasing
direcllightlng
or
for
ext
ra
soli
automatic
bounce
flash lighting.
Because
Ihe Sensor
on
the lIash
may
be removed and
mounted on your camera, Ihe flash
can be aimed either
directly
at
the subject or at
many
different
types
of
rellective surfaces such as
ceilings, walls
or
photo umbrellas
and
still maintain
fully
automalic
exposure control.
..
-':.----~·--
A
~
-----~--
\j
For
maximum
convenience
in a wide variely of
off-camera
"

 Loading...