applications
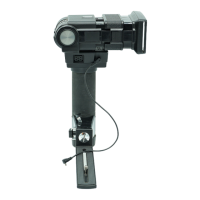
It
is recommended that you mount your !lash
on
the optional Vivitar Qu
ic
k
Re
lease Pistol Grip, available
at
your local Vlvltar dealer.
1
Set your camera to the correct
shutter speed for electronic flash.
(Refer to
your camera instructions.)
2
' Set the
ASAor
DIN him speed on
the Calculator
Dial (See page 7)
3
Remove the Sensor ® from the
flash
by pulling
il
straight out from
the
body of Ihe !lash.
4 '
Mountlhe
Sensor on the Sensor
Holder e by aligning the black
ridge
at
th
e back of the Sensor with
the groove in
Ihe fronl of the Sensor
Holder and pushing the Sensor
firmly into the Holder.
5'
Plug the small end of the
Se
nsor
Cord ® into the Sensor Socket
(2)
on
Ihe front
01
the flash. making
sure the ridge in the plug aligns wi
lh
Ihe groove in the Sensor Socket.
6'
Slide the Sensor Holder ® onlo
your camera's
!la
sh
accessory shoe
with the
Sens
or
facing forward.
If
your camera is equ
ip
ped with a
hot shoe,
fulillash
-t
o-c
amera
•
0p60n~
accnJOf)' it! _
CO<KlI>'ie
, 14
FLASH: Using ASA 25 film, you wish 10 use side lighling
on
your subject
lor
a dramatic effect. The total bounce distance
from the flash to the
wall to the subject is
12
l
ee
t and you
want relatively great depth
01
field:
• Set the Mode Selector to BLUE (automatic operating
range 2-15 feet).
• Set your camera lens to
f4
.
• Aim Ihe flash
at
the midpoint on the wall between Ihe
flash and the subject.
11
Slide the On-Off Swllch
10
the
RED
"
ON
" position. Focus the cam
era
If desired, test the
e~l>0sure
uSing
illli
ll
the Sufficient Lig
ht
Ind
ic
ator (see
pag(6).
Take the picture
after the Ready Light glows.
Your flash unit will automatically delermine correct
e~posures
wl
lh
out further adjustmenlS
as
long
as
you remain
wllhin the automallc range you selected.
Th
e Bounce Co
mp
en
sa
tor
Circuit
Your Vivitar 283 has a built-in
Bounce Compensator Cir
cu
it
(BCC) that
au
tomatically increases
the light
ou
tPUI
of the fla
sh
when
the 283 is
se
t
10
the
45
~
,
60
·.
or 75° positions on the Bounce
Angle
Scale
(11,
These three pOSitions are enclosed in the
red rectangle on the
Scale. The BCC feature supplies Ihe
extra power usually reqUired to compensate l
or
light
dispersion
wh
en bouncing !ighl 0" the ceiling
or
other
reflectors above the
flash.
NOTE: The BCC funClions wi
th
any 01 the four
au
tomatic
modes. and does not
ac
tivale when shooting in
th
e manual
" M" mode.
Shooling
Manually
D
irect
Flash
Should you wish
10
use your 283
in
the Manual mode (lor
"
I
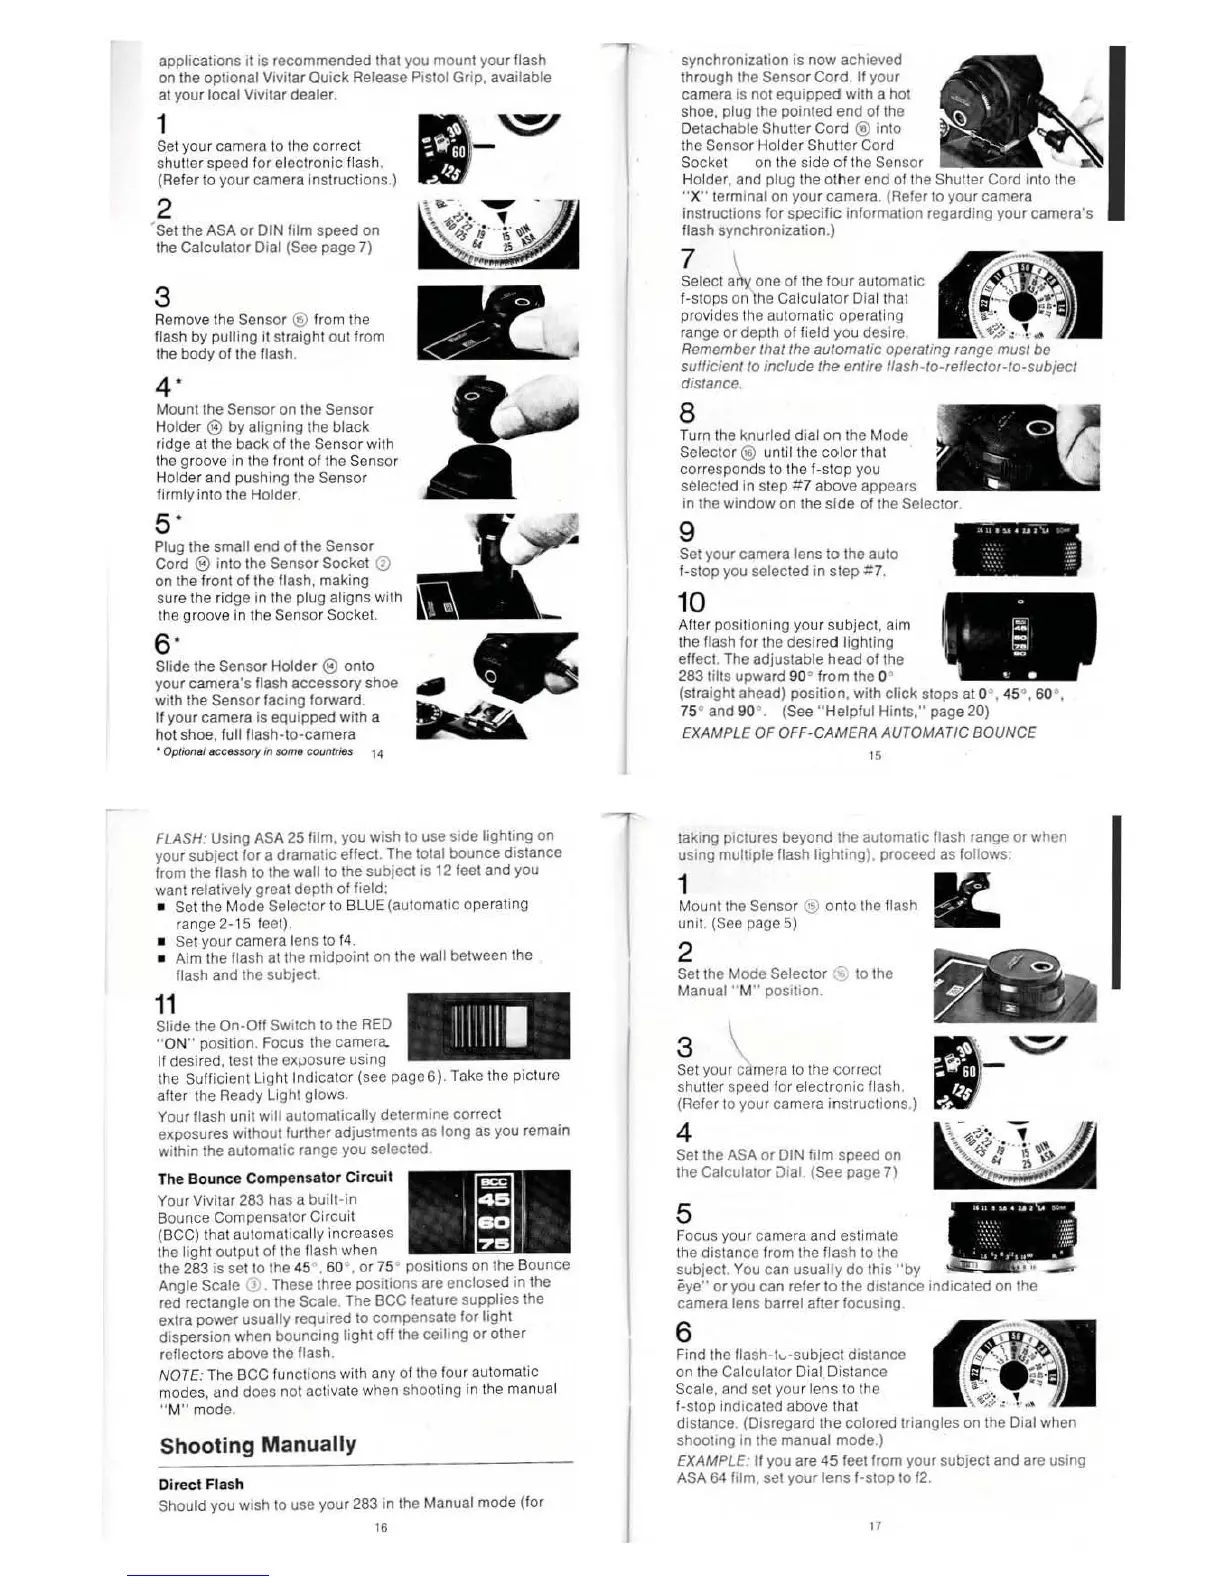
synchronization is now achieved
through the Sensor Cord.
It your
camera is not equipped with a hot
shoe, plug the pointed end of
Ihe
Delachable Shul1er Cord ® into
the
Sensor Holder Shutter Cord
Soc
ke
t
on
the side
of
th
e Sensor
Holder, and plug the
ol
n
er
end of the i
"X" terminal
on
your camera. (Refer 10 your camera
instructions
lo
r specif
ic
information regarding your camera's
flash synchronization.)
7
~
Select a one of Ihe four aulomat
ic
I-stops
on
he
Ca
lculalOr Dial that
provid
es
the
au
tomatic operat ing
ra
nge
or
depth of field you desire. ""
Remember t
hat/he
automatic operating tange must be
su/licient
/0 include the entire Ifash-to-reflector-/o-subject
d,stance.
8
Turn the knurled dial
on
the Mode
Selector ®
unl
il the color that
corresponds to
Ihe f
·slop
you
select
ed
in s
lep:::7
above appears
in the window
on
Ihe side
01
the Selector.
9
Se
t your camera lens to the aulo
I-slop
you selected in step
;:7
.
10
After positi
on
ing your subject. aim
Ihe flash
lor
the desired lighting
elle
e!.
The adjustable head
olthe
263
1i1ts
upward
90
·
lrom
the O·
, ,
,,
...
,.
"
• §
, .
(s
traight ahead) posilion. wi
th
click stops at 0' , 45", 60",
75
" and 90
·.
(See "
He
lplul H
ints."
page 20)
EXAMPLE
OF
OFF-CAMERA AUTOMATIC
BO
UNC
E
taking pictures beyond Ihe automatic flash range
or
when
uSing muiliple flash lighhng). proceed
as
follows:
1
Mount the Sensor @ onto Ihe
fl
ash
uni!. (See page
5)
2
Set the Mode Selector
~~
to the
Manual " M"
POSition.
3 \
Set you r camera to the correct
shulter speed for
electroniC flash.
(Re
fer to your camera iflstructions
.)
4
Set the ASA
or
DIN film speed on
the Calculator
~
i
al.
(See page
7)
5
Focus your came
ra
and cstimale
the
dis
tance from the flash to the
subject.
You can usually do this
"by
....
u ,
..
'
,_
':
•
.""
,- "
e
yc"
or you can refer
10
the distance indicated on the
camera lens barrel after focusing
6
Find thc flash -
t...
.-subject dislance
on
th
e Calculator Dial Distance
Scale, and
se
t your lens
to
the
I-SlOp indicated above that
distance. (Disregard the colored
If
jangles on the Dial when
shooting in the manual
mode)
EXAMPLE:
II
you are 45 feel from your subjeci and are using
ASA
64
film. sal your lens f-slop to
f2.
"

 Loading...