
J
James FosterAug 4, 2025
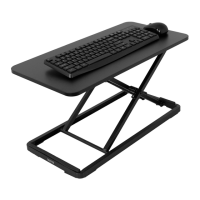
What to do if Vivo DESK-V100EB exceeded duty cycle?
- HHaley FernandezAug 4, 2025
If the duty cycle is exceeded on your Vivo Indoor Furnishing (max. 2min operating), allow the desk to rest for 30 minutes.
What to do if Vivo DESK-V100EB exceeded duty cycle?
If the duty cycle is exceeded on your Vivo Indoor Furnishing (max. 2min operating), allow the desk to rest for 30 minutes.
What to do if Vivo Indoor Furnishing button not working?
If you experience no response when pressing a button on your Vivo Indoor Furnishing, check to ensure all cables are fully connected.
What to do if I exceeded the duty cycle on my Vivo Racks & Stands?
If you've exceeded the duty cycle (maximum 2 minutes of continuous operation) on your Vivo Racks & Stands, allow the desk to rest for 30 minutes before using it again.
How to troubleshoot a Vivo Indoor Furnishing with no response while pressing the button?
If your Vivo Indoor Furnishing is not responding when you press a button, check that all cables are fully connected. If the cables are properly connected, perform a reset.
Access a step-by-step video tutorial for assembly via QR code or provided web link.
Reach out via email, phone, or website for product support and inquiries.
Includes general installation, choking hazard, electrical, and weight capacity warnings.
Details warranty terms and the 30-day return policy for defective or unwanted products.
Identifies essential tools like screwdrivers, drills, and wrenches for assembly.
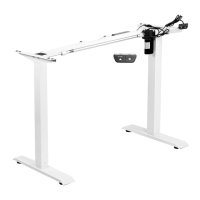
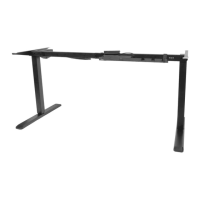
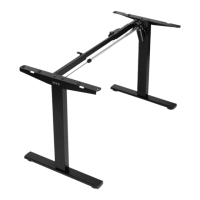
Lists and illustrates all parts and hardware needed for the desk frame assembly.
Connects the crossbar to the leg components using specified screws and Allen wrench.
Attaches the desk feet to the leg assemblies using provided screws and wrench.
Secures the side brackets to the leg frames using M8x12mm screws and Allen wrench.
Adjusts the frame width and attaches it to the desktop using ST4.2x15mm screws.
Installs the sync rod to ensure synchronized movement of both legs.
Mounts the controller and connects it to the motorized leg and AC adapter.
Attaches cable management clips and hooks to organize wiring along the desk frame.
Plugs the AC adapter into an outlet to power the desk and prepares for initialization.
Provides solutions for common operational problems and weight capacity limits.
Step-by-step instructions to reset the desk's functionality and initialize its movement.
Highlights other VIVO products such as monitor mounts and speaker stands.
Describes VIVO as a provider of high-quality, affordable ergonomic office furniture.
Provides contact methods (phone, chat, email) and support hours for assistance.
Details average resolution times for phone, chat, and email support interactions.
| Brand | Vivo |
|---|---|
| Model | DESK-V100EB |
| Category | Indoor Furnishing |
| Language | English |