Do you have a question about the vogel's SWM 4131 Series and is the answer not in the manual?
Crucial safety instructions to read before installation and use to prevent potential risks.
Lists all parts provided in the package, including brackets, bolts, screws, and Allen key.
Lists essential tools for installation: drilling machine, pencil, various drills, and screwdrivers.
Recommends wearing eye protection, ear protection, and safety shoes for safe installation.
Instructions for assembling the speaker mount components, including the tilt module and brackets.
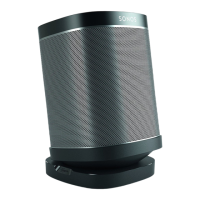
Guidance on connecting the Era 300 speaker to the assembled speaker bracket using provided bolts.
Details on mounting the wall bracket to concrete/brick walls, including drilling and securing.
Instructions for attaching the Era 300 speaker to the wall mount, covering right-side-up and upside-down orientations.
Procedure for safely detaching the speaker from the wall mount and disconnecting it.
Provides solutions for common installation problems, such as snapped wall screws.
Outlines the 5-year guarantee, conditions for its validity, and cases where it may lapse.
The SWM 4131 Series is a full installation guide for mounting your Sonos Era 300 speaker. This guide ensures a safe and efficient installation process, providing all the necessary steps and precautions to properly set up your speaker mount. The product is designed to securely hold the Sonos Era 300 speaker, allowing for optimal placement and sound experience within your home.
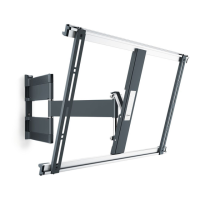
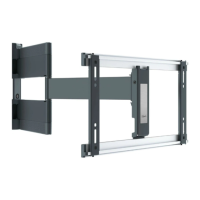
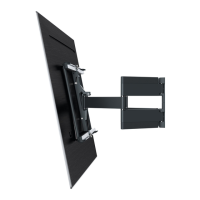
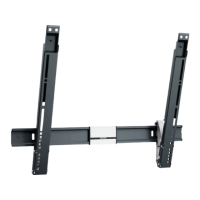
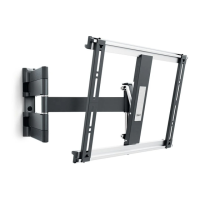
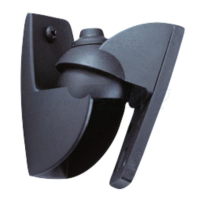
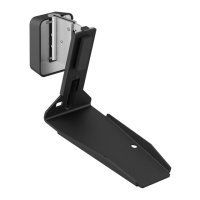
The SWM 4131 Series wall mount is specifically engineered to provide a stable and adjustable platform for the Sonos Era 300 speaker. It consists of several key components: a tilt module, a tilt bracket, a speaker bracket, and a wall mount. These components work together to allow for both right-side up and upside-down mounting configurations, offering flexibility in how you position your speaker. The tilt functionality enables you to adjust the speaker's angle to direct sound precisely where you want it, enhancing your audio experience. The mount is designed for robust attachment to various wall types, including solid brick, solid concrete, and solid wood columns, ensuring a secure installation.
The installation process begins with assembling the speaker mount, which involves sliding the tilt module and speaker bracket into the tilt bracket and securing them with a bolt. Following this, the Sonos Era 300 speaker is attached to the speaker bracket using two M5*20mm bolts. It's crucial to connect the speaker to its power plug before attaching it to the bracket.
When attaching the wall mount to the wall, the guide emphasizes the importance of understanding your wall type. For concrete or brick walls, you'll need an 8mm or 5/16" concrete/brick drill. The process involves deciding the desired height, marking the location of the two holes using the wall mount as a guide, and then drilling to the correct depth. The guide provides a helpful tip to check the screw length against the drill depth to prevent damage. After drilling, Fischer Plugs are inserted, and the wall mount is secured with screws, utilizing an integrated spirit level to ensure it's perfectly level. It's important to mount the wall mount with the opening pointing towards the ceiling.
For walls with wooden studs, a stud finder is essential to locate the studs. A 3mm or 1/9" wood drill is required for this wall type. Similar to concrete/brick walls, the process involves marking the holes, drilling to the correct depth, and then securing the wall mount with screws. The guide explicitly warns against using the wall mount as a drill guide to prevent damage.
Once the wall mount is securely in place, the Sonos Era 300 can be attached. For right-side up mounting, the speaker, with its assembled tilt module, is lifted and placed into the wall mount. The speaker can then be slightly lifted and tilted to the desired angle, and a setscrew on the side of the tilt module is tightened to fasten it in position. The process for upside-down mounting is similar, offering the same flexibility in angle adjustment.
The guide also includes instructions for removing the speaker, which involves lifting it out of the wall mount, unscrewing the bolts from the speaker bracket, and disconnecting the power plug. This ensures that the speaker can be safely detached when needed.
The SWM 4131 Series emphasizes proper care and maintenance to ensure the longevity and safety of the product. For cleaning, it is recommended to use a dry, lint-free cloth. Harsh detergents or other solvents should be avoided as they can damage the product's finish or components.
The guide stresses that only qualified, certified personnel should repair the product, and only original spare parts should be used. Using non-original parts can void the warranty and potentially lead to injuries or product malfunction. Alterations or technical modifications to the product are strictly prohibited, as they will void the warranty and could pose safety risks.
For storage, the product should always be kept in a dry and safe place, with a temperature range between -10°C and +50°C. When transporting the product or storing it for extended periods, it should be repacked in its original packaging to protect it from damage.
The guide also provides troubleshooting tips for common issues, such as screws snapping during installation. It suggests using a sharp drill of the correct size and ensuring the drill depth matches the screw length to prevent such problems. If the issue persists, using another hole in the wall plate is recommended.
Vogel's offers a 5-year guarantee on the product, provided it has been installed and used according to the instructions. The guarantee covers material faults or manufacturing defects. However, it will be void if the product has not been installed correctly, if the wall holes were not properly drilled, if the product was altered or repaired by unauthorized personnel, or if faults arise due to external causes like lightning, water damage, or incorrect usage. The company encourages users to contact their Consumer Care Team for any issues or questions regarding the product or its guarantee.
| Series | SWM 4131 |
|---|---|
| Product Type | TV wall mount |
| Color | Black |
| Material | Steel |
| Type | Wall Mount |
| Tilt | Tilt |
| VESA Compatibility | 200x200 |
| Tilt Range | Up to 15° |
| Mounting Type | Wall |