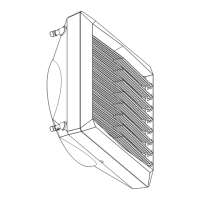
Heater vent/ heating medium drain
The device will be vented when you loosen the vent bolt 1 placed on the connection pipe. The heating medium is drained through the drain plug 2, placed on the bottom connection pipe. When
starting the device after the heating agent has been drained, remember to vent the heater.
<RXQHHGWRSD\VSHFLDODWWHQWLRQWRVHFXUHWKHGHYLFHDJDLQVWZDWHUDFFLGHQWDOO\JHWWLQJLQWRWKHKHDWHUFDVLQJGXULQJWKHDJHQWGUDLQLQJSURFHVV
&RQQHFWLQJWRWKHSRZHUVXSSO\
NOTICE The installation must be equipped with disconnectors at all power supply poles. Recommended safety: overload disconnector VOLCANO VR Mini – 1 A, VOLCANO VR1, VR2 – 2
$92/&$129595'$DQGGLIIHUHQWLDOFXUUHQWVDIHW\92/&$12950LQL95959595'IDQDUHHTXLSSHGZLWKDWHUPLQDOEORFNDFFHSWLQJ[PPHOHFWULF
ZLUHV127,&(:HUHFRPPHQGFRQQHFWLQJWKHZLUHVWRWKHWHUPLQDOEORFNZLWKSUHLQVWDOOHGEXVKLQJV.
VOLCANO VR Mini, VR1, VR2, VR3, VR-D/
AC
5 x 1,5 mm2
VOLCANO VR Mini, VR1, VR2, VR3, VR-D/
(&
3RZHUVXSSO\[PP
Control:
0-10Vdc: LiYCY 2x0,75 (shielded)
$GMXVWLQJWKHDLUJXLGHV
Volcano air guides are mounted on the pivot 1, which provides smoothly change of air direction 4. In order to change position of air blade should turn it in both hands (grasping the edges of the
enclosure) to turn the blade at the same time on both pins.
1
VOLCANO VR Mini, VR1, VR2, VR3, VR-D/
1
2
35
EN