36
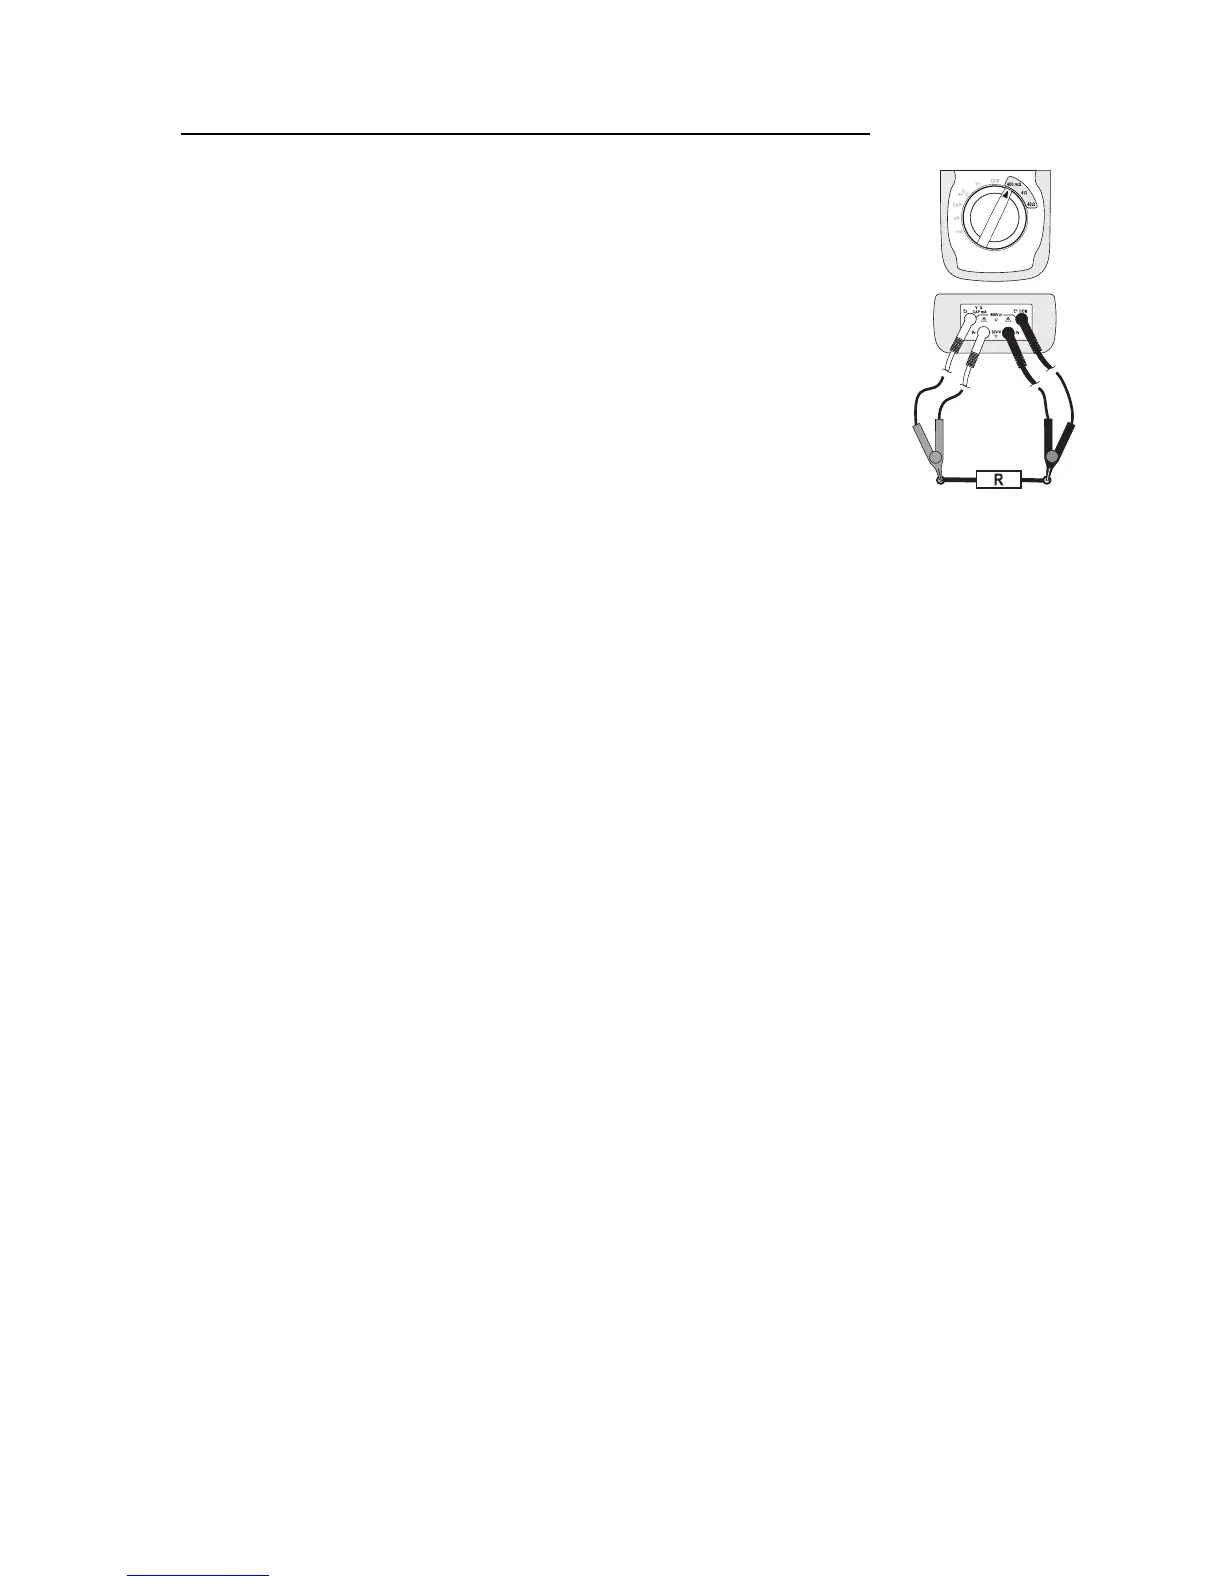
Proceed as follows to measure the resistance using the 4-lead procedure:
- Turn the DMM on and select measuring range “400 mΩ, 4Ωor 40Ω”
depending on the measurement you are going to make.
- Plug the red double-measuring lead (Kelvin measuring lead) into the Ω
measuring socket “E2” (10) and the second plug lead into the measuring
socket “P2” (11).
- Plug the black double-measuring lead (Kelvin measuring lead) into the
COM measuring socket “E1” (13) and the second plug into the measuring
socket “P1” (12).
- Check the measuring leads for continuity by connecting both measuring
probes with one another. This should produce a display value of 0 (+/-
0,1). The unit changes depending on the measurement range.
- Connect the measuring probes to the object to be measured. As long as
the object to be measured is not high-Ohm or interrupted, the measured
value will be indicated on the display. Wait until the displayed value has
stabilised.
- If “OL” (overload) appears on the display, you have exceeded the mea-
suring range or the measuring circuit has been broken.
- After measuring, remove the measuring leads from the measured object and turn the DMM off.
☞
If you carry out a resistance measurement, make sure that the measuring points which you
contact with the measuring probes are free from dirt, oil, soldering paint or similar. An incor-
rect measurement may result under such circumstances.
If no stable measurement values are shown or if the continuity check (0-display) fails, check
the inbuilt fuse “F2”. Fuse replacement is described in the “Cleaning and Maintenance”
chapter.
HOLD Function
The HOLD function freezes the currently indicated measured value to allow you to read it or to take the
record without rushing.
If you test live wires make sure that this function is deactivated before the measure-
ment starts. Otherwise, the measurement will be incorrect!
To switch on the Hold function, press the “HOLD” button (3); an acoustic signal confirms this command
and “HOLD” appears on the display.
In order to switch off the HOLD function, press the “HOLD” button again or simply change the measure-
ment function.