73
Maintenance. Fuel system
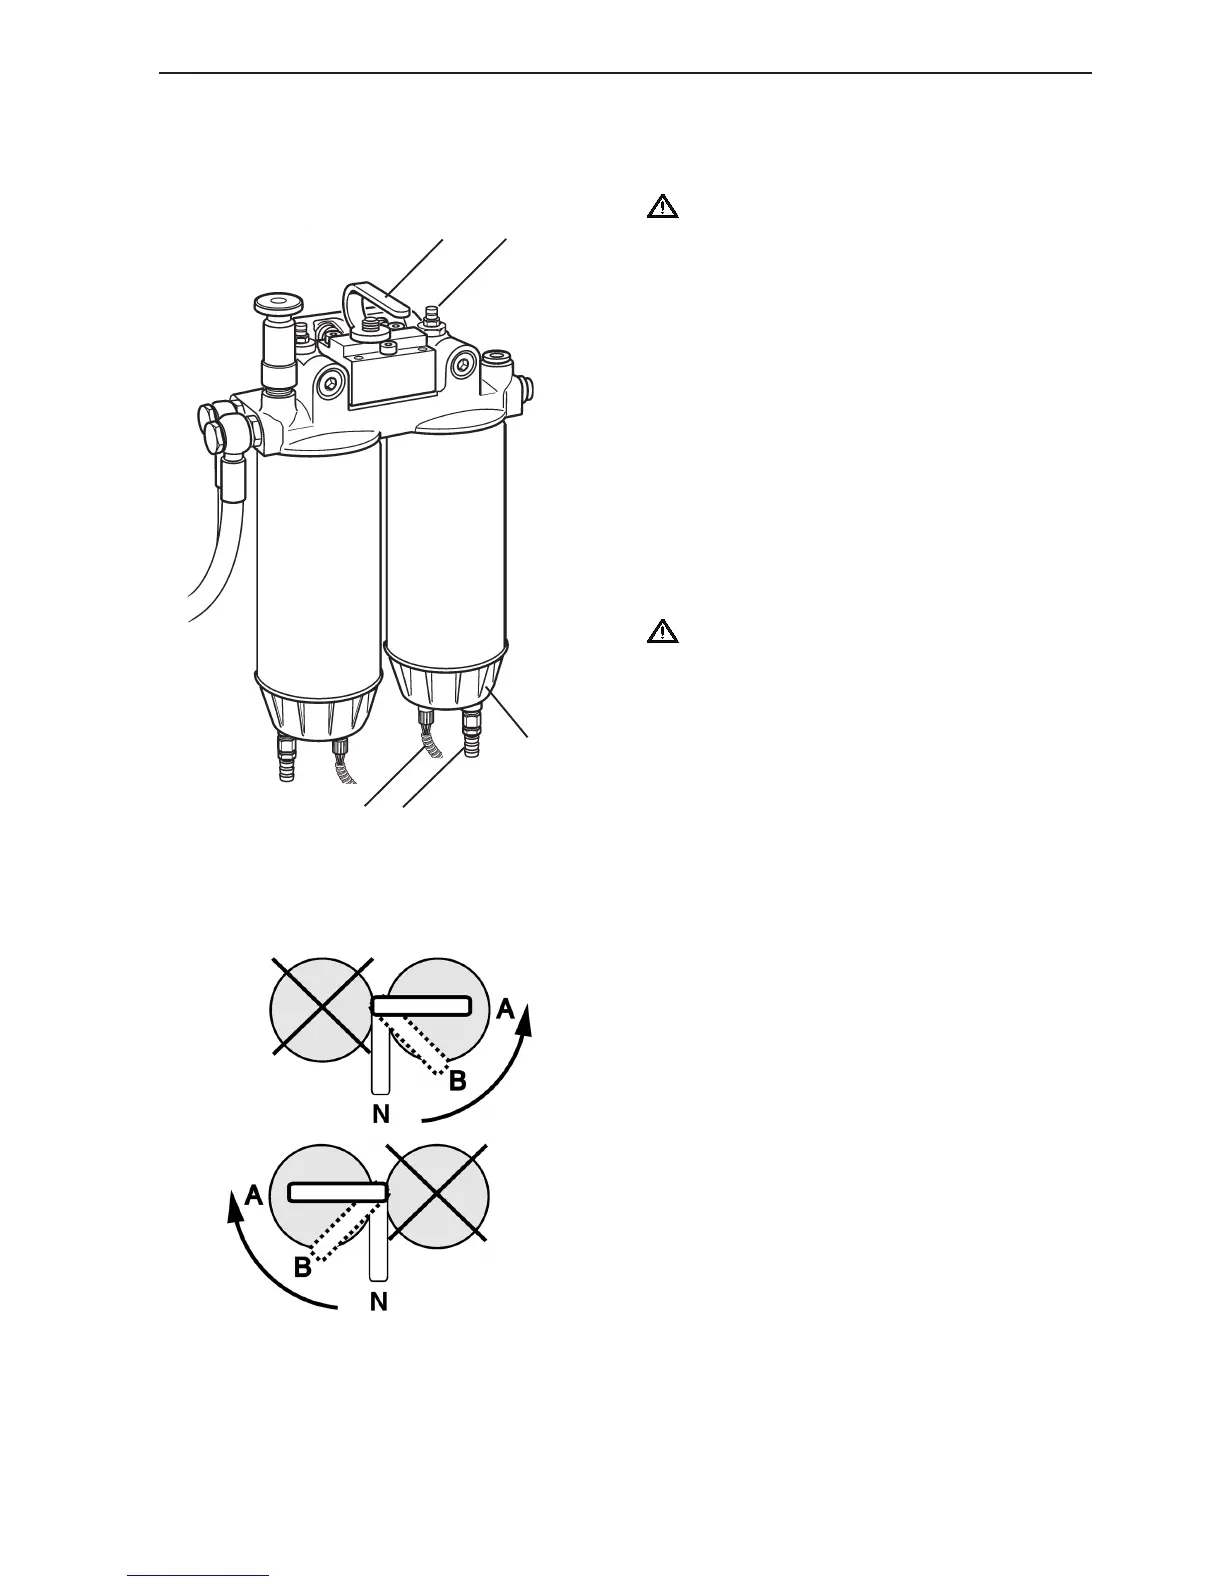
Change the filter elements
Running engine (switchable filters only):
WARNING! Hot fuel can cause burns.
1. Clean the filter bracket and put a suitable vessel
under the filter.
2. Remove the protective cap from the venting nipp-
le (1) on the filter bracket. Connect a transparent
plastic hose to the nipple and lower this into the
vessel.
3. Shut off the fuel flow to one of the filters by lifting
the handle (2) and turning it to its end position
(A).
4. Remove the cables (3) from the water trap (4) on
the shut off filter.
5. Relieve pressure inside the filter by first opening
the drain tap (5) at the bottom of the water trap
and then the venting nipple to drain the filter of
fuel.
WARNING! High pressure, open the tap with
caution. Hot fuel can spray out in any direction.
6. Unscrew the water trap and filter, use a filter
wrench if needed.
7. Clean the sealing surfaces of the filter bracket.
Make sure the filter is absolutely clean and the
sealing surfaces are undamaged. Moisten the
sealing rings with engine oil, including the inner
rubber seal located inside the threaded hole in
the center of the filter.
NOTE! Do not fill the new filter with fuel before
assembly. Contaminations may get into the
system and cause damage and malfunction.
8. Screw the new filter on by hand until the seal
just touches the mating surface. Then tighten a
further 1/2 turn. Reinstall the water trap and the
cables. Close the drain tap.
9. Vent by turning the handle (2) to venting po-
sition (B). This allows a reduced flow of fuel
through the filter and evacuates air through the
vent. Tighten the venting nipple when air-free fuel
flows out.
10. Remove the hose and put the protective cap
back on the venting nipple.
11. Repeat with the other filter.
12. Turn the handle to normal operating position (N).
Check for leakages.
2 1
3
4
5
 Loading...