61
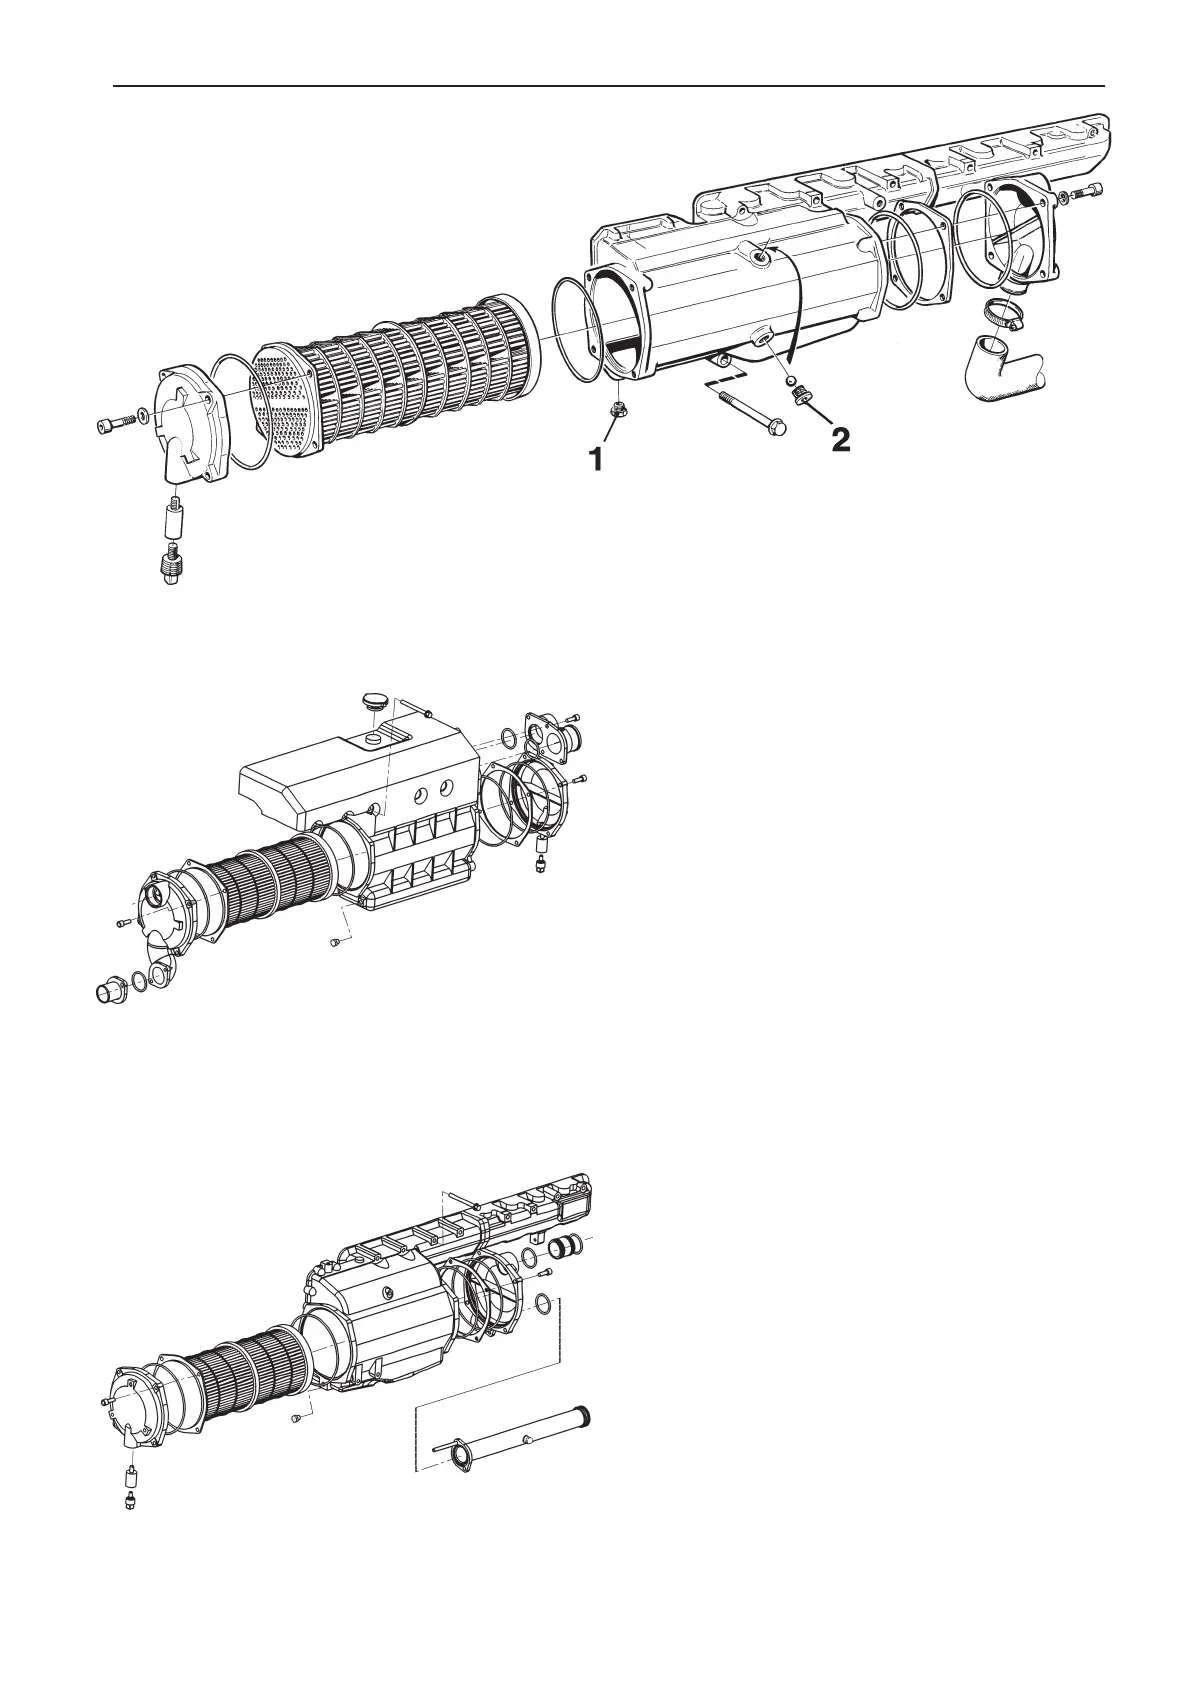
TAMD63: Charge air cooler (CAC) and insert
1. Screw with drainage hole
2. Plugs over guide balls for CAC insert
5. Remove the cooling water hoses to and from the
heat exchanger/charge air cooler (CAC).
6. TAMD73 and TAMD74: Remove coolant pipe
between seawater pump and charge air cooler
(CAC).
7. TAMD73 and TAMD74: Undo brace at the heat
exchanger front.
8. Remove the heat exchanger from the engine (6
screws).
9. Remove the end covers from the heat exchanger
or CAC (6 mm Allen screw). Remove the O-rings
and intermediate rings.
10. TAMD63: Unscrew plugs (2) over the two guide
balls for the charge air cooler’s insert a few turns
(10 mm Allen screw).
11. Push out the inserts.
Note. The inserts can only be pushed out back-
wards as they have a flange at the rear.
12. Flush and clean them internally and externally.
Use suitable brushes. Also clean the housings
and covers.
Note. Ensure that no contaminants enter the
engine’s inlet manifold via the charge air cooler.
Check that the drainage hole in screw (1) at the
back of the charge air cooler is not blocked.
13. Install the inserts in the housings. Use new
sealing rings.
Note. The intermediate rings should be fitted
with the hole down. Inserts and intermediate
rings can be fitted in only one position due to the
distribution of holes.
TAMD73, TAMD74: Heat exchanger and insert
TAMD73, TAMD74: Charge air cooler (CAC)
and insert
7740156 - Downloaded from www.volvopenta.com 22/07/2009 00:44:08