Group
21
Reconditioning engine
Assembly
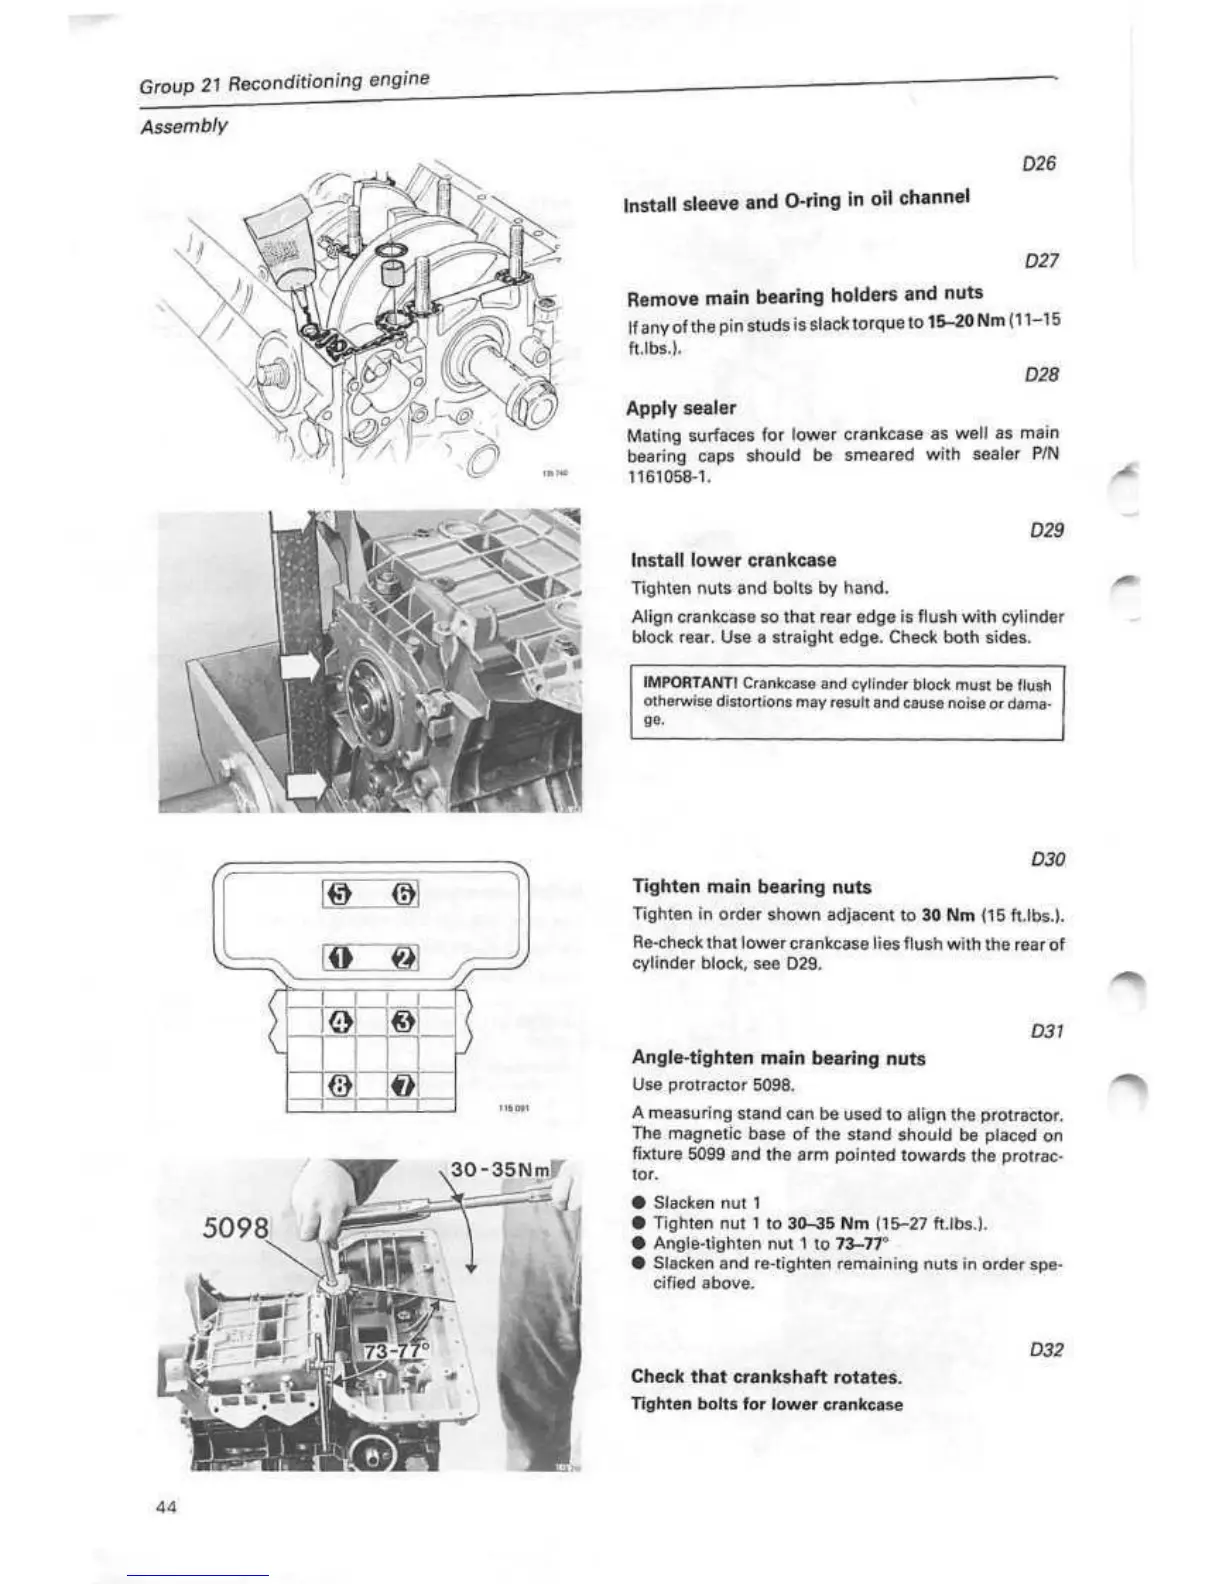
Install sleeve and
O-ring
in oil channel
D26
D27
Remove main bearing holders and nuts
If
any of the pin studs is
slack
torque to
15-20
Nm
(11-15
ft.lbs.).
D28
Apply sealer
Mating surfaces for lower crankcase as well as main
bearing caps should be smeared with sealer P/N
1161058-1.
D29
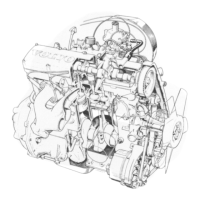
Install lower crankcase
Tighten nuts and bolts by hand.
Align crankcase so that rear edge is flush with cylinder
block rear. Use a straight edge. Check both sides.
IMPORTANT! Crankcase and cylinder block must be flush
otherwise distortions may result and cause noise or dama-
ge.
5098
# ©
O @
I
I I I I
1€N
©
©
J-I
o
I I I I
D30
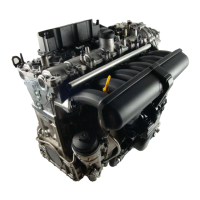
Tighten main bearing nuts
Tighten in order shown adjacent to 30 Nm (15 ft.lbs.).
Re-check that lower crankcase lies flush with the rear of
cylinder block, see D29.
D31
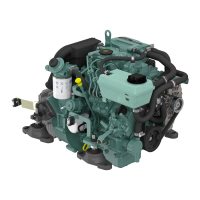
Angle-tighten main bearing nuts
Use protractor 5098.
A measuring stand can be used to align the protractor.
The magnetic base of the stand should be placed on
fixture 5099 and the arm pointed towards the protrac-
tor.
• Slacken nut 1
• Tighten nut 1 to
30-35
Nm
(15-27
ft.lbs.).
• Angle-tighten nut 1 to
73-77°
•
Slacken and re-tighten remaining nuts in order spe-
cified above.
D32
Check that crankshaft rotates.
Tighten bolts for lower crankcase
44