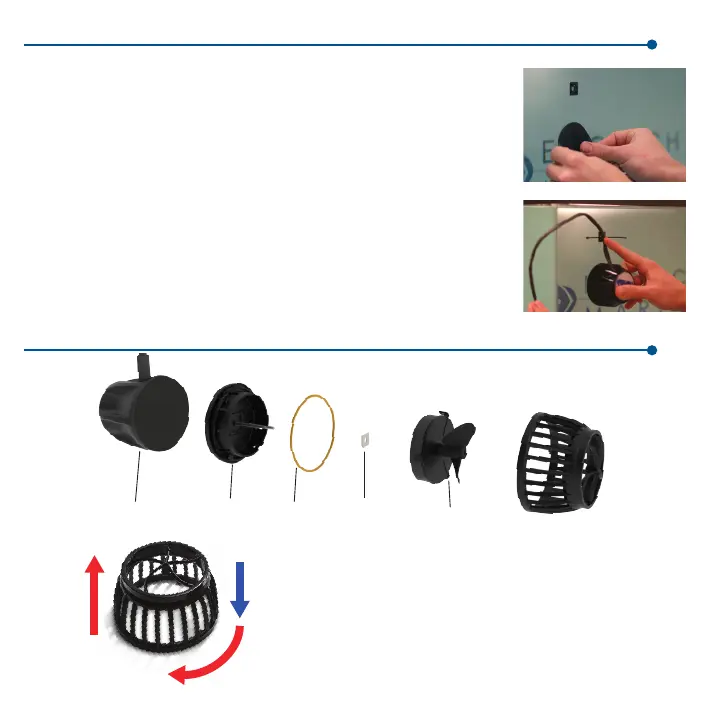
Attach the motor assembly
• Apply the rubber gasket at the chosen location for the VorTech pump, on the
outside of your aquarium.
• Apply the cord mounting tab approximately 2” above this location. Make sure
the glass is clean and free of any grease or dirt prior to applying this tab.
• Place the VorTech motor, with or without the pin spacer attached, upon
the black gasket, and secure the cord to the mounting tab using one of the
provided wire-ties.
• The cord must be positioned pointing upwards so that if the VorTech were to
fall off the aquarium, it does not swing and damage your aquarium or pump.
When operating, make sure the gasket is properly recessed within the pin
spacer.
Attach the wetside assembly
• Place the wet side into the aquarium, making sure to allow ALL air to escape
from the propeller housing.
• Carefully connect both halves of the pump together and visually align both
halves of the pump.
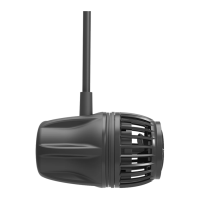
Your VorTech MP10/MP10w ES
Motor
Wet Frame
with Axle
O-Ring
Ceramic
Washer
Rotor
Nozzle
Specifications and Operating Parameters
Flow: 200-1575 gallons/hour, Power: 6-18 watts,
Aquarium Wall Thickness: 1/8” to 3/8”
To remove the nozzle from the wet frame, remove the entire wet
half of the pump from the aquarium and place it on a non-metallic
surface. Gently but firmly press down on the nozzle with your
palm and TWIST CLOCKWISE. The nozzle should become free
of the wet frame. It may then be cleaned of any obstructions. Be
careful to minimize force when twisting the wet frame.
Attach the MP40w ES
3
1.Push
2.Twist
3.Remove