Changing Tubes
Do not attempt to change tubes yourself. Contact your authorized VTL dealer or the VTL factory services
department so that a trained technician can perform this service. You will need to take the unit and this
procedure to your dealer for them to perform this procedure and the corresponding bias procedure properly.
Notes to the Service technician:
Be sure to only touch the tubes themselves, and do not allow any part of your body or hanging jewelry to come
into contact with any part of the circuit inside the unit.
1. Diagnose the tubes: If you are not undergoing a complete retube for the entire amplifier, then
you must first decide how many tubes and which tubes should be changed. Use the bias
checking procedure as documented in the Getting Started section of this manual to find out how
to measure the bias setting of the tubes and to determine whether they are within the acceptable
range. For example if you find out from the bias measurements that tube #1 and #3 are
fluctuating frequently and they are above or below the acceptable range this may indicate that a
replacement of these two tubes is necessary. A full power test of the amplifier may need to be
undertaken to ensure that all power tubes are conducting equally.
2. Power off the amplifier: To change tubes in this amplifier you should first power the unit down,
unplug the unit from the wall outlet and disconnect the amplifier from the rest of your system.
Let the amplifier stay power-off for at least 15 minutes before you start working with it. Make
sure the tubes are cool before you touch them. Using a Philips #2 point screwdriver remove the
protective cage from the unit by loosening the two screws from the side of the amplifier.
Carefully remove the cover and the screws and store them in a safe place.
3. Removing Tubes: Locate the tube you need to remove and hold onto the upper portion of the
tube towards its tip. Gently rotate and rock the tube with your fingers to loosen it from its socket
until its pins are completely disengaged from the socket. Take the tube out of the unit.
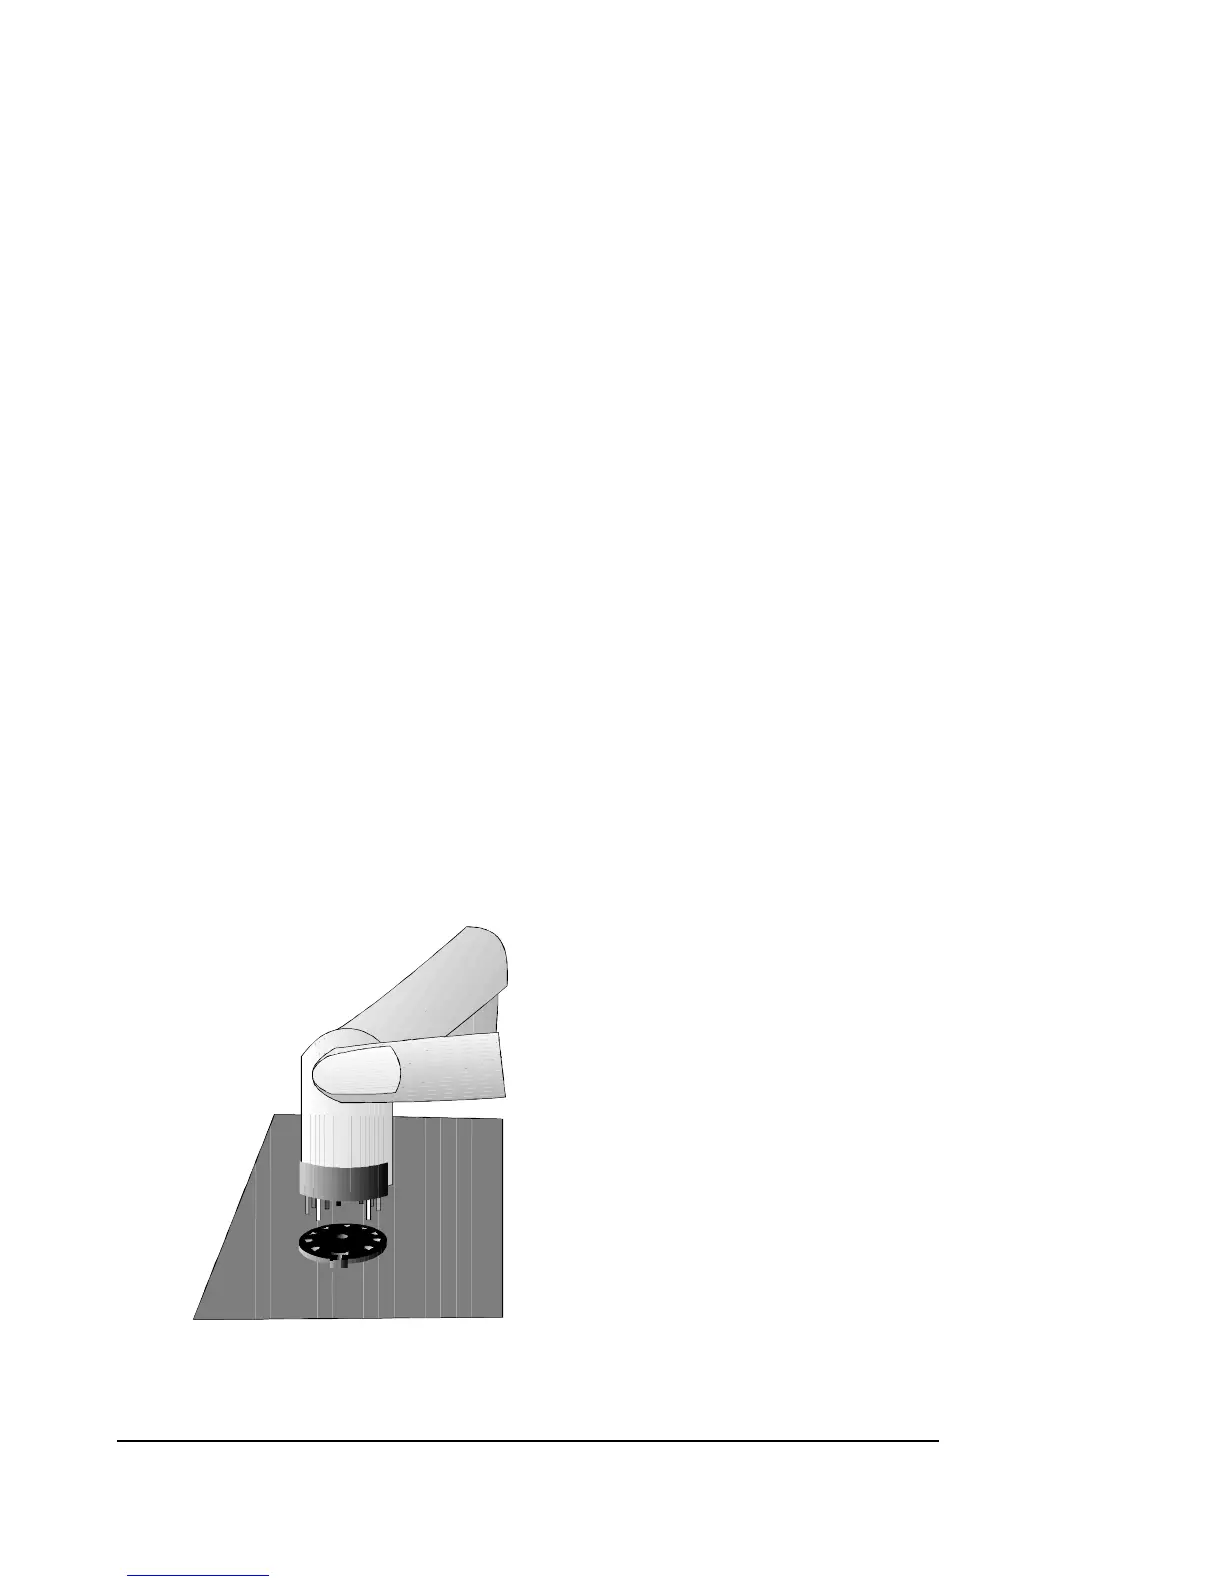
1. Plugging in a new tube: Hold onto the upper portion of the tube towards its tip. Lower the
tube onto the socket, making sure that the
pins from the tube match the holes in the
socket. There are either two pins on the
tube which are spaced at a wider distance
from each other than the rest of the pins (9
pin miniature tubes), or there is a locating
key in the middle of the tube (8 pin octal
tubes). Make sure that these locators go
into the side of the socket that matches.
Press the tube firmly into its socket, using a
gentle force and a slight “rocking” motion.
When the tube is properly and completely
inserted into the socket it should be firmly
implanted and does not give in to any
movement at all when you try to rock it.
2. Replacing the protective cage: Lower
the amplifier’s cover chassis slowly back
into the opened amplifier box, making sure that the cover is put on in the correct front and back
position. Locate the screws that were removed from the cover and put them back in the correct
holes. Tighten all screws to make sure that the cover is securely fastened to the unit.
ST-150 Owner’s Manual
VTL
12
 Loading...