10
M L XL
6 8 10
M L XL
42 56 70
M L XL
42 56 70
M L XL
1 1 1
M L XL
6 8 10
M L XL
1 1 1
M L XL
1 1 1
M L XL
6 8 10
M L XL
6 8 10
M L XL
6 8 10
M L XL
12
(6xA, 6xB)
16
(8xA, 8xB)
20
(10xA, 10xB)
M L XL
12
(6xA, 6xB)
16
(8xA, 8xB)
20
(10xA, 10xB)
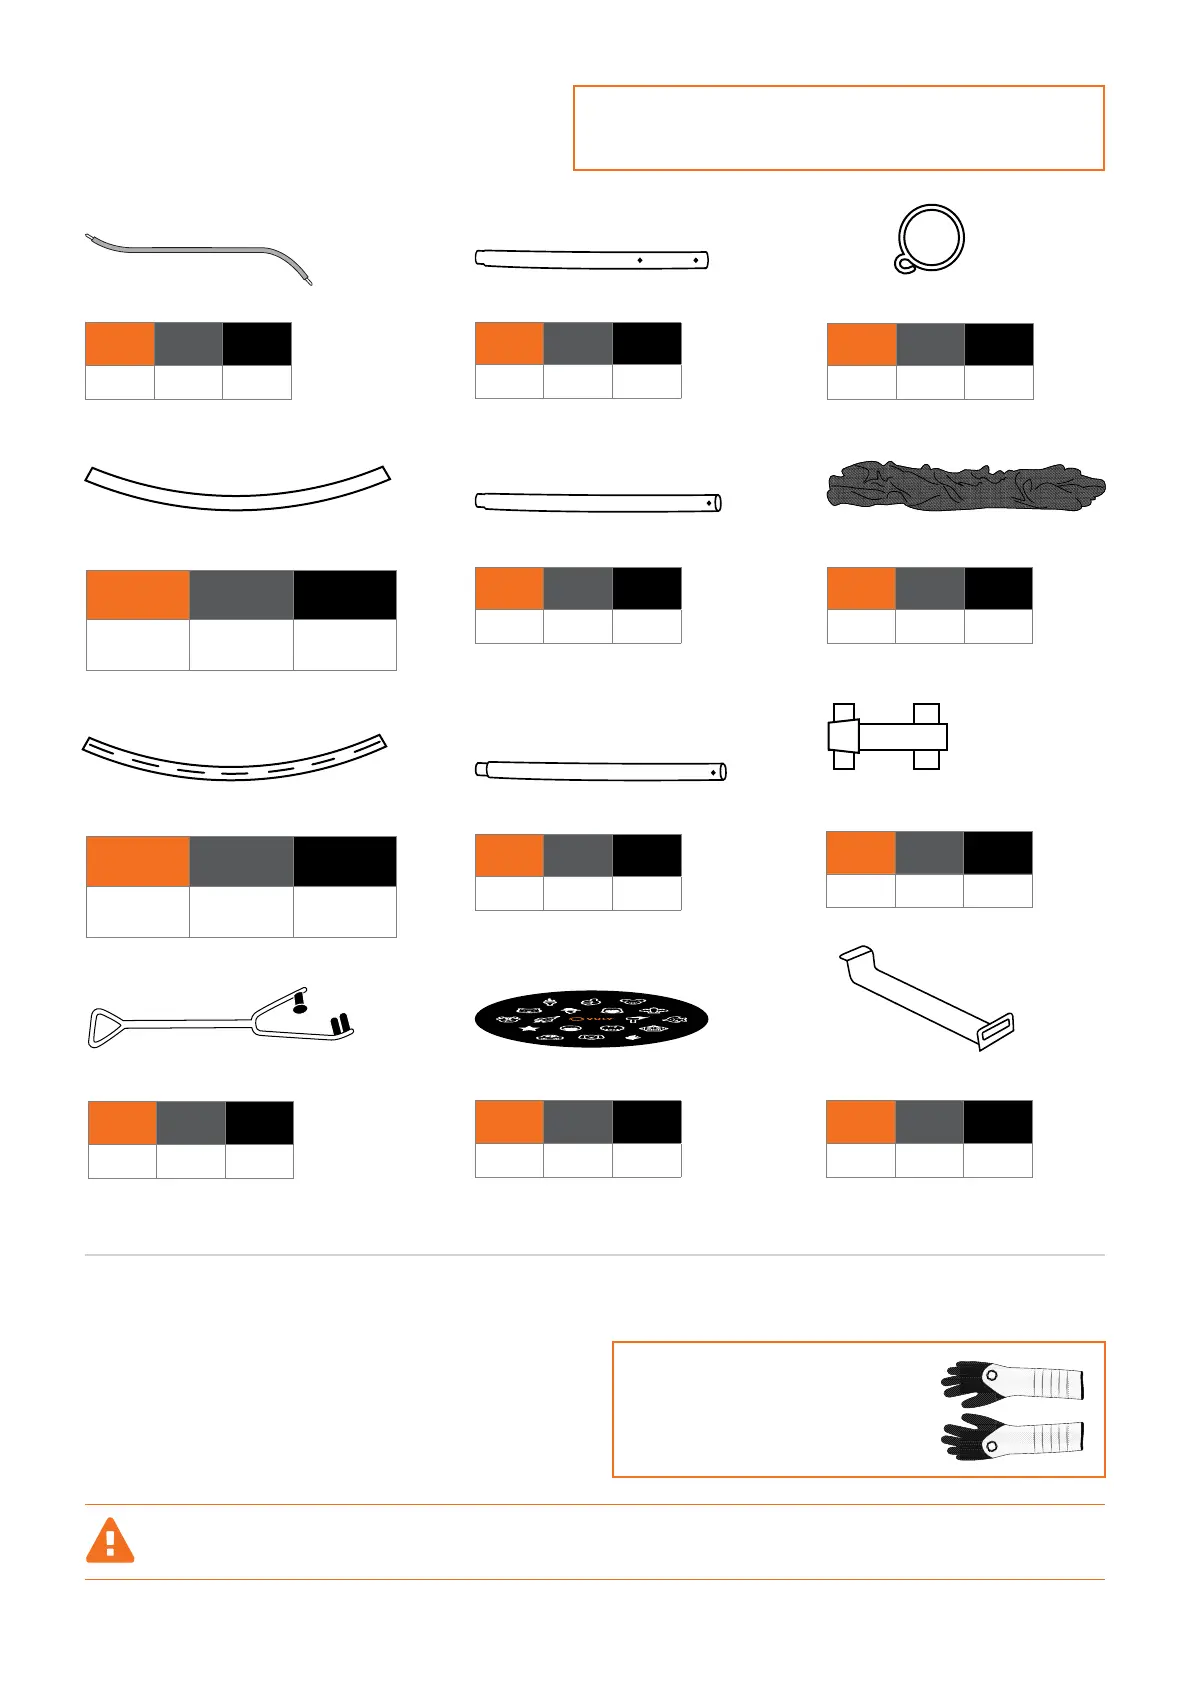
Joiner Poles
Safety Rings
Leaf Springs
Jump Mat Frame Reinforcements
Safety Net
Spring tool
Upper Net Poles
Middle Net Poles
Lower Net Poles
Upper Frame Tubes
Lower Frame Tubes
5.3. Assembly instructions – Vuly Thunder Pro
PRE-ASSEMBLY
• Find level ground, and make sure that there are no
obstructions nearby.
• Check that you have all the parts required for assembly.
VULY Thunder Pro
Check that your trampoline bundle
contains the all of following parts:
REMEMBER: WEAR THE VULY
GLOVES AT ALL TIMES WHEN
INSTALLING YOUR TRAMPOLINE.
TIME REQUIRED FOR ASSEMBLY: 1 HOUR (APPROX).
NUMBER OF PEOPLE REQUIRED FOR ASSEMBLY: 2
Keep the Leaf Spring sleeves on during assembly and over the life of your trampoline. These sleeves provide
crucial protection in the unlikely event of a Leaf Spring breaking.