screen. This is required to compensate for viewing angle, and to adjust for parallax caused by the display
screen cover glass. Set the pen display in its working position, then follow the procedure.
Note: As you do the calibration, read the
directions on the calibration screens
for detailed instructions and
additional options. The calibration
setting applies to all applications.
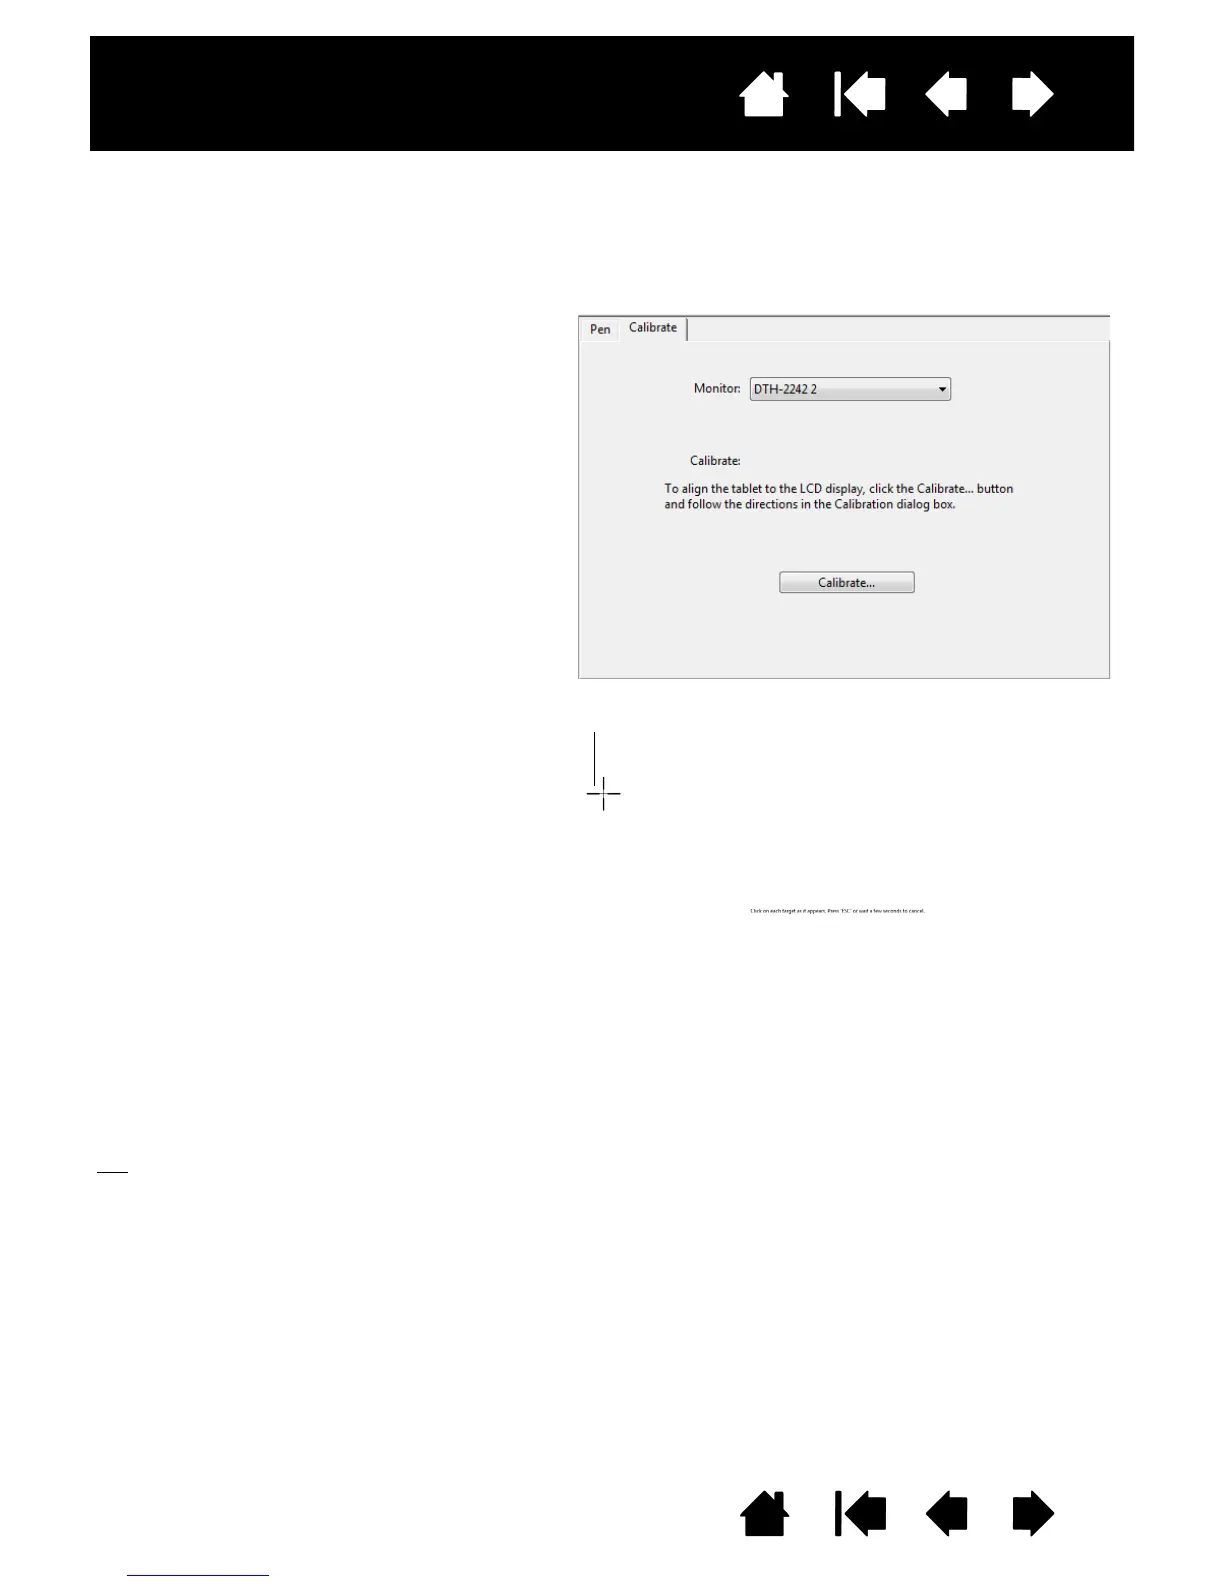
1. Open the Wacom tablet control panel.
If more than one pen display is installed
on your system, select the unit you are
working with from the T
ABLET list.
2. Select P
EN from the TOOL list.
Then select the C
ALIBRATE tab.
3. If you are working with multiple monitors,
select the M
ONITOR corresponding to the
pen display. (Only monitors that are set
to one of the resolutions supported by
the unit will appear in the list.)
4. Click C
ALIBRATE... to activate the
calibration screen.
5. Hold the pen and position yourself as
you normally do when working with the
pen display. Use the pen tip to click on
the center of the crosshairs in the upper-
left corner.
6. Then click on the center of each of the
crosshairs that appear on the display.
7. On the next dialog that appears, test the
alignment by positioning the pen at a few
different points on the display. Click OK
to accept the calibration. Click T
RY
A
GAIN to recalibrate.
First Crosshairs
Tip: To see the screen cursor slightly offset from the actual position of the pen tip, calibrate by
clicking on a spot showing that offset from the crosshairs. For example, to have the screen cursor
appear 2.5 mm (1/10th of an inch) above and to the left of the pen tip, calibrate by clicking on a
spot 2.5 mm (1/10th of an inch) below and to the right of the crosshairs.
 Loading...