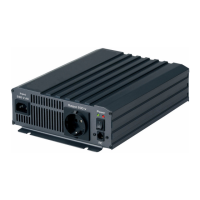
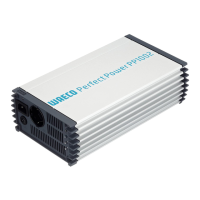
Fastening and connecting the inverter PerfectPower
36
Sample circuit diagram legend:
➤ Install a residual current circuit breaker in the socket distribution circuit.
Setting grounding bridge (fig. 4, page 4)
e
Warning – Danger of electrocution!
The grounding bridge may only be connected by a trained
professional who is familiar with the relevant VDE (German
Engineering Society) regulations.
I
Note
The grounding bridge plug is always plugged into socket “FG”
(insulated AC current) when delivered.
➤ Unscrew the top four fastening screws (2) on the front of the device with
a hex key.
➤ Take off the cover (1).
e
Caution
The grounding bridge is changed with sockets “FG” and “N + FG”.
Do not alter the other sockets, otherwise the device may be
damaged.
➤ Remove the plug (3) from socket “FG” (4).
➤ Insert the plug (3) into socket “N + FG” (5).
➤ Replace the device cover (1) and fix using the screws (2).
No. in fig. 6,
page 5
Explanation
1230 V
AC
power source
2 Additional devices, e.g. battery charger, refrigerator
3 DC power source (battery)
4 Inverter
5 Grounding bridge set
(At delivery: not set, shown by dotted line)
6 Circuit breaker (residual current circuit breaker)
7 Socket distribution circuit for consumers
_PP1000_PP2000.book Seite 36 Dienstag, 6. April 2010 4:31 16