ENGLISH
7
User’s Manual—Read before using this equipment
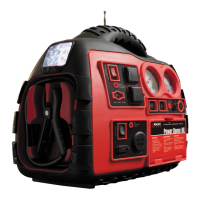
CHARGING THE IONBOOST
This product may arrive partially charged from the manufacturer� It is recommended to
fully charge the unit immediately after purchase and before using for the first time� Prior to
charging the unit, read and understand all instructions in this manual�
In order to prolong the life of the iOnBoost, be sure to fully recharge the unit after each use and
every 3 months even if the iOnBoost has not been used.
Warning
• Only use the charging adapters supplied with this unit!
• Do not charge the unit on a boat, boat ramp, or dock since the electrical cords and outlets
used for charging could cause severe electrical shock if they get wet.
AC Charging
1. Insert AC charging adapter into charging jack of the unit.
2. Plug the other end of AC charging adapter into a wall socket. The blue battery status indicator
lights will be illuminated while the unit is charging.
3. Fully charge the unit (average 2–4 hours continuously between uses). Charging is complete
when all battery status indicator lights illuminate solid.
4. When charging is complete, unplug the AC charging adapter from the wall socket first, then
from the charging jack on the unit.
5. The battery status can be checked by tapping on the “MODE” button once.
6. Store the unit and charge adapters in a cool, dry environment, away from flammable
materials. Remember to fully charge the unit every three months.
DC Charging in Your Vehicle
Engine must be operating while charging the iOnBoost�
1.
T
urn the vehicle engine on.
2.
I
nsert the DC charging adapter into the charging jack of the unit.
3.
P
lug the other end of DC charging adapter into vehicle’s cigarette lighter (DC) or accessory
socket. The blue battery status indicator lights will be illuminated while the unit is charging.
4.
F
ully charge the unit (around 4–5 hours continuous). Engine must be operating during entire
charge. Charging is complete when all battery status indicator lights illuminate solid.
5.
W
hen charging is completed, unplug the DC charging adapter from the vehicle first, then from
the charging jack on the unit.
6.
T
he battery status can be checked by tapping on the “MODE” button once.
7.
S
tore the unit and charge adapters in a cool, dry environment, away from flammable
materials. Remember to fully charge the unit every three months.

 Loading...