ASSEMBLY
EN
7
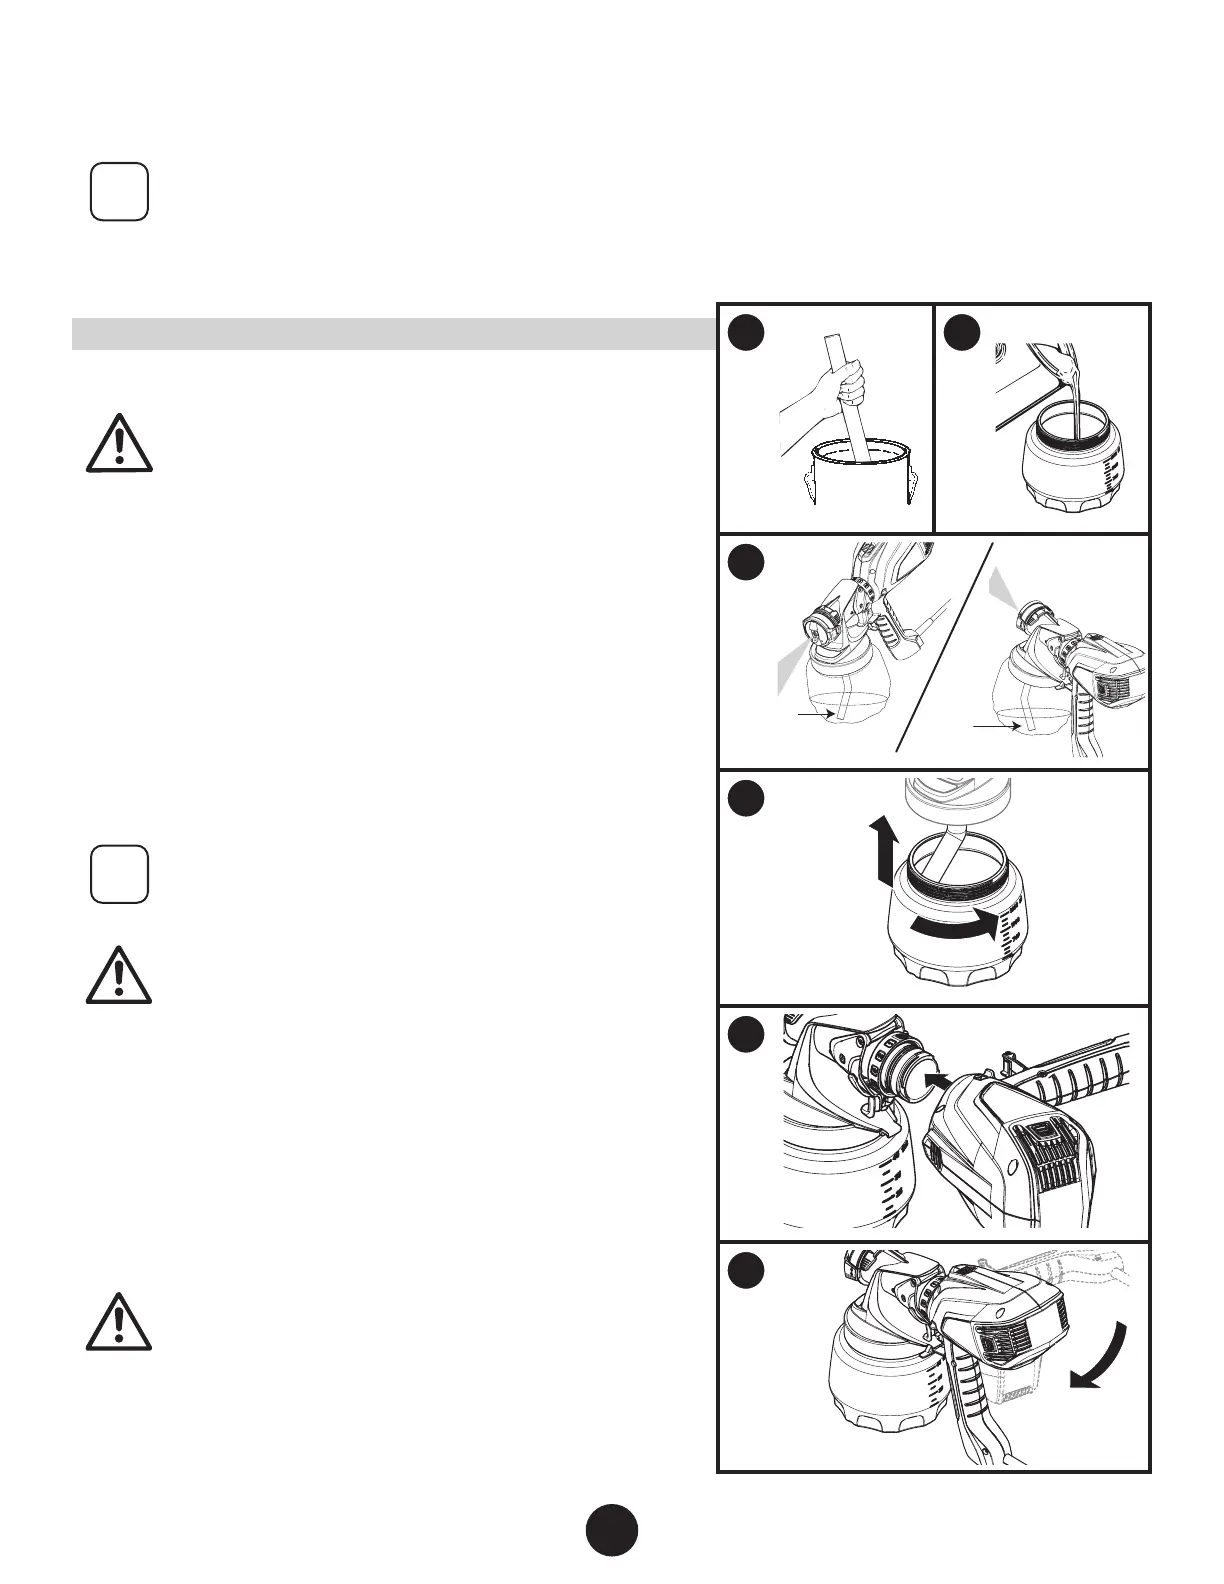
SETUP
NEVER point the spray gun at any part of the
body.
Make sure the power cord is unplugged.
1. Stir the spraying material thoroughly.
2. Fill the container. Use a strainer to remove any particles.
(see Thinning the Material, previous page, if thinning is
required).
3. Align the pickup tube -
A If spraying downward, the angled end of the pickup tube
should be pointing toward the front of the nozzle.
B If spraying upward, the angled end of the pickup tube should
be pointing toward the rear of the nozzle.
Make sure the pickup tube is inserted as far as it
will go to ensure a tight t.
tention
Never tip the sprayer at more than a 45° angle.
Material could get into the turbine and damage
the sprayer.
4. Carefully screw the cup back onto the nozzle assembly. Tighten
rmly.
5. Align the nozzle and the turbine approximately as shown.
6. Insert and twist the nozzle into the turbine toward the “lock”
symbol on the turbine.
The tab below the trigger will lock the two pieces into place.
tention
Do not pull trigger at any time if the turbine is
not running. Paint will drip from the nozzle.
For a video showing how to set up the Control Spray QX5, visit:
www.wagnerspraytech.com/controlsprayQX5
1 2
3
A
B
4
5
6
 Loading...