EasyManua.ls Logo

WAGNER Control Pro 130 - User Manual

WAGNER Control Pro 130
28 pages
Print Icon
To Next Page IconTo Next Page
Loading...
0524 • Form No. 2439673D
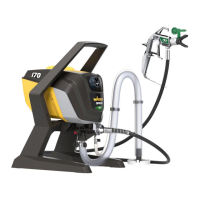
CONTROL PRO
130
OWNER‘S MANUAL • MANUEL DE L‘UTILISATEUR • MANUAL DE USARIO
READ THIS MANUAL FOR COMPLETE INSTRUCTIONS • LIRE CE MANUEL POUR OBTENIR DES DIRECTIVES COMPLÈTES
LEA ESTE MANUAL PARA OBTENER LAS INSTRUCCIONES COMPLETAS
EN
TABLE OF CONTENTS
IMPORTANT SAFETY INFORMATION _____________________ 2-5
PIECES AND COMPONENTS ______________________________6
BEFORE YOU BEGIN ____________________________________7
LOAD MATERIAL _______________________________________8
SPRAYING _________________________________________ 9-13
SHORT TERM STORAGE _______________________________ 14
CLEANUP _________________________________________ 15-16
LONG TERM STORAGE ________________________________ 17
CLEANING THE INLET VALVE _________________________ 18-19
CLEANING THE OUTLET VALVE _________________________ 20
TROUBLESHOOTING __________________________________ 21
PARTS LIST _______________________________________2425
WARRANTY _________________________________________ 28
F
TABLE DE MATIÈRES
CONSIGNES DE SÉCURITÉ IMPORTANTES ________________ 25
PIÈCES ET COMPOSANTS _______________________________6
AVANT DE COMMENCER ________________________________7
REMPLISSEZ DE MATIÈRE LIQUIDE _______________________8
PULVÉRISATION ____________________________________913
RANGEMENT À COURT TERME _________________________ 14
NETTOYAGE ______________________________________1516
RANGEMENT À LONG TERME __________________________ 17
NETTOYAGE DE LA SOUPAPE DE ENTRÉE ______________1819
NETTOYAGE DE LA SOUPAPE DE SORTIE ________________ 20
DÉPANNAGE _______________________________________ 22
LISTE DE PIÈCES ___________________________________2425
GARANTIE LIMITÉE __________________________________ 28
ES
CONTENIDO
INFORMACIÓN IMPORTANTE SOBRE SEGURIDAD _________ 25
PIEZAS Y COMPONENTES _______________________________6
AVANT DE COMENZAR _________________________________7
CARGAR MATERIAL ____________________________________8
ROCIADO _________________________________________913
ALMACENAMIENTO DE CORTO PLAZO __________________ 14
LIMPIEZA ________________________________________1516
ALMACENAMIENTO DE LARGO PLAZO __________________ 17
LIMPIEZA DE LA VÁLVULA DE ENTRADA _______________1819
LIMPIEZA DE LA VÁLVULA DE SALIDA ___________________ 20
SOLUCIÓN DE PROBLEMAS ___________________________ 23
LISTA DE PIEZAS __________________________________2425
GARANTÍA LIMITADA ________________________________ 28
CAPABILITY
Sprays a variety of paints (oil-based and latex), primers,
stains, preservatives and other nonabrasive materials.
DO NOT USE!
This pump should not be used with textured materials,
block ller, lacquers, industrial enamels, or asphalt sealer
or materials containing HHC. See coating supplier if ash
point is not listed on the container.
Do not spray or clean with liquids having a ash point of
less than 38˚C (100˚F). Flash point is the temperature at
which a uid can produce enough vapor to ignite.
SAFETY FEATURES
Spray gun trigger lock and pressure diuser; built-in tip
safety guard; PRIME/SPRAY knob for safe pressure release.
Conforms to UL STD 1450. Certied to CSA C22.2 NO 68.
POSSIBILITÉS
Pulvérisation de divers types de peintures (au latex ou à
huile), d’apprêts, de teintures, d’agent d’imprégnation et
d’autres substances non abrasives.
NE PAS UTILISER!
Cette pompe ne devrait pas être utilisée avec les
matériaux à grain, les blocs de remplissage, les laques,
les émaux industriels, l’asphalte scellant ou les matériaux
contenant du HHC. Vérier le point d’éclair énuméré par
le fournisseur d’enduit sur le récipient.
Ne pulvérisez pas et ne les nettoyez pas avec des liquides
ayant un point d’éclair inférieur à 38 ˚C (100 ˚F). Le point
d’éclair est la température à laquelle un uide peut
produire susamment de vapeur pour s’enammer.
CARACTÉRISTIQUES DE SÉCURITÉ
Serrure et garde de déclenchement de pistolet de
pulvérisation; protège-embout intégré; bouton prime/
spray permettant la décompression en toute sécurité. Se
conforme à UL STD 1450. Certié au NON 68 de CSA C 22,2.
CAPACIDAD
Aplica una variedad de pinturas (látex y base de aceite,
imprimadores, tintes, preservantes y otros materiales no
abrasivos.
NO ROCIAR!
No utilizar esta bomba con materiales texturados, pasta
de relleno, lacas, barnices industriales, ni selladores
de asfalto o materiales que contengan HHC (cemento
aluminoso por sus siglas en inglés). Consulte al proveedor
de revestimientos si el punto de inamación no se
encuentra especicado en el envase.
No pulverice ni limpie con líquidos que tengan un punto
de inamación por debajo de 38 ˚C (100 ˚F). El punto de
inamación es la temperatura a la que un uido puede
producir vapor suciente como para incendiarse.
CARACTERÍSTICAS DE SEGURIDAD
Seguro del gatillo de la pistola rociadora, protección
de seguridad incorporada en la boquilla; perilla PRIME/
SPRAY para liberar presión sin peligro. Se conforma con
UL STD 1450. Certicadas para CAN/CSAC 22.2 NO 68.
Scan the QR codes for videos, tips,
troubleshooting, and more.
Scannez le codes QR pour vidéos, aux
conseils, au dépannage et plus encore.
Escanee el códigos QR para videos,
consejos, resolución de problemas y más.
www.wagnerspraytech.com Product Support: 1-800-328-8251

Questions and Answers

  • L
    Leah Wolfe MDJul 29, 2025
    What to do if WAGNER Control Pro 130 Paint Sprayer does not turn on?
    • B
      bautistaangelJul 29, 2025
      If your WAGNER Paint Sprayer doesn't turn on, first ensure it's properly plugged into a working power outlet. Check that the sprayer is switched to the ON (I) position. If the outlet isn't providing power, reset the circuit breaker or try a different outlet. Also, a damaged or improper extension cord could be the cause. If these steps don't resolve the issue, there might be a problem with the sprayer motor, or the spray tip could be clogged.
  • N
    nelsonjonathanAug 3, 2025
    What to do if WAGNER Control Pro 130 spray gun will not spray?
    • L
      Lisa GrahamAug 3, 2025
      If the spray gun on your WAGNER Paint Sprayer isn't spraying, the spray tip might be plugged or in the wrong position. Ensure the PRIME/SPRAY knob is set to SPRAY and that the gun filter isn't dirty or plugged. Try unclogging the spray tip, rotating it to the SPRAY position, setting the PRIME/SPRAY knob to SPRAY, or cleaning/replacing the gun filter.
  • J
    John LawsonAug 8, 2025
    Why WAGNER Paint Sprayer draws material but the pressure drops?
    • T
      thomaskingAug 8, 2025
      If your WAGNER Paint Sprayer draws material but the pressure drops when the gun is triggered, it could be due to several reasons. The spray tip might be worn or plugged, or the inlet filter could be clogged. The material you're using might be too heavy, thick, or coarse. Also, the outlet valve assembly could be damaged or worn, or the spray hose might be too long. Try replacing the spray tip, cleaning the inlet filter, thinning or straining the material, replacing the outlet valve, or removing extra hose length.
  • R
    rickwallAug 13, 2025
    How to fix WAGNER Paint Sprayer spray tip assembly leaks?
    • S
      sbellAug 13, 2025
      If the spray tip assembly on your WAGNER Paint Sprayer is leaking, first check if the tip guard nut is loose and tighten it. If that's not the issue, the tip guard might be assembled incorrectly; remove and reassemble it correctly. A worn tip seal can also cause leaks, so consider replacing it.
  • K
    Kelly WilliamsAug 18, 2025
    Why WAGNER Control Pro 130 starts but does not draw material?
    • J
      Jonathan ChangAug 18, 2025
      If your WAGNER Paint Sprayer starts but doesn't draw material when the PRIME/SPRAY knob is set to PRIME, the inlet valve may be stuck, or there may be no suction at the inlet valve. The inlet filter could also be clogged. Alternatively, the outlet valve might be stuck or contain debris, or the inlet or outlet valve could be worn or damaged. Try pushing the inlet filter tab to release it, checking for suction at the inlet valve, cleaning or replacing the inlet filter, cleaning the outlet valve, or replacing the inlet/outlet valve.
  • R
    Ryan LaraAug 22, 2025
    How to fix poor spray pattern (tailing) on WAGNER Paint Sprayer?
    • E
      erika46Aug 23, 2025
      If your WAGNER Paint Sprayer is producing a poor spray pattern (tailing), the spray tip may be plugged or worn, or the inlet filter could be clogged. The material you're using might be too heavy or thick, or the spray hose might be too long. Try unclogging the spray tip, cleaning the inlet filter, replacing the spray tip, thinning the material, or removing any extra hose length.

Summary

IMPORTANT SAFETY INFORMATION

CAPABILITY

Describes the types of materials the sprayer can handle.

DO NOT USE!

Lists materials and conditions that should not be sprayed.

SAFETY FEATURES

Highlights built-in safety mechanisms of the sprayer.

GROUNDING INSTRUCTIONS

Instructions for proper grounding to prevent electric shock.

IMPORTANT ELECTRICAL INFORMATION

Details regarding electrical requirements and extension cord usage.

SAFETY HAZARDS

General safety warnings related to electrical hazards and injection injuries.

WARNING: HAZARDOUS VAPORS

Precautions regarding harmful paint and solvent vapors.

WARNING: GENERAL

General warnings about potential severe injury or property damage.

WARNING: EXPLOSION OR FIRE

Safety measures to prevent explosions or fires from flammable materials.

PARTS AND COMPONENTS

ASSEMBLY

Instructions for assembling the sprayer components.

BEFORE YOU BEGIN

SPRAY GUN TRIGGER LOCK

How to engage and disengage the spray gun trigger lock.

MOVING;EMPTYING THE SPRAYER

Guidance on safely moving and emptying the sprayer tank.

PRESSURE RELIEF PROCEDURE

Step-by-step guide to relieve pressure in the system.

LOAD MATERIAL

SPRAYING

PRACTICE SPRAYING

SPRAYING TROUBLESHOOTING

UNCLOGGING THE SPRAY TIP

Steps to clear a clogged spray tip for proper operation.

CLEAN THE SPRAY GUN FILTER

Instructions for cleaning the spray gun filter to resolve pattern issues.

CLEAN THE INLET FILTER

Steps to clean the inlet filter if the spray pattern is distorted or stops.

SHORT TERM STORAGE

SHUTDOWN

Procedure for temporarily storing the sprayer, for latex materials.

STARTUP

Steps to resume operation after short-term storage.

CLEANUP

CLEANING NOTES - READ BEFORE CLEANING

Important notes and precautions to follow before cleaning the sprayer.

DO NOT SPRAY PUMP ASSEMBLY WITH WATER OR CLEANING SOLUTION

Critical warning against spraying the pump assembly with liquids.

FOLLOW THESE STEPS WHENEVER CLEANING WITH MINERAL SPIRITS:

Specific instructions for cleaning with mineral spirits.

IMPORTANT STEP: Fill the tank with warm, soapy water.

Crucial step involving flushing with soapy water for thorough cleaning.

LONG TERM STORAGE

PARO

Instructions for preparing the sprayer for long-term storage (shutdown).

ARRANQUE

Steps for preparing the sprayer for long-term storage (startup).

CLEANING THE INLET VALVE

Suggestion for removal of the inlet valve assembly

Guidance on safely removing the inlet valve assembly.

CLEANING THE OUTLET VALVE

Recommendation: If used with latex-based paints...

Advice on flushing the outlet valve with water for latex paints.

TROUBLESHOOTING

A. The sprayer does not turn on.

Troubleshooting steps for when the sprayer fails to power on.

B. The sprayer starts but does not draw material...

Troubleshooting steps for lack of material draw when set to PRIME.

C. The sprayer draws material but the pressure drops...

Troubleshooting steps for pressure drop or poor spray pattern after material draw.

D. The PRIME;SPRAY knob is set to SPRAY and there is flow through the material return tube

Troubleshooting steps when material flows through the return tube.

E. The spray gun leaks

Troubleshooting steps for spray gun leaks.

F. The spray tip assembly leaks

Troubleshooting steps for leaks in the spray tip assembly.

G.The spray gun will not spray

Troubleshooting steps when the spray gun fails to spray.

H. The spray pattern is poor (tailing)

Troubleshooting steps for poor spray pattern or tailing.

I. The spray tip will not turn

Troubleshooting steps when the spray tip does not rotate.

PARTS LIST

MAIN ASSEMBLY

Lists components of the main sprayer assembly with part numbers.

DATE CODE LOCATION

Indicates where to find the date code on the unit.

SPRAY GUN ASSEMBLY

Replacement parts available by calling Product Support

Information on how to order replacement parts.

ACCESSORIES

SPRAY TIPS AND ACCESSORIES

Lists compatible spray tips and related accessories.

SPRAY GUN FILTERS

Details available spray gun filters based on mesh size.

WARRANTY

WARRANTY • PAINT SPRAY EQUIPMENT

Details the manufacturer's warranty terms for paint spray equipment.

WAGNER Control Pro 130 Specifications

General IconGeneral
TypeAirless Paint Sprayer
Power SourceElectric
Nozzle Size0.015 inch
Voltage230 V
Frequency50 Hz
Power600 W

Related product manuals