EasyManua.ls Logo

WAGNER POWER TEX

WAGNER POWER TEX
20 pages
To Next Page IconTo Next Page
Loading...
1-800-328-8251
Wagner Technical Service
http://www.wagnerspraytech.com
Or visit us on the world wide web!
Ou visitez notre site Web!
¡O visitenos en Internet!
Owner
Owner
s manual:
s manual:
Read this manual for complete instructions
Guide d’utilisation :
Ce manuel contient des instructions détaillées
Manual del propietario:
Le este manual para obtener instrucciones completas
1-800-328-8251
Wagner Technical Service
http://www.wagnerspraytech.com
Or visit us on the world wide web!
Ou visitez notre site Web!
¡O visitenos en Internet!
Safety Information. . . . . . . . . . . . . . . . . . . . . . . . . . . . . . . 2
Components and Description . . . . . . . . . . . . . . . . . . . . . . 3
Setup. . . . . . . . . . . . . . . . . . . . . . . . . . . . . . . . . . . . . . . . . 4
Spraying . . . . . . . . . . . . . . . . . . . . . . . . . . . . . . . . . . . . . . 5
Cleanup. . . . . . . . . . . . . . . . . . . . . . . . . . . . . . . . . . . . . . . 6
Troubleshooting / Warranty. . . . . . . . . . . . . . . . . . . . . . . . 7
Parts List. . . . . . . . . . . . . . . . . . . . . . . . . . . . . . . . . . . . . 20
Technical service hours: Monday through Friday, 8:00
am to 4:30 Central Time
0506 • Form No. 0520900D
Need Help?
Call us first for answers
fast.
Call Wagner toll-free if
you have any comments or
problems with this W
agner
product.
Besoin d’aide?
Appelez-nous pour des
réponses rapidas.
Téléphonez à Wagner sans
frais d’appel si vous avez
des commentaires ou des
problèmes avec l’appareil.
¿Necesita Ayuda?
Llámenos primero para
obtener respuestas rápidas.
Llame a la línea gratuita de
Wagner si quiere hacer un
comentario o tiene problemas
con este producto de Wagner.
English - Table of Contents
Consignes de sécurité . . . . . . . . . . . . . . . . . . . . . . . . . . . 8
Composants et description . . . . . . . . . . . . . . . . . . . . . . . . 9
Montage . . . . . . . . . . . . . . . . . . . . . . . . . . . . . . . . . . . . . 10
Pulvérisation . . . . . . . . . . . . . . . . . . . . . . . . . . . . . . . . . . 11
Nettoyage . . . . . . . . . . . . . . . . . . . . . . . . . . . . . . . . . . . . 12
Dépannage / Garantie . . . . . . . . . . . . . . . . . . . . . . . . . . 13
Liste de pièces . . . . . . . . . . . . . . . . . . . . . . . . . . . . . . . . 20
Heures d’ouverture du Service technique : du lunde
au vendredi, de 8 h à 4:30 h, heure normale du Centre
Français - Table des matières
Información sobre seguridad . . . . . . . . . . . . . . . . . . . . . 14
Componentes y descripción . . . . . . . . . . . . . . . . . . . . . . 15
Montaje . . . . . . . . . . . . . . . . . . . . . . . . . . . . . . . . . . . . . . 16
Rociadora
. . . . . . . . . . . . . . . . . . . . . . . . . . . . . . . . . . . .
17
Limpieza . . . . . . . . . . . . . . . . . . . . . . . . . . . . . . . . . . . . . 18
Solución de problemas / Garantía . . . . . . . . . . . . . . . . . 19
Lista de piezas . . . . . . . . . . . . . . . . . . . . . . . . . . . . . . . . 20
Horario del servicio técnico: De lunes a viernes, de 8
a.m. a 4:30 p.m., Hora Central
Español - Tabla de Contenido
Patent Pending
Questions and Answers:

WAGNER POWER TEX Specifications

General IconGeneral
Max Pressure3000 PSI
TechnologyAirless
FilterYes
Voltage120 V
TypeAirless
Hose Length25 ft
Nozzle Size / Tip Size0.015 in

Summary

General Safety Warnings

Hazard: Dust Inhalation

Dust or mist created by this sprayer may cause eye, skin, throat or respiratory irritation.

Hazard: Electric Shock

Electric shock hazard that may cause severe injury.

Important Electrical Information

Grounding Instructions

Product must be grounded to reduce risk of electric shock by providing an escape wire for the electric current.

Components and Description

ONOFF Switch

The ON/OFF switch turns the power to the sprayer on and off (O=OFF, I=ON).

Lock N Go Technology

This sprayer has been designed with Lock N Go technology, allowing for easy cleanup.

Trigger

The trigger controls the delivery of the fluid being pumped. Do not pull the trigger while the turbine is turned OFF (I).

Spray Nozzle

The unit is equipped with three different spray nozzles. The nozzles have different opening sizes (large, medium, small).

Product Description

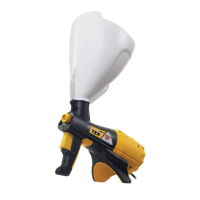
This sprayer is intended for use on water-based textured materials for walls, ceilings, or small repair areas.

Materials that can be sprayed

Use with aggregated materials such as acoustic (popcorn) and knockdown or orange peel.

Mixing the material

Material should be applied creamy, thin, or like pancake batter. Do not mix with water inside the sprayer.

Preparing the work area

Cover surfaces with drop cloths and remove non-essential items from the room.

Setup

Step 1: Attach Turbine

Line up the "unlock" symbol on the turbine with the guide on the sprayer. Twist the two halves in opposite directions.

Step 2: Attach Hopper

Slide the hopper into the receptacle on the turbine, turning until it locks in place.

Step 3: Attach Nozzle

Attach the desired nozzle by threading it onto the end of the sprayer.

Step 4: Fill Hopper

Slowly fill the hopper with the material you plan to use. Do not exceed the fill point.

Step 5: Connect Power

Plug the power cord into an extension cord and then into a grounded outlet. Turn the switch to ON (I).

Step 6: Test Spray

Rest the turbine over your forearm, aim the sprayer at a scrap piece of wood or cardboard, and test the spray pattern.

Texture Spraying

General Spraying Tips

Tips for using the sprayer, including support, angle, distance, and pattern adjustment.

Surface Preparation

Cover anything you do not want sprayed with drop cloths and remove non-essential items.

Nozzle Adjustment

Adjust the spray pattern by switching to a different nozzle. Turn sprayer OFF before changing nozzles.

Repairing Small Areas

Scrape away damaged material, spray slightly larger area, use small nozzle and light trigger pressure.

New Surfaces

All new surfaces should be covered with primer prior to texture spraying.

Post-Application Painting

Knockdown and orange-peel materials may need to be painted after application for a uniform color.

Spraying Texture Chart

Chart detailing variables for Simulated Acoustic, Knockdown, and Orange Peel textures.

Cleanup

Step 1: Turn Off and Unplug

Turn the sprayer OFF (O) and unplug the power cord. Empty the hopper into a separate container.

Step 2: Unlock Turbine

Unlock turbine by turning the two halves in opposite directions. Set turbine aside in a dry area.

Step 3: Remove Nozzle

Remove the nozzle from the sprayer.

Step 4: Clean Sprayer and Hopper

Hand-clean the nozzle, sprayer, and hopper with warm, soapy water and the cleaning brush.

Step 5: Lubricate

Lubricate the O-ring on the hopper and the outer edge of the plunger with the provided lubricant.

Step 6: Wipe Down

Wipe down all components, reassemble the sprayer/turbine, and ensure ON/OFF switch is facing upward.

Troubleshooting Warranty

Problem: Sprayer does not start

Check power connection, ON/OFF switch, extension cord, and turbine.

Problem: No material coming from sprayer

Check material thickness and nozzle size. Ensure sprayer is not plugged.

Problem: Application speed too slow

Check nozzle size, plugged sprayer, or O-ring condition.

Problem: SputteringIntermittent flow

Check hopper fill level or if the sprayer is plugged.

Problem: Clumpy spray pattern

Ensure material is not mixed insufficiently or sprayer is plugged.

Problem: Material leakage at hopper connection

Check O-ring on hopper for damage or missing parts.

WAGNER ONE-YEAR LIMITED WARRANTY

Warranty covers defects in material and workmanship for one year from date of purchase.

Parts List

Replacing the valve ring

Instructions on how to replace the valve ring using a screwdriver and new valve.

Related product manuals