smartPRINTER Operating Instructions
smartPRINTER Operating Instructions 003/10.2017 42
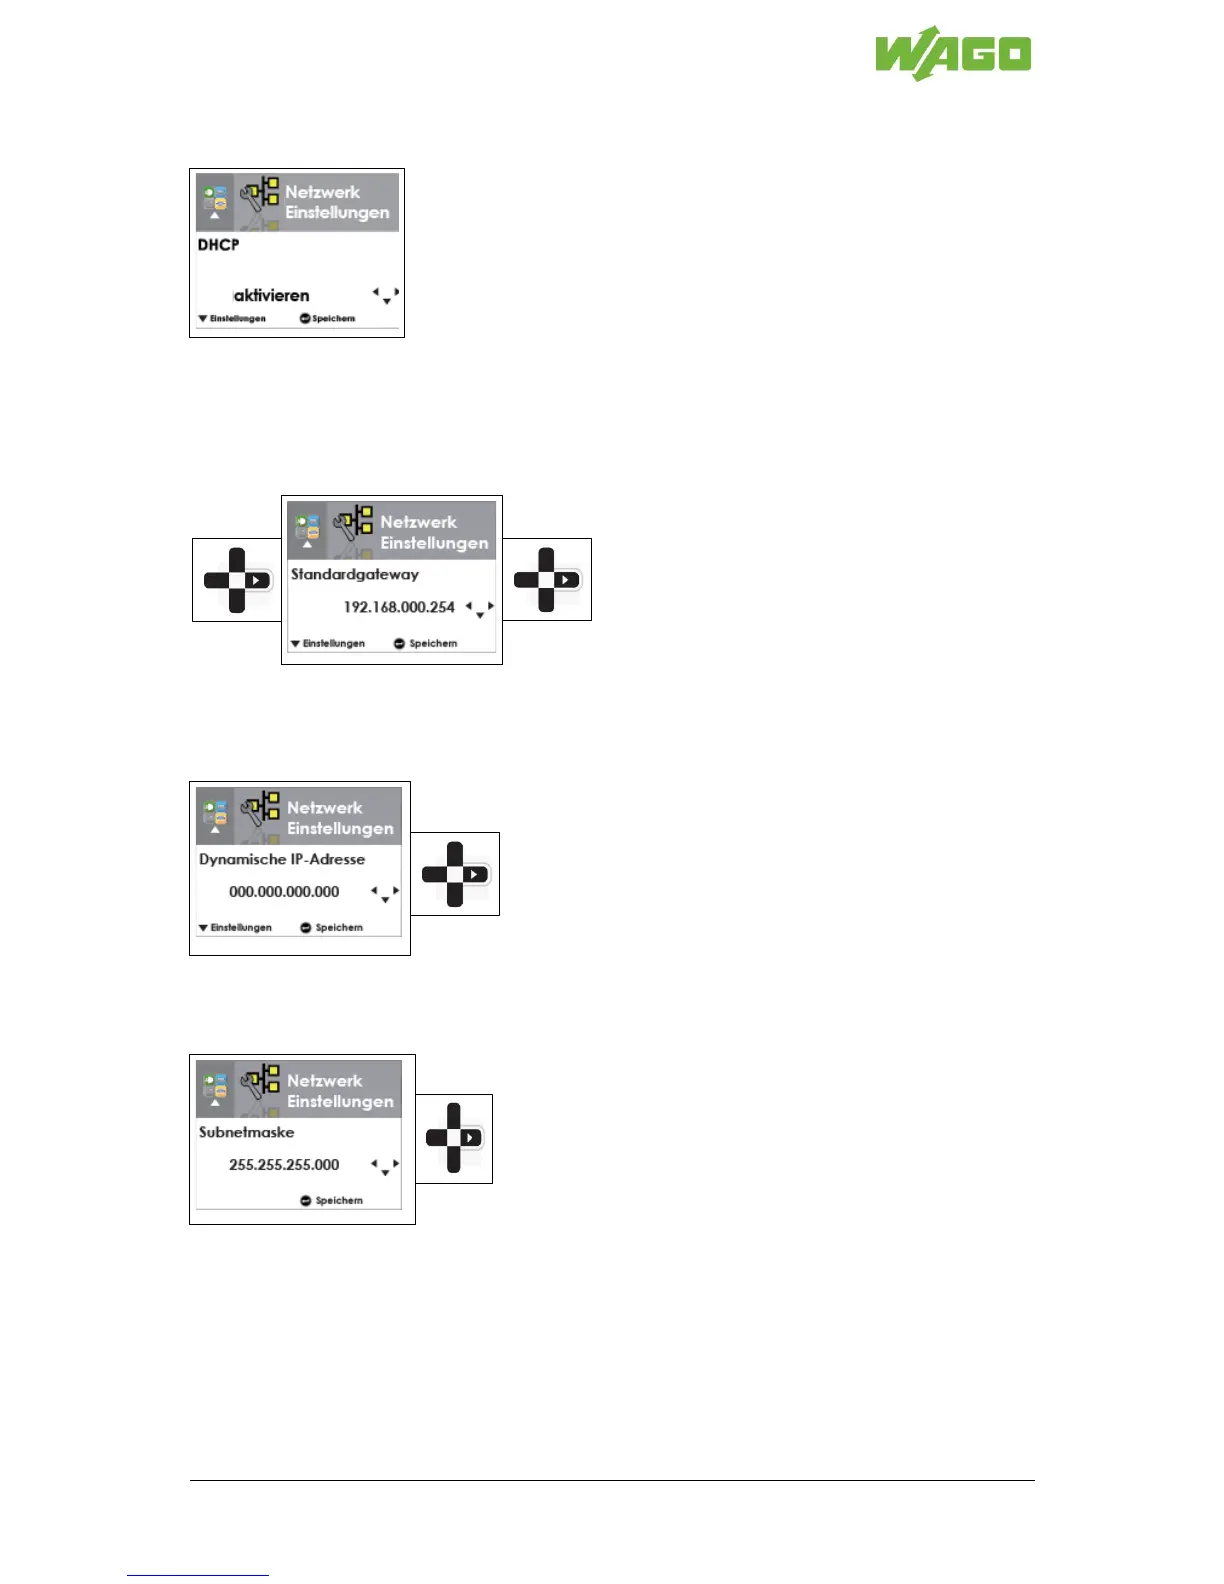
[DHCP] Do not make any changes in this menu item.
Press the right-hand button on the directional pad and navigate to [Standard Gateway].
Press the right-hand button on the directional pad and navigate to [Standard Gateway].
[Standard Gateway]: The assigned address is displayed. This address cannot be changed via the
menu.
Press the right-hand button on the directional pad and navigate to [Dynamic IP Address].
[Dynamic IP Address]: The assigned address is displayed. This address cannot be changed via the
menu.
Press the right-hand button on the directional pad and navigate to [Subnet Mask].
[Subnet Mask]: The assigned address is displayed. This address cannot be changed via the menu.
Press the Enter button to exit the menu item.
Switch the smartPRINTER on.
Launch the installation software.
Select “Install driver” from the installation menu.
Follow the steps in the driver installation program (Driver Wizard):