- 14 -
(RECORD): the TV will start to record the
selected progamme. You can press again to stop
the recording.
Note: Switching to a different broadcast or source is
not available during the recording.
/ : Page left / Page right.
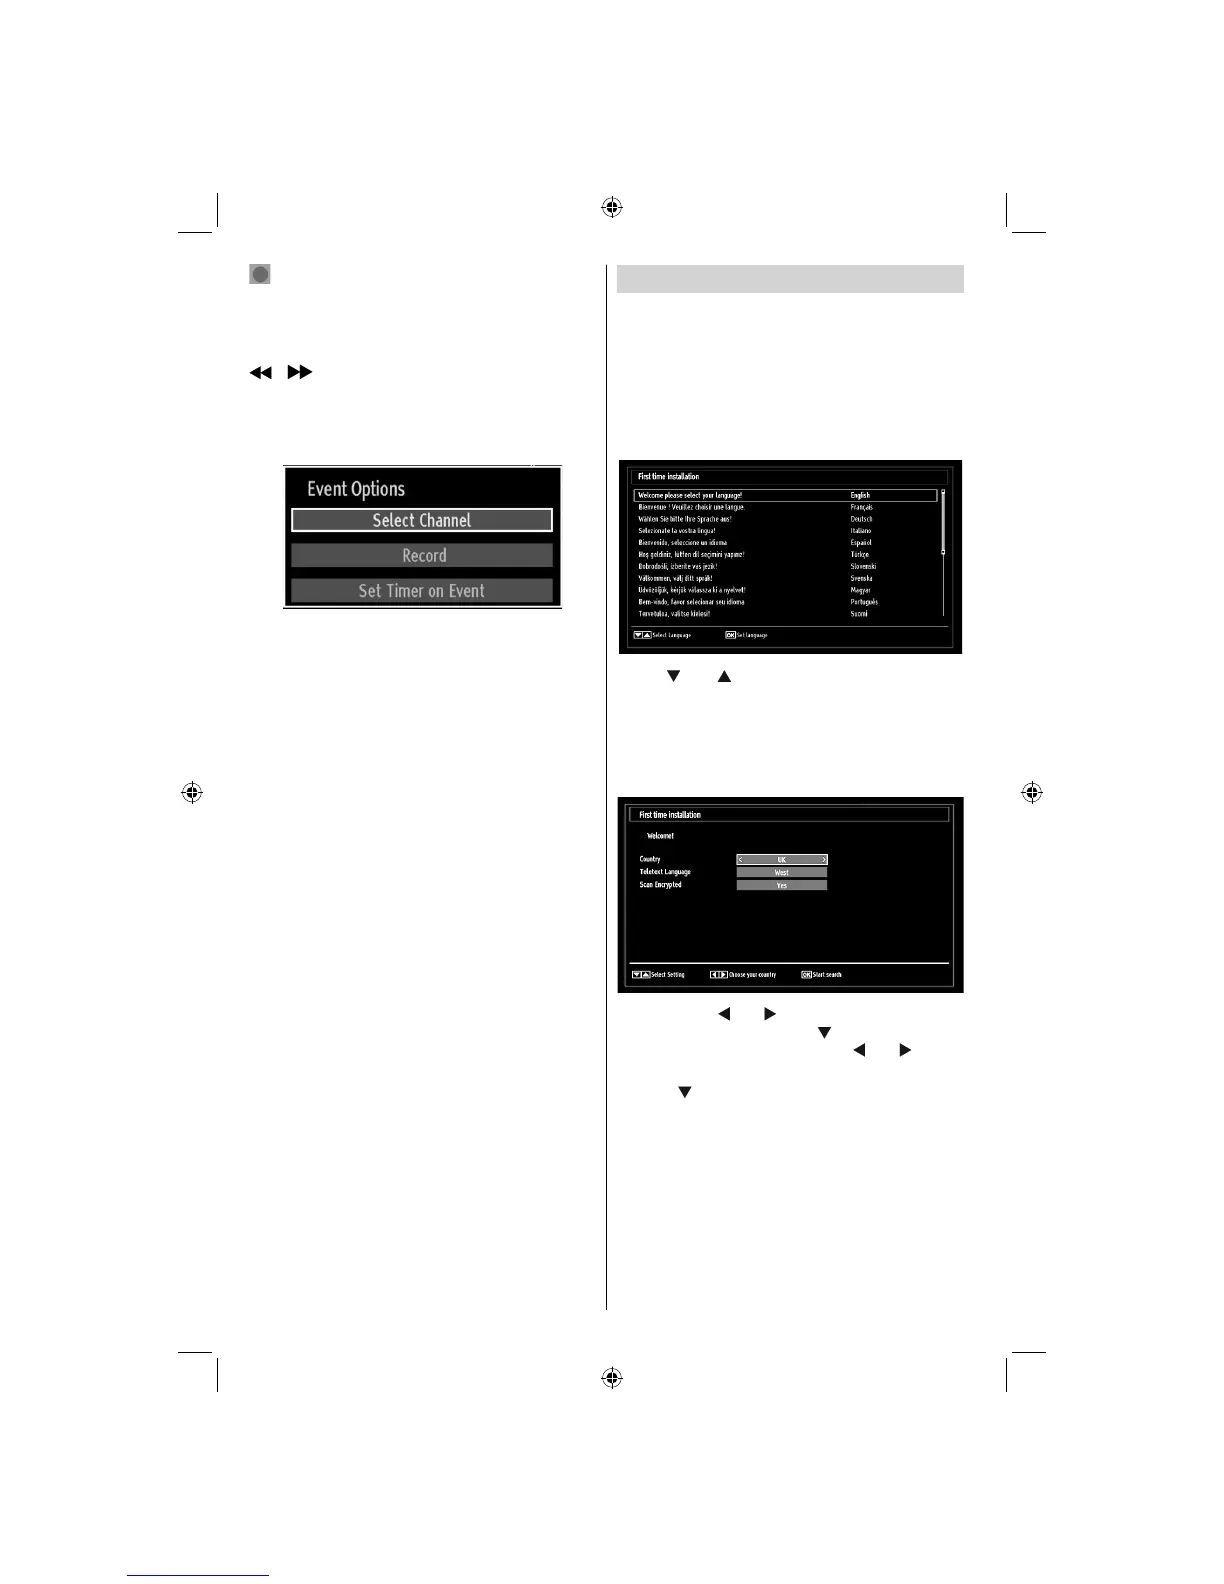
Programme Options
In EPG menu, press the OK button to enter the “Event
Options” menu.
Select Channel
In EPG menu, using this option, you can switch to the
selected channel.
Record / Delete Record Timer
IMPORTANT: To record a programme, you should
fi rst connect a USB disk to your TV while the TV is
switched off. You should then switch on the TV to
enable recording feature. Otherwise, recording feature
will not be available.
After you have selected a programme in EPG menu, •
press the OK button and and Options screen will
be displayed. Select “Record” option and press the
OK button. After this operation, a recording becomes
set to the selected programme.
To cancel an already set recording, highlight that •
programme and press the OK button and select
the option “Delete Rec. Timer”. The recording will
be cancelled.
Note: You cannot switch to any other channel or
source while there is an active recording on the
current channel.
Set Timer / Delete Timer
After you have selected a programme in EPG menu,
press the OK button and and Options screen will
be displayed. Select “Set Timer on Event” option
and press OK button. You can set a timer for future
programmes.
To cancel an already set reminder, highlight that
programme and press the OK button. Then select
“Delete Timer” option. The timer will be cancelled.
Note: It is not possible to record or set timer for two or
more individual events at the same time interval.
First Time Installation
IMPORTANT: Ensure that the aerial is connected
and a Common Interface module is not inserted
before switching on the TV for the first time
installation.
When the TV is operated for the fi rst time, the •
installation wizard will guide you through the
process. First, the language selection screen will
be displayed:
Use “• ” or “ ” buttons to select your language
and press OK button to set selected language and
continue.
After selecting the language, “• Welcome!” screen will
be displayed, requiring you to set Country, Teletext
Language and Scan Encrypted options.
By pressing “• ” or “ ” button, select the country
you want to set and press “ ” button to highlight
Teletext Language option. Use “ ” or “ ” button
to select desired Teletext Language.
Press “•
” button after setting Teletext Language
option. Scan Encrypted will be then highlighted.
You can set Scan Encrypted as Yes if you want to
scan coded stations. Afterwards select the desired
Teletext Language.
Press • OK button on the remote control to continue
and the following message will be displayed on the
screen:
01_MB65_[GB]_DVB-TC_PVR_BRONZE18_1910UK_42843W_10076242_50202610.indd 1401_MB65_[GB]_DVB-TC_PVR_BRONZE18_1910UK_42843W_10076242_50202610.indd 14 04.11.2011 11:18:4804.11.2011 11:18:48