Installation:
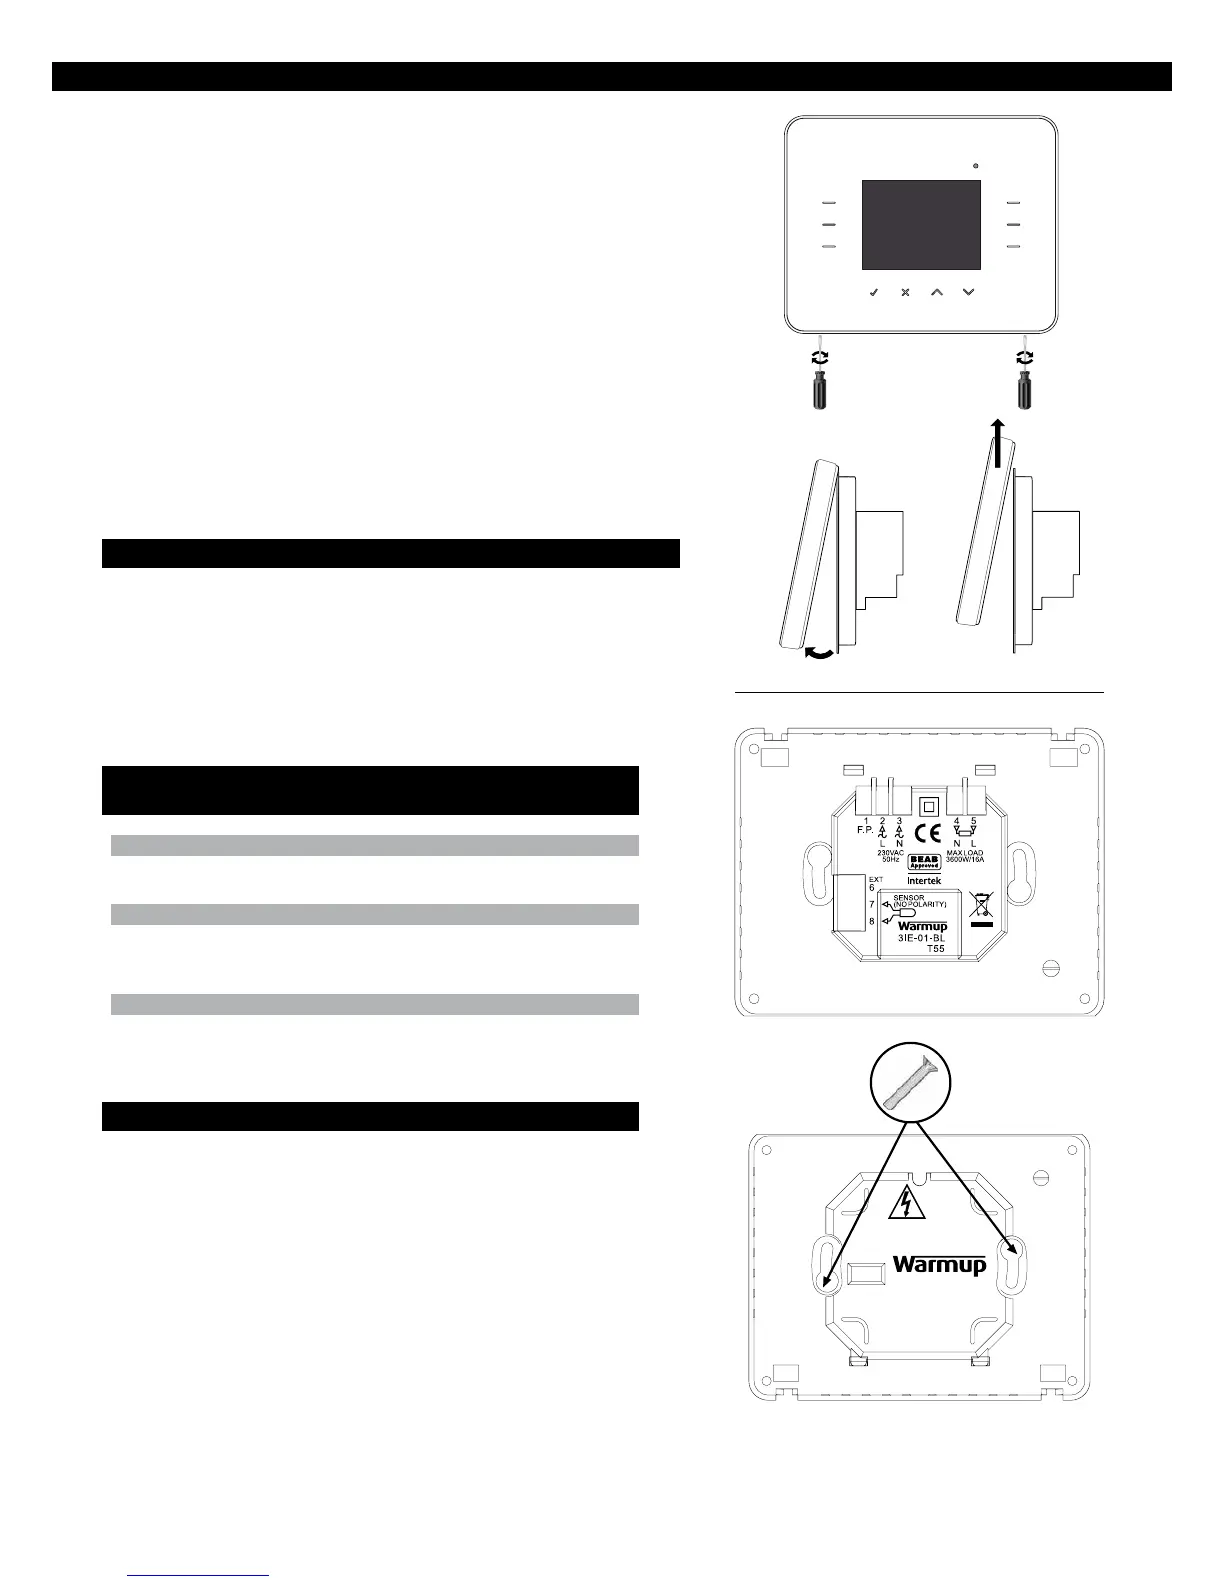
Separate the front housing of thermostat from wall module:
1. Un-screw both closing screws (bottom of stat) until they will not turn
any further.
2. Release front housing by gripping lower half of outer frame and pull-
ing outwards then upwards
3. Place front housing somewhere safe
4. Run all wires to the wall box. Check to ensure that you have included
the following:
• Power (Live and Neutral)
• Heater (Live and Neutral)
• Floor sensor
• Fil pilote (if necessary)
• External/ 2nd oor Sensor (if necessary)
5. Pull wires through wall box and complete terminal wiring.
IMPORTANT: Ensure that multi strand wires are fully inserted into the
terminal and secured tightly. Any loose strands should be trimmed as they
could cause a short-circuit.
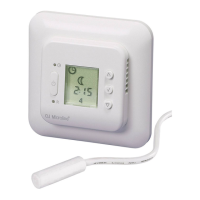
Normal electrical installation (see numbering on diagram to right)
2. Connect to Power Supply (Live – MAX 240V)
3. Connect to Power Supply (Neutral – MAX 240V)
4. Connect to Warmup heater(s) (Neutral – MAX 3600W/ 16 Amps)
5. Connect to Warmup heater(s) (Live – MAX 3600W/ 16 Amps)
7. Connect to 1st wire of oor sensor (colour not important)
8. Connect to 2nd wire of oor sensor (colour not important)
Special installations:
(should only be performed under the supervision of Warmup)
Fil Pilote installation: (only for use in France)
1. Connect to l pilot (F.P.)
Second sensor installation: (2nd oor probe or exterior probe)
6. Connect to 1st wire of external sensor/ 2nd oor sensor
7. Connect to 2nd wire of external sensor/ 2nd oor sensor
Master/Relay installtion: (connecting 2 stats together)
6. Connect to terminal 6 on other thermostat
7. Connect to terminal 7 on other thermostat
Mounting thermostat into the wall box:
1. Push excess wire back through the wall box and insert thermostat
back module into wall box.
2. Put xing screws through mounting holes and tighten.
3. Ensure that thermostat is straight before tightening completely.
4. Replace thermostat front housing;
i) align and sit front housing on to hinges,
ii) push lower half of front housing until a ‘click’ is heard.
5. Ensure front housing is securely xed.
6. IMPORTANT: Tighten both retaining screws
0
,I
)(
A V
D
c::::;
~
~
~
[
1 2 3 4 5
FP
,i
,i
CE
Yd
L N N L
2
ii~~G
[Pi,~~~)
~Olk?.~
~XT lntertek
SENSOR
7
~LARITY
)
8
Warmup
3IE-01-BL
T55
<
~------------------~~-
_/
/
, I
\\~57=
- - - - - - -
/;
=1
~
~
·
~
~
I
I
I
I
I
I
I
I