The 3iE has a Ingress Protection rating of IP20 but this rating can be increased when used in conjunction with the Gasket
(supplied separately), in which case it is ingress Protection rated to IP32 but only when used in accordance with these
instructions.
Fitting the Gasket
Remove backing from seal and attach to the back of the thermostat ensuring that there is a tight bond between the seal
and the back of the thermostat.
Once tted do not remove or attempt to ret the seal as this may aect the protection against ingress of water if the not
xed correctly.
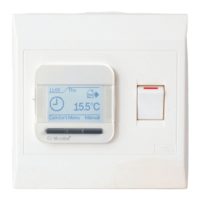
Powering-up:
You can now power up the thermostat and begin the programming process. An easy to follow menu will guide you through
the rest. If you want to turn on / o the thermostat and heating system then hold down the recessed button on the bottom of
the stat for 3 seconds
When you have ensured that both the oor sensor and heating elements are working correctly you can complete the installa-
tion of oor covering and remove the protective cover on the front of the thermostat.
Error Messages:
Your thermostat can give you two error indications:
1. “er1”: This will occur if no oor sensor is detected
2. “er2”: This will occur if the oor sensor has a short circuit
Using the Gasket with the 3iE
Dimensions :
41mm
23mm
31mm
54.5mm
Dimensions (mm)
113mm
90mm
3iE Installation Guide V5 © Warmup plc - 2015
Mounting thermostat into the wall box:
1. Push excess wire back through the wall box and insert thermostat back
module into wall box.
2. Put xing screws through mounting holes and tighten.
3. Ensure that thermostat is straight before tightening completely.
4. Replace thermostat front housing;
i) align and sit front housing on to hinges,
ii) push lower half of front housing until a ‘click’ is heard.
5. Ensure front housing is securely xed.
6. IMPORTANT: Tighten both retaining screws
3ie Installation guide v5.indd 3 10/5/2015 4:19:36 PM