Page 10 ;&(%$*4.8"4,7%<'*#$"&8#=%/7*,#*%4,77%>?@@@?@AA?BCDC1 Item 57342
EF;6GH IJ6KFGLIM NFLMG6MFMO6E6GPJ
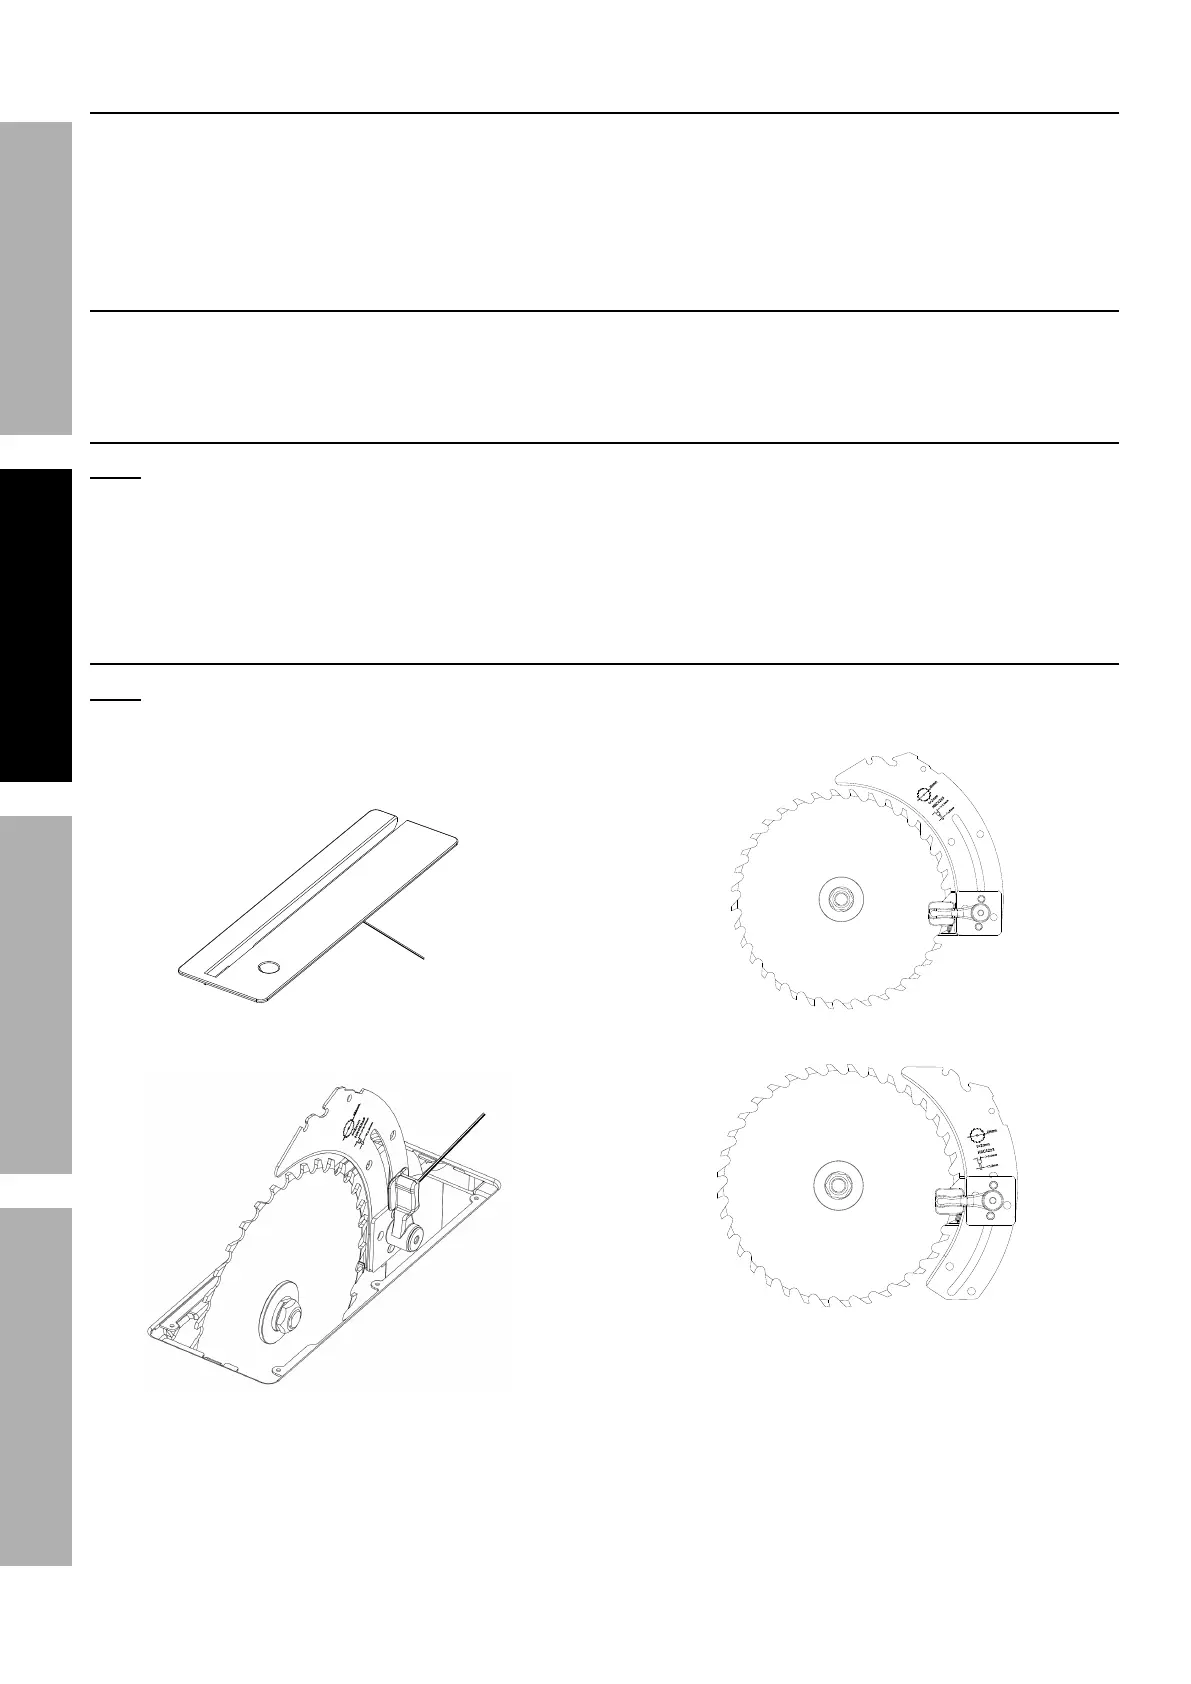
E,)%S7,9*%E*7*4$"&8
1. Any saw blade that will be used must be
marked as suitable for the material to be cut.
2. Match the saw blade diameter, kerf width
and body dimensions to the riving knife.
3. Use only saw blades that are marked with a speed
equal or higher than the speed marked on the tool.
S*W*7%F837*%E*$$"83
1. Loosen Lock Knob, then move Blade Height
Handle until red indicator points to desired angle.
2. Tighten Lock Knob.
S7,9*%U*/$.%F9]'#$5*8$
M&$*- Blade depth should be set so that outer
points of blade are higher than workpiece
by approximately 1/8″ to 1/4″ and bottom of
gullets are below top surface of workpiece.
1. Loosen Lock Knob, then move Blade Height
Handle until red indicator points to 0°.
2. Tighten Lock Knob.
3. Turn Height Handle until desired depth is achieved.
K"W"83%Y8"2*%F9]'#$5*8$
M&$*- Riving Knife is permanently installed. It comes
in its lowest position for shipping. Reposition the
Riving Knife according to type of cut before use.
1. Remove Table Insert, pull up by using hole.
G,+7*%
L8#*($
2. Raise Riving Knife Lock.
K"W"83%
Y8"2*%T&4X
3. Adjust Riving Knife to proper position for type of cut:
a. Through Cut
b. Non-Through Cut
4. Lower Riving Knife Lock and replace Table Insert.