Page 11;&(%$*4.8"4,7%<'*#$"&8#=%/7*,#*%4,77%>?@@@?@AA?BCDC1Item 57342
EF;6GHIJ6KFGLIMNFLMG6MFMO6 E6GPJ
L8#$,77%S7,9*%R',(9
QFKMLMRl%%F7),V#%'#*%#,)%+7,9*%3',(9%,89%("W"83%X8"2*%2&(%*W*(V%$.(&'3.?4'$$"83%&/*(,$"&81%
;&(%$.(&'3.?4'$$"83%&/*(,$"&8#%).*(*%$.*%#,)%+7,9*%4'$#%4&5/7*$*7V%$.(&'3.%$.*%$."4X8*##%&2%
$.*%)&(X/"*4*=%$.*%3',(9%,89%&$.*(%#,2*$V%9*W"4*#%.*7/%(*9'4*%$.*%("#X%&2%#*("&'#%"8]'(V1
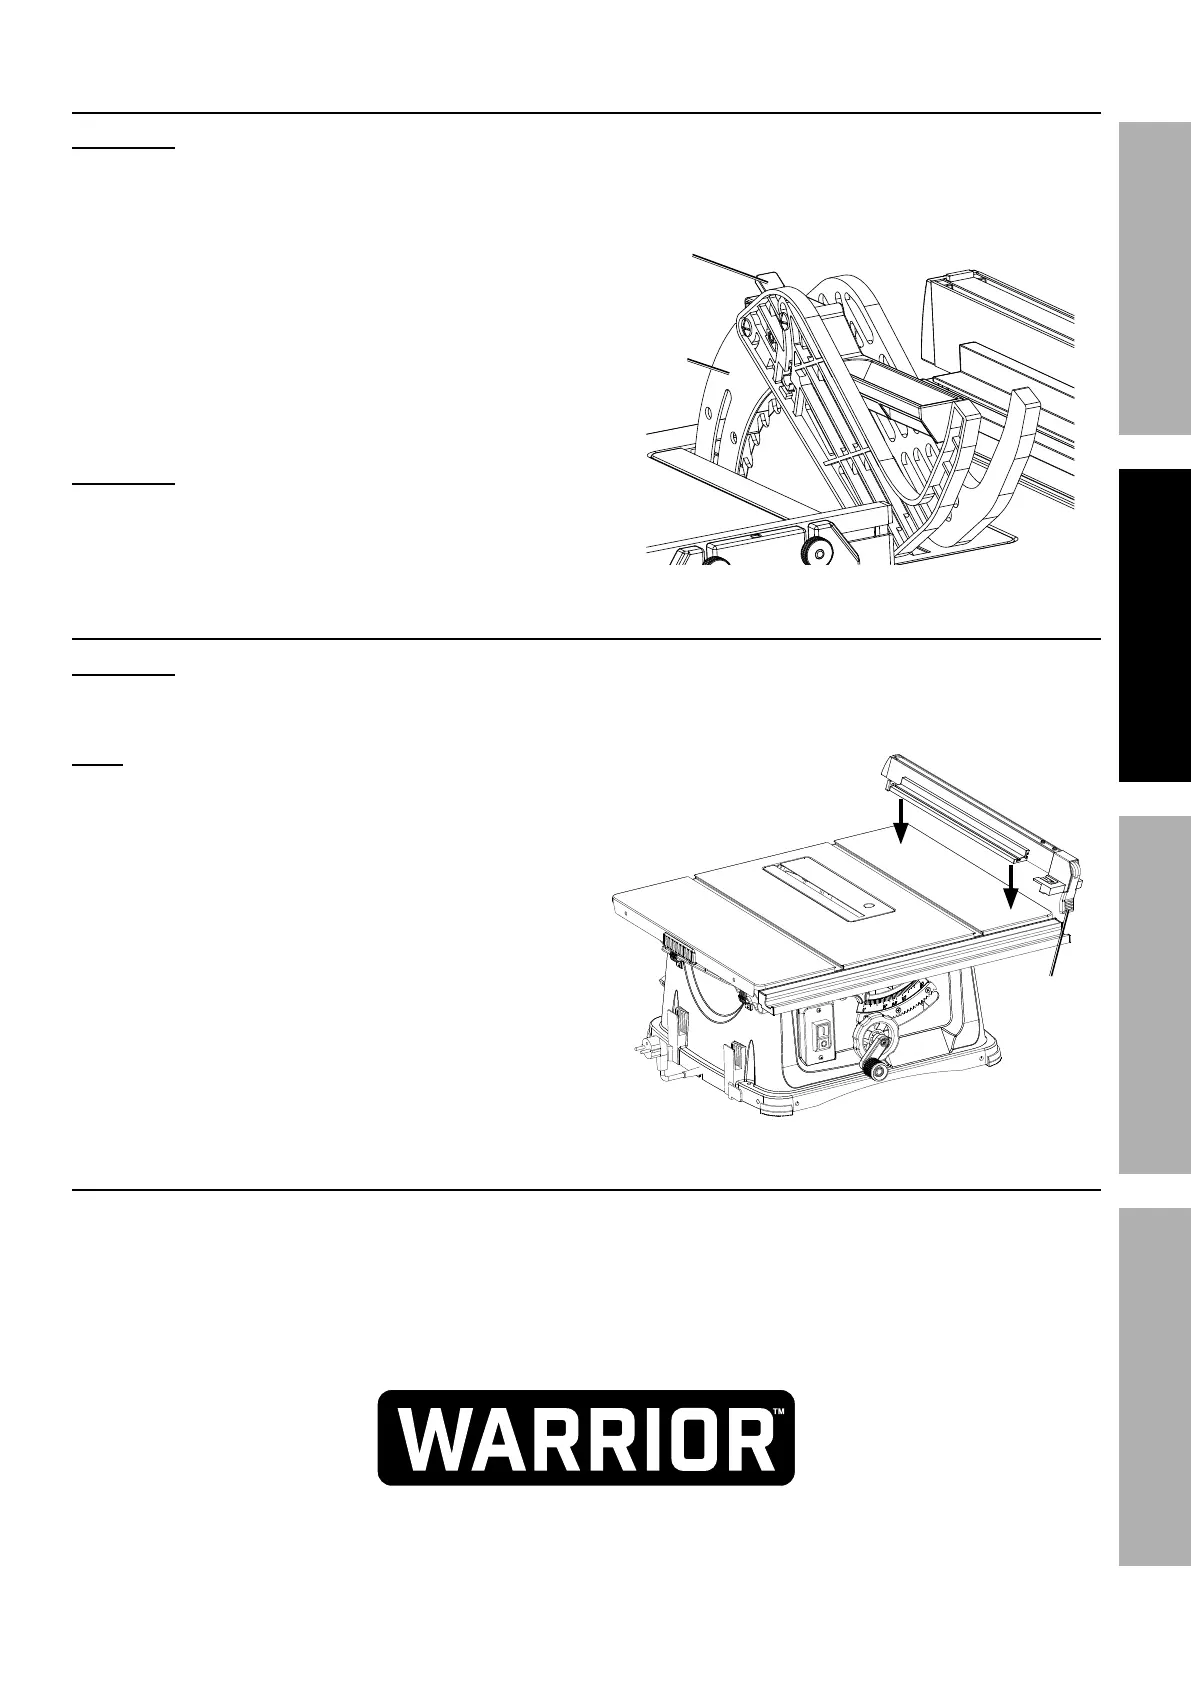
1. Raise Blade Guard Lock, then place Blade Guard
on top of Riving Knife so the Roller slides into
open slot at top of Riving Knife. Push Guard to the
back of the slot, then lower Blade Guard Lock.
2. Make sure Blade Guard is fully engaged, aligned
properly and does not contact the Blade.
3. Adjust Blade Guard to prevent
contact with Saw Blade.
QFKMLMRl%%GI%JK6!6MG%E6KLIPE%LMkPKH-
The Blade Guard must be removed for making
non-through cuts and must be reinstalled
after making non-through cuts.
S7,9*%
R',(9%
T&4X
K"W"83%
Y8"2*
L8#$,77%K"/%;*84*
QFKMLMRl GI%JK6!6MG%E6KLIPE%LMkPKH-
G&%/(*W*8$%X"4X+,4X=%5,X*%#'(*%K"/%;*84*%"#%/,(,77*7%$&%$.*%+7,9*%,89%7&4X*9%"8%/7,4*1%%%
U&%8&$%'#*%K"/%;*84*%).*8%4'$$"83%,4(&##%)&&9%3(,"8%[4(&##4'$$"83\1
M&$*- The Rip Fence can be installed
on either side of Blade.
1. Raise Rip Fence Lock.
2. Place Rip Fence on Work Table, then side to
desired location using Scale if necessary.
3. Lower Rip Fence Lock.
K"/%
;*84*%
T&4X
U'#$%6Z$(,4$"&8%E*$'/
Attach dust collection system to Dust Port on back of Table Saw.