Setup
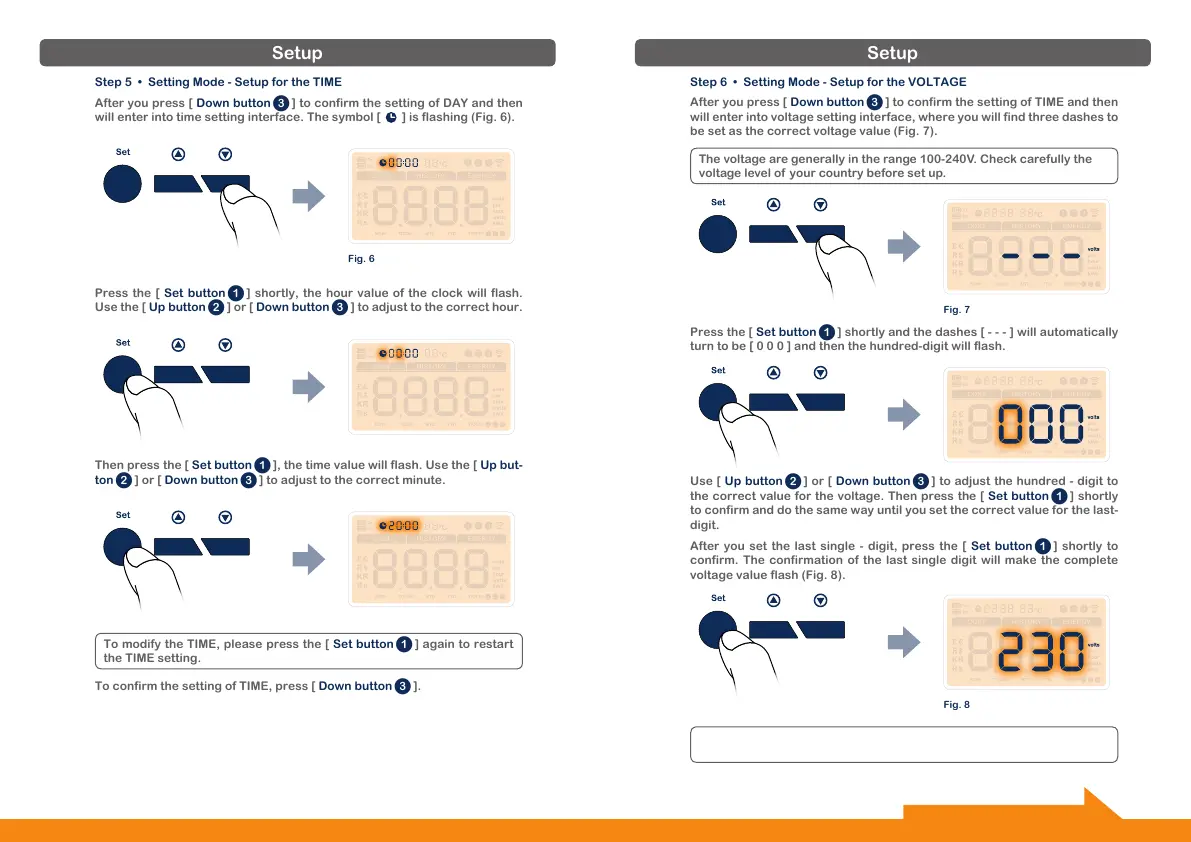
Press the [ Set button1] shortly and the dashes [ - - - ] will automatically
turn to be [ 0 0 0 ] and then the hundred-digit will flash.
Fig. 7
Fig. 8
Step 6 • Setting Mode - Setup for the VOLTAGE
After you press [ Down button3] to confirm the setting of TIME and then
will enter into voltage setting interface, where you will find three dashes to
be set as the correct voltage value (Fig. 7).
Use [ Up button2] or [ Down button3] to adjust the hundred - digit to
the correct value for the voltage. Then press the [ Set button1] shortly
to confirm and do the same way until you set the correct value for the last-
digit.
After you set the last single - digit, press the [ Set button1] shortly to
confirm. The confirmation of the last single digit will make the complete
voltage value flash (Fig. 8).
The voltage are generally in the range 100-240V. Check carefully the
voltage level of your country before set up.
Setup
Step 5 • Setting Mode - Setup for the TIME
After you press [ Down button3] to confirm the setting of DAY and then
will enter into time setting interface. The symbol [ ] is flashing (Fig. 6).
Fig. 6
Press the [ Set button1] shortly, the hour value of the clock will flash.
Use the [ Up button2] or [ Down button3] to adjust to the correct hour.
Then press the [ Set button1], the time value will flash. Use the [ Up but-
ton2] or [ Down button3] to adjust to the correct minute.
To confirm the setting of TIME, press [ Down button3].
To modify the TIME, please press the [ Set button1] again to restart
the TIME setting.
10 11
Continue setting on the next page.
To modify the VOLTAGE, please press the [ Set button1] again to re-
start the VOLTAGE setting.
To confirm the setting of VOLTAGE, press [ Down button3].
 Loading...