Press the [ Set button1] shortly to enter the location setting of decimal
point. Use the [ Up button2] or [ Down button3] to adjust the deci-
mal point to the correct location, and press the [ Set button1] shortly
to confirm.
Setup
● No matter the applied tariff is single tariff or multi-tariff, the tariff
setting will go through tariff 1 to tariff 3 accordingly.
● For single tariff, please enter [ 00:00 ] as the starting time of tariff 1.
● Please only enter the starting time of every tariff.
The confirmation of the last digit will make the clock value [ - - : - - ] flash.
The starting time for TARIFF 1 will be set next.
Use [ Up button2] or [ Down button3] to adjust the first digit to the
correct value, then press the [ Set button1] shortly to confirm and do the
same way until you set the correct value for the last digit and press the
[ Set button1] to confirm for the rate of TARIFF 1.
Setup
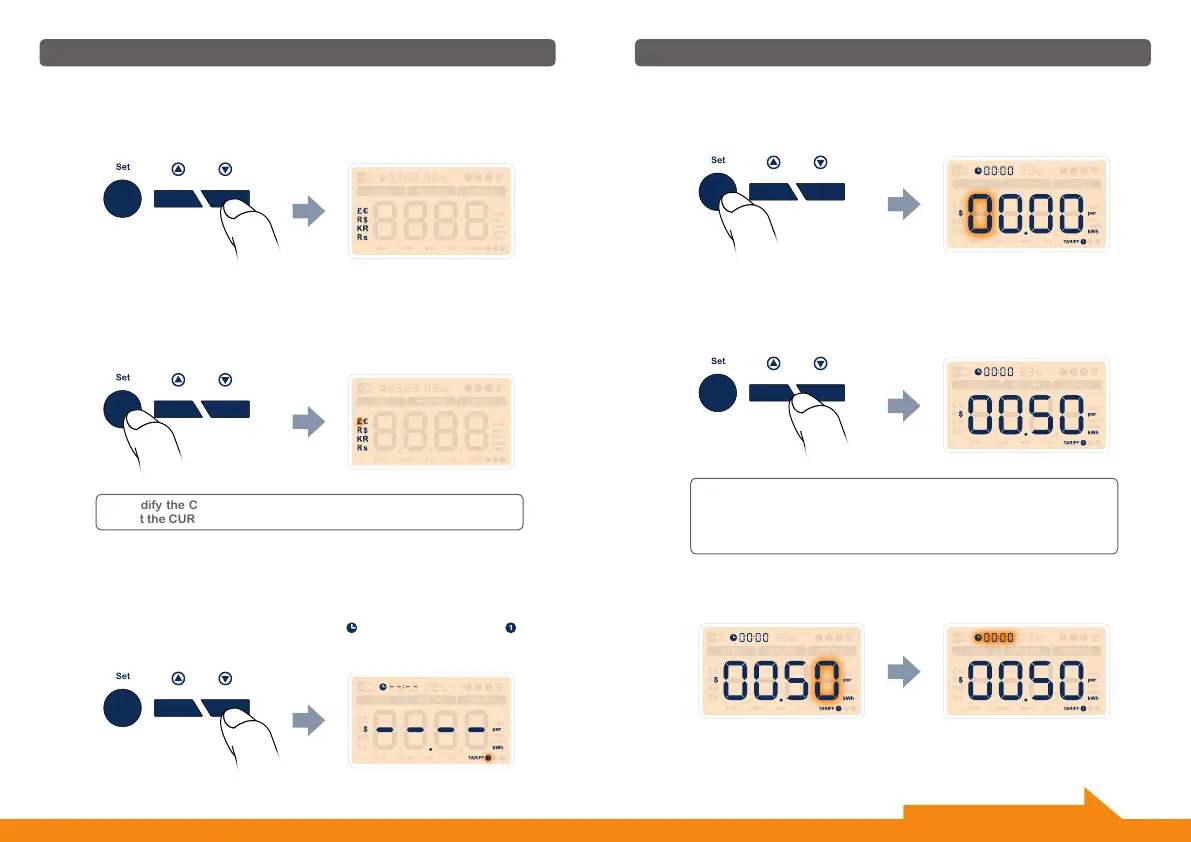
To modify the CURRENCY, please press the [ Set button1] again to
restart the CURRENCY setting.
Step 7 • Setting Mode - Setup for the CURRENCY
After you press [ Down button3] to confirm the setting of VOLTAGE and
then will enter into currency setting interface. Totally there are 7 kinds of
currencies [ £ / € / R / $ / R$ / KR / Rs ] that can be selected (Fig. 9).
Fig. 9
Press the [ Set button1] shortly and the first currency will flash. Use the
[ Up button2] or [ Down button3] to adjust to the correct currency.
Press the [ Set button1] shortly again to confirm the currency.
Step 8 • Setting Mode - Setup for the TARIFF
After you confirm the currency (eg. $ ), press [ Down button3] to enter
into TARIFF setting interface, where you will find the default tariff value is
displayed as [ $ - - . - - ], the time value is [ - - : - - ] and the symbol [ ]
is flashing behind [ TARIFF ]. It means TARIFF 1 will be set first (Fig. 10).
Fig. 10
To confirm the setting of CURRENCY, press [ Down button3].
12 13
Continue setting on the next page.
 Loading...