7
WARNING
IMPORTANT!
IMPORTANT!
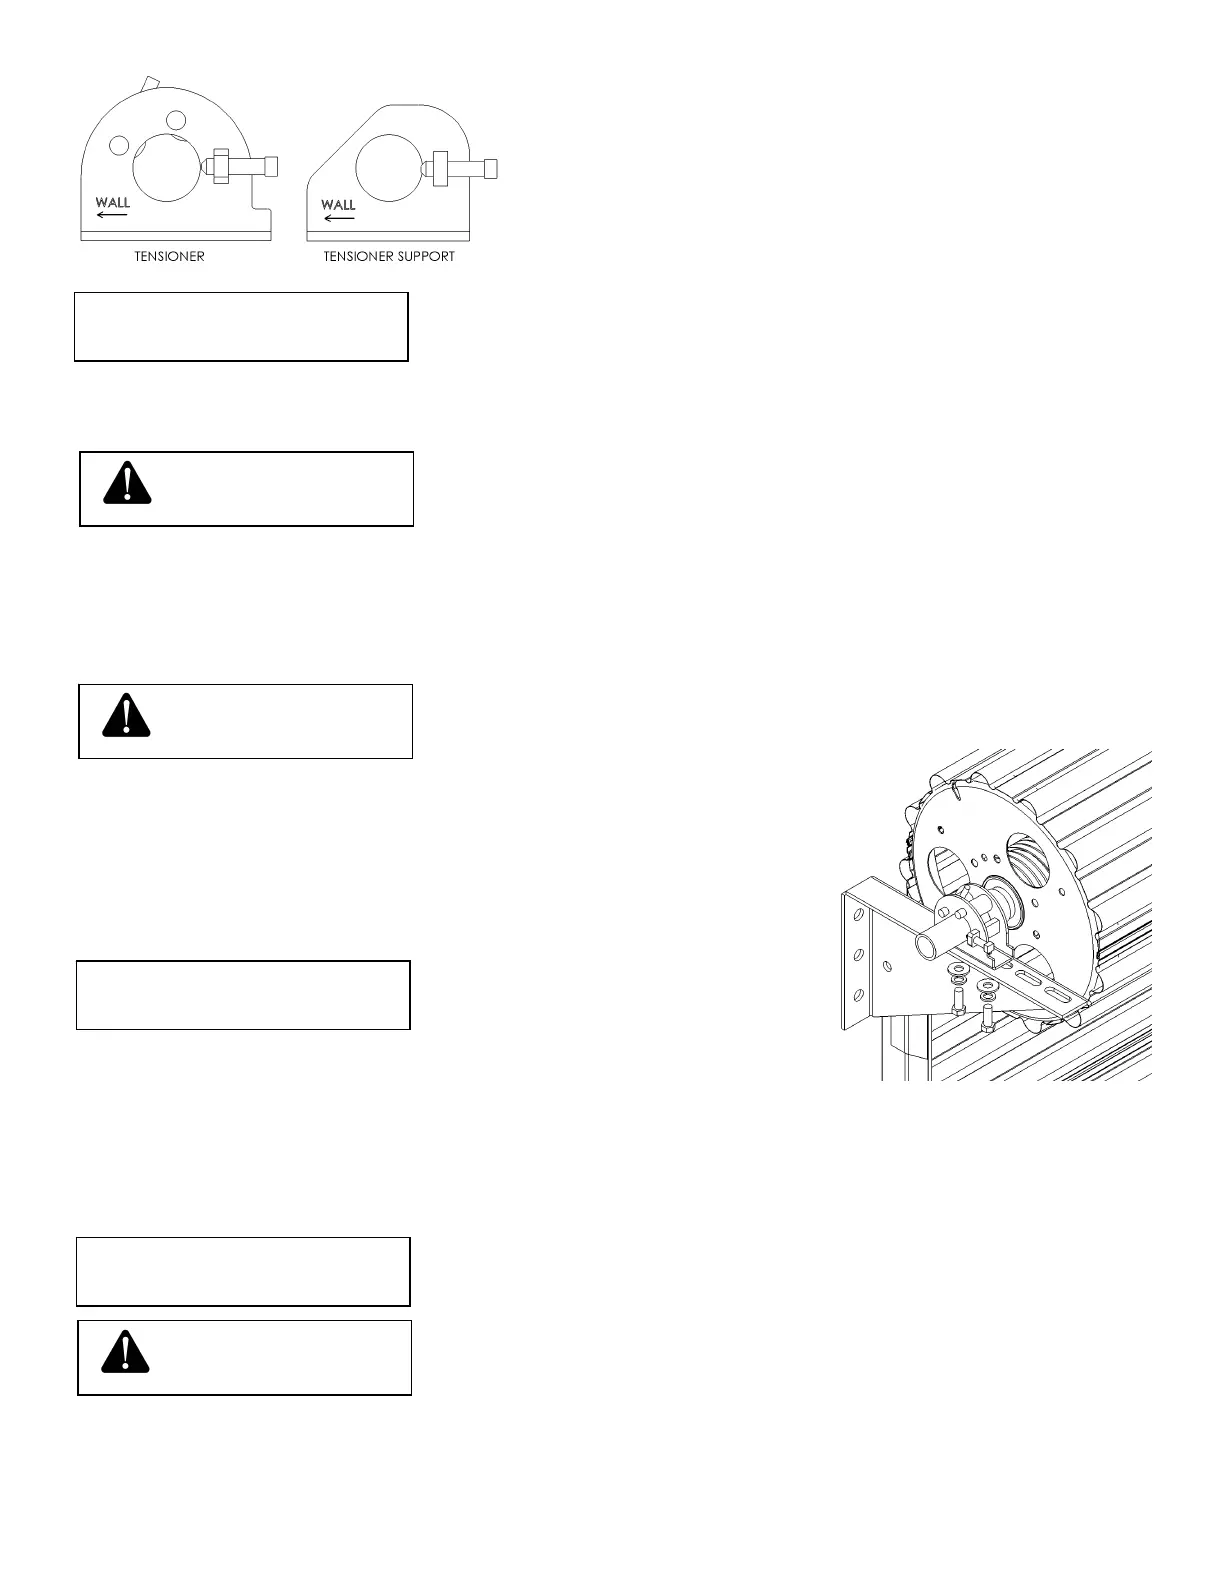
wall on the device will point to the wall when the door is installed.
hat the arrow on the device points to the
wall.
Tension holding assemblies must be oriented correctly in order
STE O
Lift the curtain assembly up to the support brackets. Align tensioner devices with the brackets so that when door is
lowered h d
without er
he curtain roll. Now, remove the cardboard packaging from the door.
y or death, never walk, stand, or work
KETS
E s
se c
s snug.
close to header as possible per
NSION TO THE DOOR SPRINGS
St t
ap he he amount of tension required may vary slightly. Final adjustment, if
ne .
before operating the
oor.
the curtain down into the guides on both sides until the
ottom bar is below the bottom bar stops. Do not pry on the bottom bar stops to get bottom bar past, loosen fasteners
After installing the brackets and drive components, install the axle
tensioner devices. On the non-operator side of the curtain slide the
tensioner device on the axle and ensure the arrow pointing to the
Next, slide the tensioner support device on the opposite side of the
axle, again making sure t
IMPORTANT!
to hold tension on the door.
OR ASSEMBLY P 5 LIFTING THE D
Door assembly is extremely heavy. Do not allow door
assembly to fall from lifting mechanism, or serious injury or
death could result.
WARNING
down to the brackets, bot
scraping against door head
evices will sit on top of the brackets. Be sure that the door is able to revolve
or guides. Rotate curtain assembly so that bottom bar angle is at the bottom of
t
To avoid serious injur
below door assembly before it is secured to support brackets.
STEP 6 SECURE TENSIONERS TO BRAC
nsure that the bottom bar angle i
cure the tension devices to the bra
ashers, and washers. Tighten bolt
at the bottom of the curtain roll and
kets using the (2) 3/8”x1” bolts, lock
w ½ turn past
Tensioners must be installed as
step #5.
STEP 7 APPLY INITIAL TE
art with the bottom bar angle a
proximately 1 turn to pre-tension t
cessary, will be made in Step #10
the bottom of the curtain roll and use a pipe wrench to rotate the axle
door. T
Tighten the set screws on both tensioners
d
Always stand to one side of wrench when applying tension, to
avoid injury if you lose control of wrench.
Cut the tape that holds the door in a roll and gently pull
WARNING
b